Digital Photography 203: Color Management
© Brooke Clarke 2011Background
References
Adobe Camera Raw
Pantone - Huey Monitor Color Correction
Datacolor - Spyder4
Browser Test
Possible Autum Leaves Color Problems
Color Spaces
Color Stacking Idea
Printers
Profiles
Canon Pro-100 Printer
Links
Background
Shooting Menu: Image Quality: RAW, NEF(RAW) bit depth: 14-bit,. White balance: AUTO, Color Space: Adobe RGB, Active-D Lighting: Auto
After shooting Autum leaves and having a print made the leaves looked more brown than bright red.
References
Just into it and there's a lot of good info.
Basic Photographic Materials and Processes 2nd edition Leslie Stroebel et al (2000)
Just arrived, not opened.
Adobe Camera Raw
This is required to work with the Nikon .NEF raw files. The Nikon D300s supports 14 bits per color channel when RAW (.NEF) files are used and that means every photo has fantastic dynamic range, not stacking or other stuff needed.
A side benefit is that you also have a lot of control of the color balance.
This is an add on to Photoshop CS4. The stock version was 5.0 something and when you try to load a xxx.NEF file the error message:
Could NOT Complete Your Request Because The File-Format Module Cannot Parse The File.
This happened because Adobe Camera Raw 5.0 does not support .NEF files from the Nikon D300s. (Table of Cameras & required ACR version)
Program Files\Common Files\Adobe\Plug-Ins\CS4\File Formats
This is where ACR is. Move ACR to a temporary location.
Now run the Camera_Raw_5_7_updater (or the version ending .dmg if you have a Mac).
When the updater has finished it places the new ACR in the above file location.
NOTE: if the old version of ACR is in the above folder the updater will not replace it!
To confirm open CS4 and under EDIT\Preferences\Camera Raw - you will see the version is now 5.7.
A workaround may to be open the file using some other application, like Microsoft Paint, and then save it in some Photoshop compatible file format with a new name.
Now hopefully the file can be opened.
Pantone - Huey Monitor Color Correction
 |
 |
This is a USB device that measures the room light (assume brightenss and color). This is done with the probe in it's desktop cradle and with the LEDs facing you. There is also an option for automatic monitor adjustement for room lighting and in the preferences selection (right click the Pantone icon in the system tray) you can choose how often to make that correction. It seems to default to once every minute, but I set it for a 10 minute interval.
It also measures and adjusts the monitor (select LCD or CRT) color temperature and brightenss. This requires using the small suction cups on the probe and sticking it to the monitor. In my case it would fall off the monitor, so I used Blue masking tape to hole it. When finished you can click on Before or After correction to see the difference, and it's very noticable. What's correct is based on which application you select. For example Gaming, pre press, web browsing, etc.
The Stock "huey" has no serial number and there's very little information about how it works or what it's doing. There's an on line upgrade to "huey PRO" that supports multiple monitors, different gamma values and has a few other features.
I'm not aware if there's a "monitor profile" or not. Do not know if it changed the monitor settings or changed settings in Windows XP. Not sure what applications will see the new settings or if everything will see the settings.
A few years ago the Huey quit working. April 2015 saw an ad for the Datacolor - Spyder4 and got their basic version (Express).
Datacolor - Spyder4
The Spyder products are for measuring and adjusting color monitors. The Spyder5 is the current model, hence the sale price on the Spyder4.
For me the key thing is controlling the details in shadows. This can best be done when the monitor is calibrated.
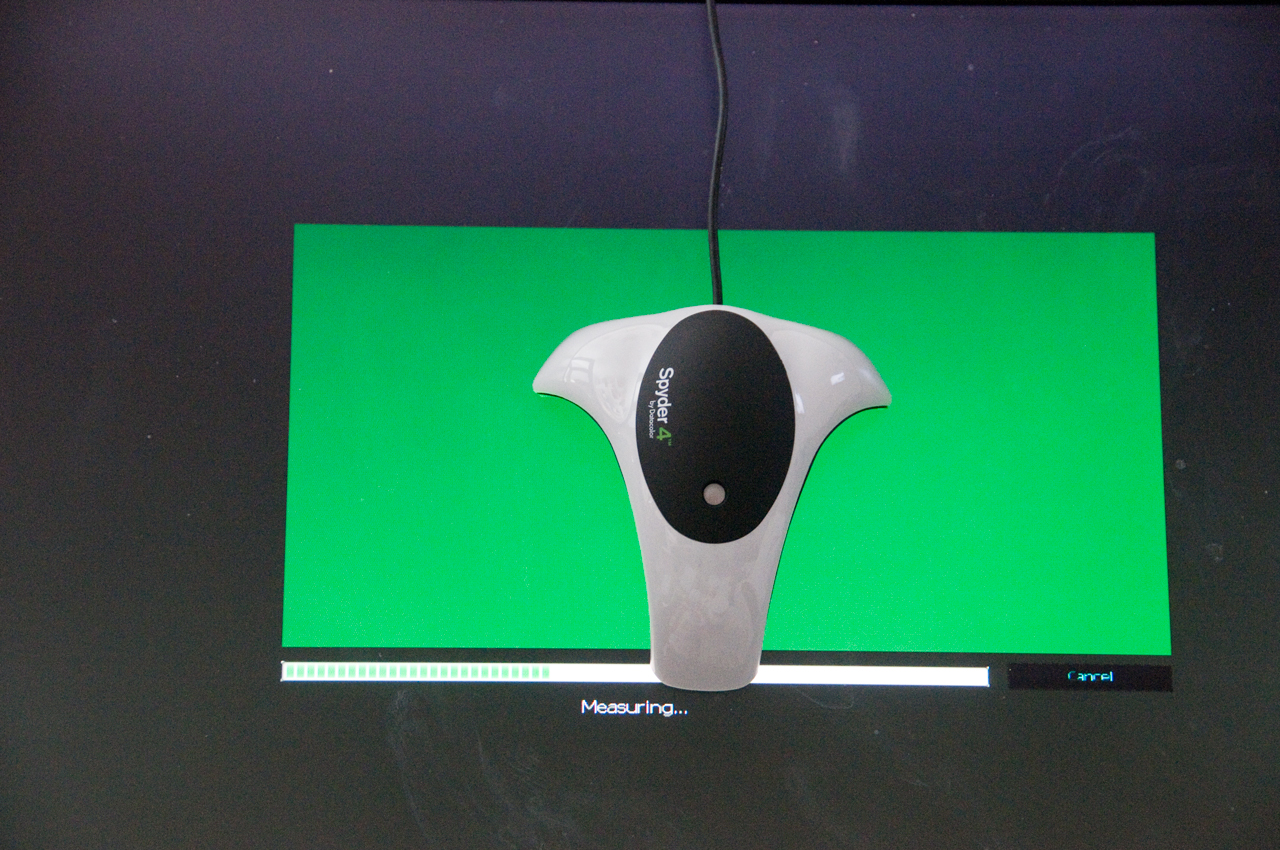
Fig 1 During Calibration
A bug advantage over the Huey is the counterweight
that hangs on the back of the monitor.
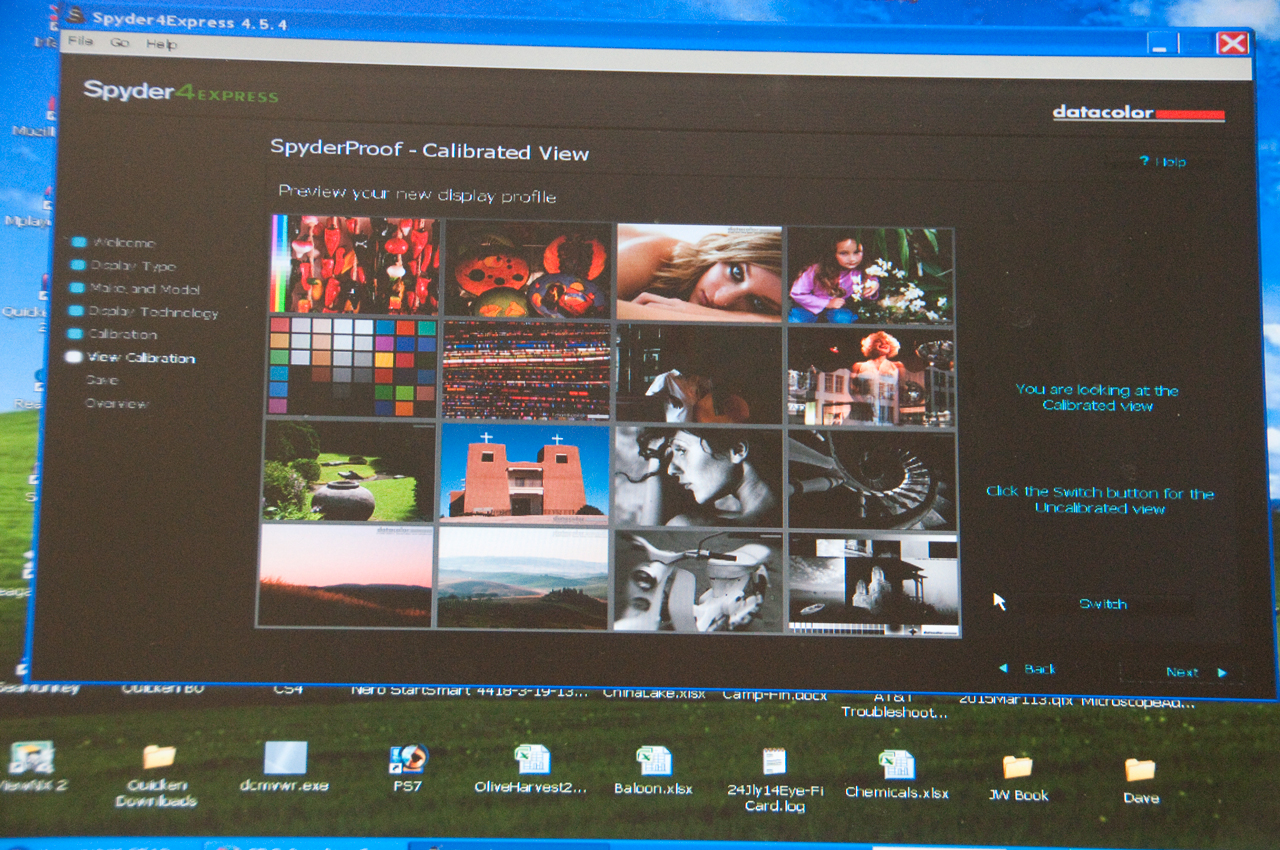
Fig 2 Calibrated test images after calibration.
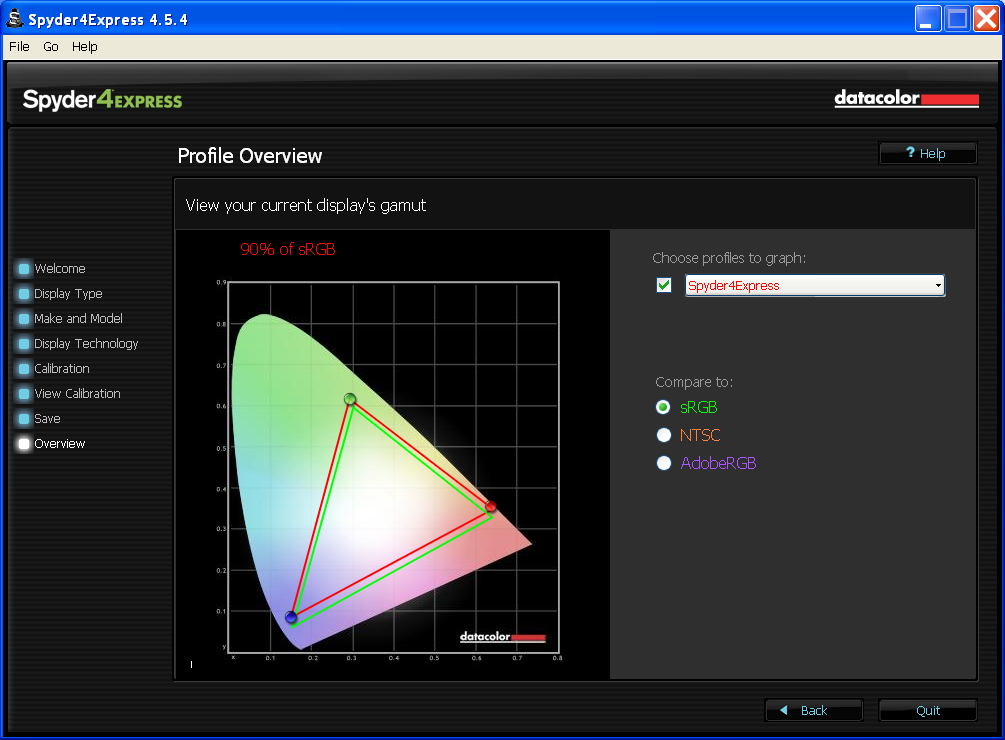
Fig 10 Percentage coverage of sRGB space is 90%
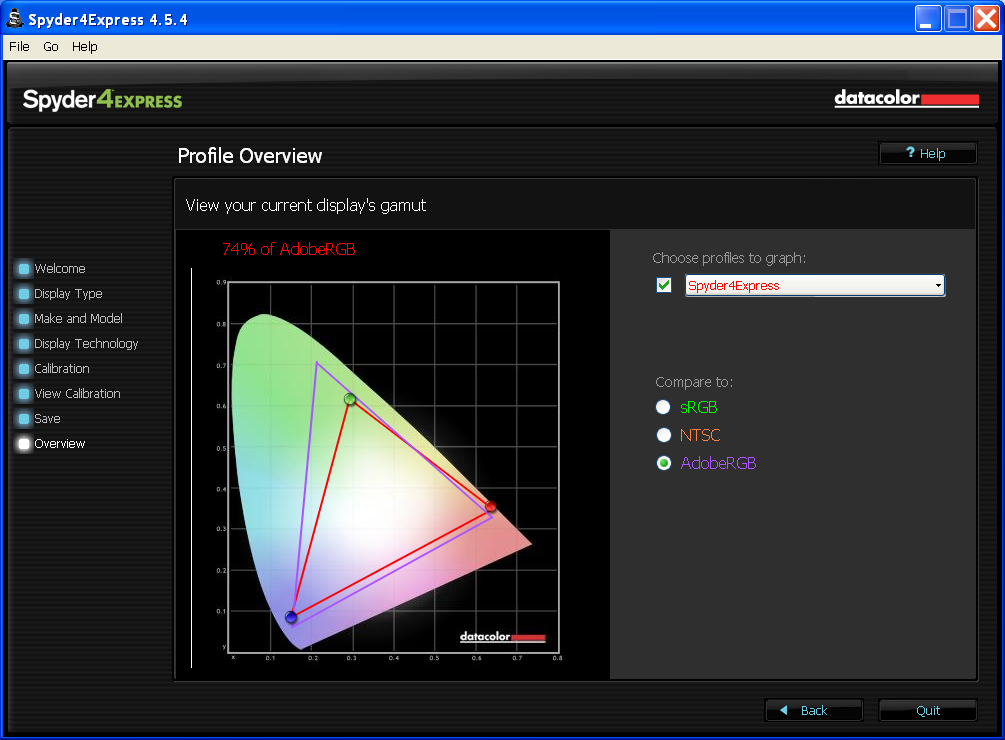
Fig 11 Percentage coverage of AdobeRGB space is 74%
This raises some questions:
1) Are there better monitors that will display most or all of the AdobeRGB space?
2) Does the Nikon D300s camera setting for sRGB or AdobeRGB make any difference with .NEF files are used.
3) How to get the color space coverage values for various monitors?
Browser Test
Possible Autumn Leaves Color Problems
- Since you can specify either sRGB or AdobeRGB color spaces the White Balance setting matters. In the case of the Autumn leaves photo the camera choose 4100 K which is not the correct value. This may be part of the problem in getting a color print that has the correct colors for the leaves.
- Maybe the Adobe RGB color space needed to be changed to sRGB prior to being sent to Costco.
- Costco by default Auto Corrects your color balance. I tried a sample print with that turned off and it made no difference.
- Something else is wrong.
Test No. 1
Brown leaves.
Test No. 2
Brown leaves.
Test No. 3
Test No. 4
Going to the folder where the NEF file is stored and deleting the file Fall2011f22.xmp then opening the NEF again.
Now the temperature shows up as 4100K. Making no changes in ACR and opening in PS CS4.
At the bottom left of the image on the border there's an icon for "unmanaged file".
The "Save As" dialog box has a check mark next to ICC Profile: ProPhoto. How to get that changed?
Resized to 8x12" and 72 DPI and saved as a .tuf file with the ICC Profile unchecked. Shut down CS4 and restarted.
No change in ACR, open image in CS4, change image size to 8x12 (leave at 300 dpi).
But when trying to save as .tiff the ICC Profile has not changed, it's still checked and at ProPhoto.
| Note: At the
bottom of ACR that's what appears to be a blue
colored link, but it's really how you change some of
the parameters including the color space. What a stupid change in the human interface from all the other input methods. |
Test No. 5
At the bottom changed the blue link from PhotoPro color space to AdobeRGB color space.
In CS4 changed image size to 8x12" (kept 300 dpi).
Test No. 6
At the bottom changed the blue link from PhotoPro color space to sRGB color space.
In CS4 changed image size to 8x12" (kept 300 dpi).
Color Spaces (Wiki)
CIE 1931 XYZ color space (Wiki)
Lab (Wiki)
(aka: CIE 1976, CIELAB D50)
sRGB (Wiki)
It's well inside the CIE space for all the colors and is far short of being on the perimeter of the CIE space anywhere.
AdobeRGB (Wiki)
This appears to be the best choice in terms of getting an imporvement and getting prints made.
ProPhoto (Wiki)
Uses 3 colors and the red seems to be at the CIE perimeter for red. The Blue and Green colors are OUTSIDE the CIE space and so saturated red, orange and yellow colors are included. But the Green, although outside the CIE space, does not include the CIE green peak and so the possible colors fall short in the greens and blues.
CMYK (Wiki)
Color Stacking Idea
By taking a series of photographs each of which is illuminated with a single color LED, where the focus is sharp for each color (eliminating problems with lens design), then the images are combined to form a color image. If the color of the illuminating light is known and hopefully on the edge of the CIE color space (Wiki) then all the colors enclosed by straight lines connecting the light source points can be rendered. It will take more than 3 colors of light to enclose the space, maybe as many as 8 different colors. But the resulting image should be very good.
No Good
The Motion Picture people have tried this and found LEDs do not work. See Wiki Color rendering index.Printers
Profiles
Assumes your monitor is calibrated.Step 1 Download & Install Profiles
Each Costco store that has on premises color printing has an on line printer profile for:http://www.drycreekphoto.com/icc/Profiles/California_profiles.htm
Store info: Noritsu 3111, Fuji Crystal Archive Paper. (up to 12x18")
Glossy (Gls)
Lustre (Lus)
Store info: Epson 7880 Poster Printer, Fujifilm Papers.
Satin paper (Stn)
semi-Gloss Poster Board (Brd)
Note: This lab uses our enhanced accuracy custom profiles.
To get the Epson 7800 printer select Lustre only in a print size of 16x20 or 20x30.
Step 2 Adjust Colors
Using Printer Profiles with Digital Labs - has instructions on usng the printer profiles.http://www.drycreekphoto.com/icc/using_printer_profiles.htm
Some tips:
Use: Image-> Duplicate to preserve the origional
View -> Proff Setup -> Custom gets you to the "Customize Proff Condition" Window where the printer profile is slected.
Do NOT select Preserve RGB Numbers (you can click it to see how bad the image gets).
Do select Simulate Black Ink and Simulate Paper Color and Preview.
I tried all combinations of the 4 Costco profiles and the Rendering Intents and the closest one is shown below.
When done click OK (do not click Load or Save)
Size the print for 300 dots per inch for the print size you want. It' not clear if you need the exact pixel count or exact size.
Image -> Mode -> 8 bits/channel

Step 3 Convert to Profile
Edit \ Convert to ProfileCanon Pro-100 Printer
The story goes that Canon was offering a package deal of this printer and a Canon DSLR camera but they didn't get enough takers so offered a different package deal where this printer and a couple of boxes of Canon brand color paper were combined for a total price (after mail back rebate) of $100 which I couldn't pass up.
I have a box of 13" x 19" paper and some smaller sizes.
A friend used some special cloth on a backing which is supposed to allow color printing on cloth and they remove the backing, but more than half the time it jammed.
Links