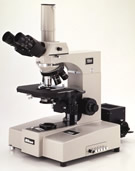
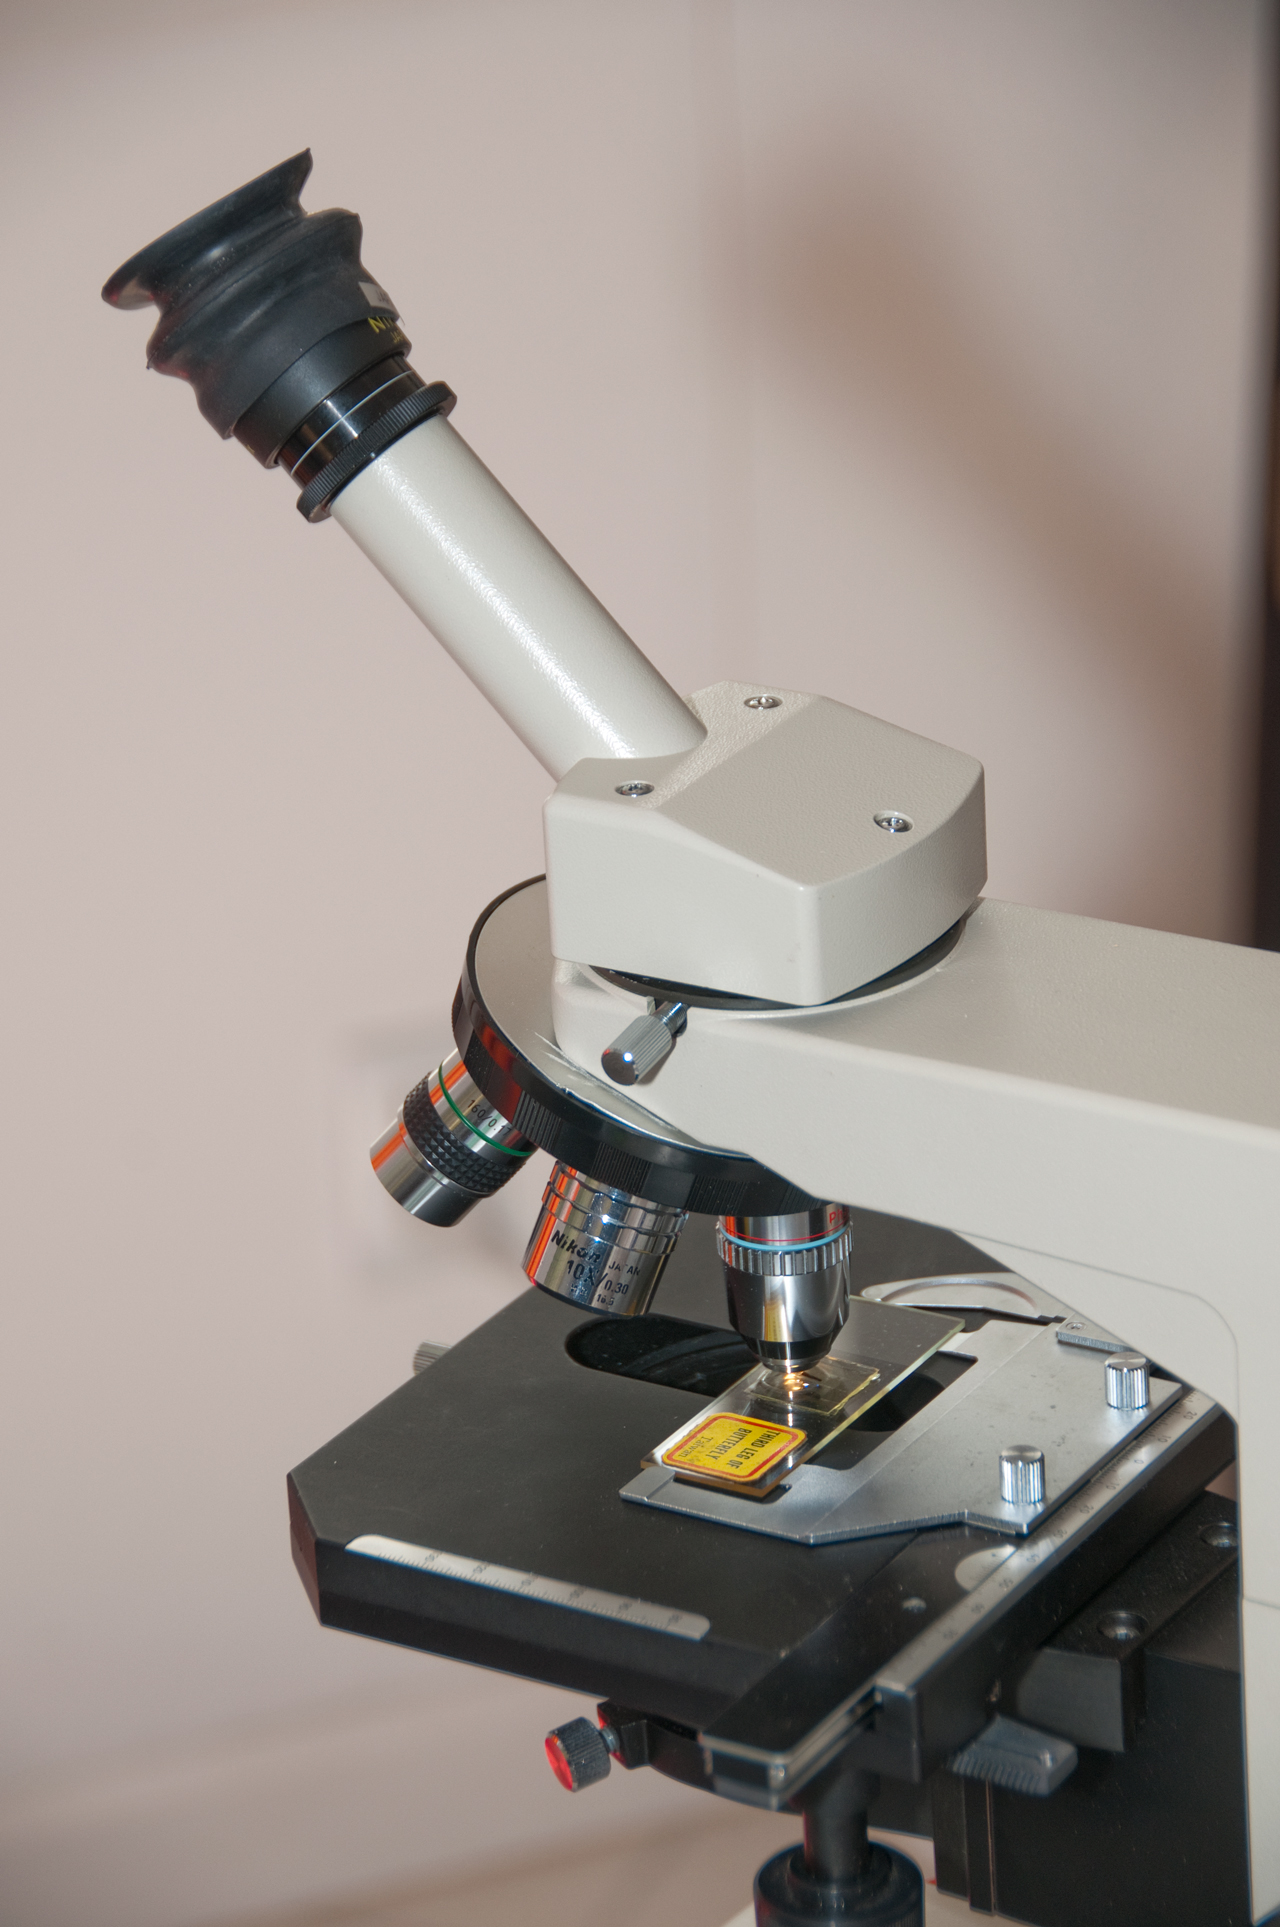
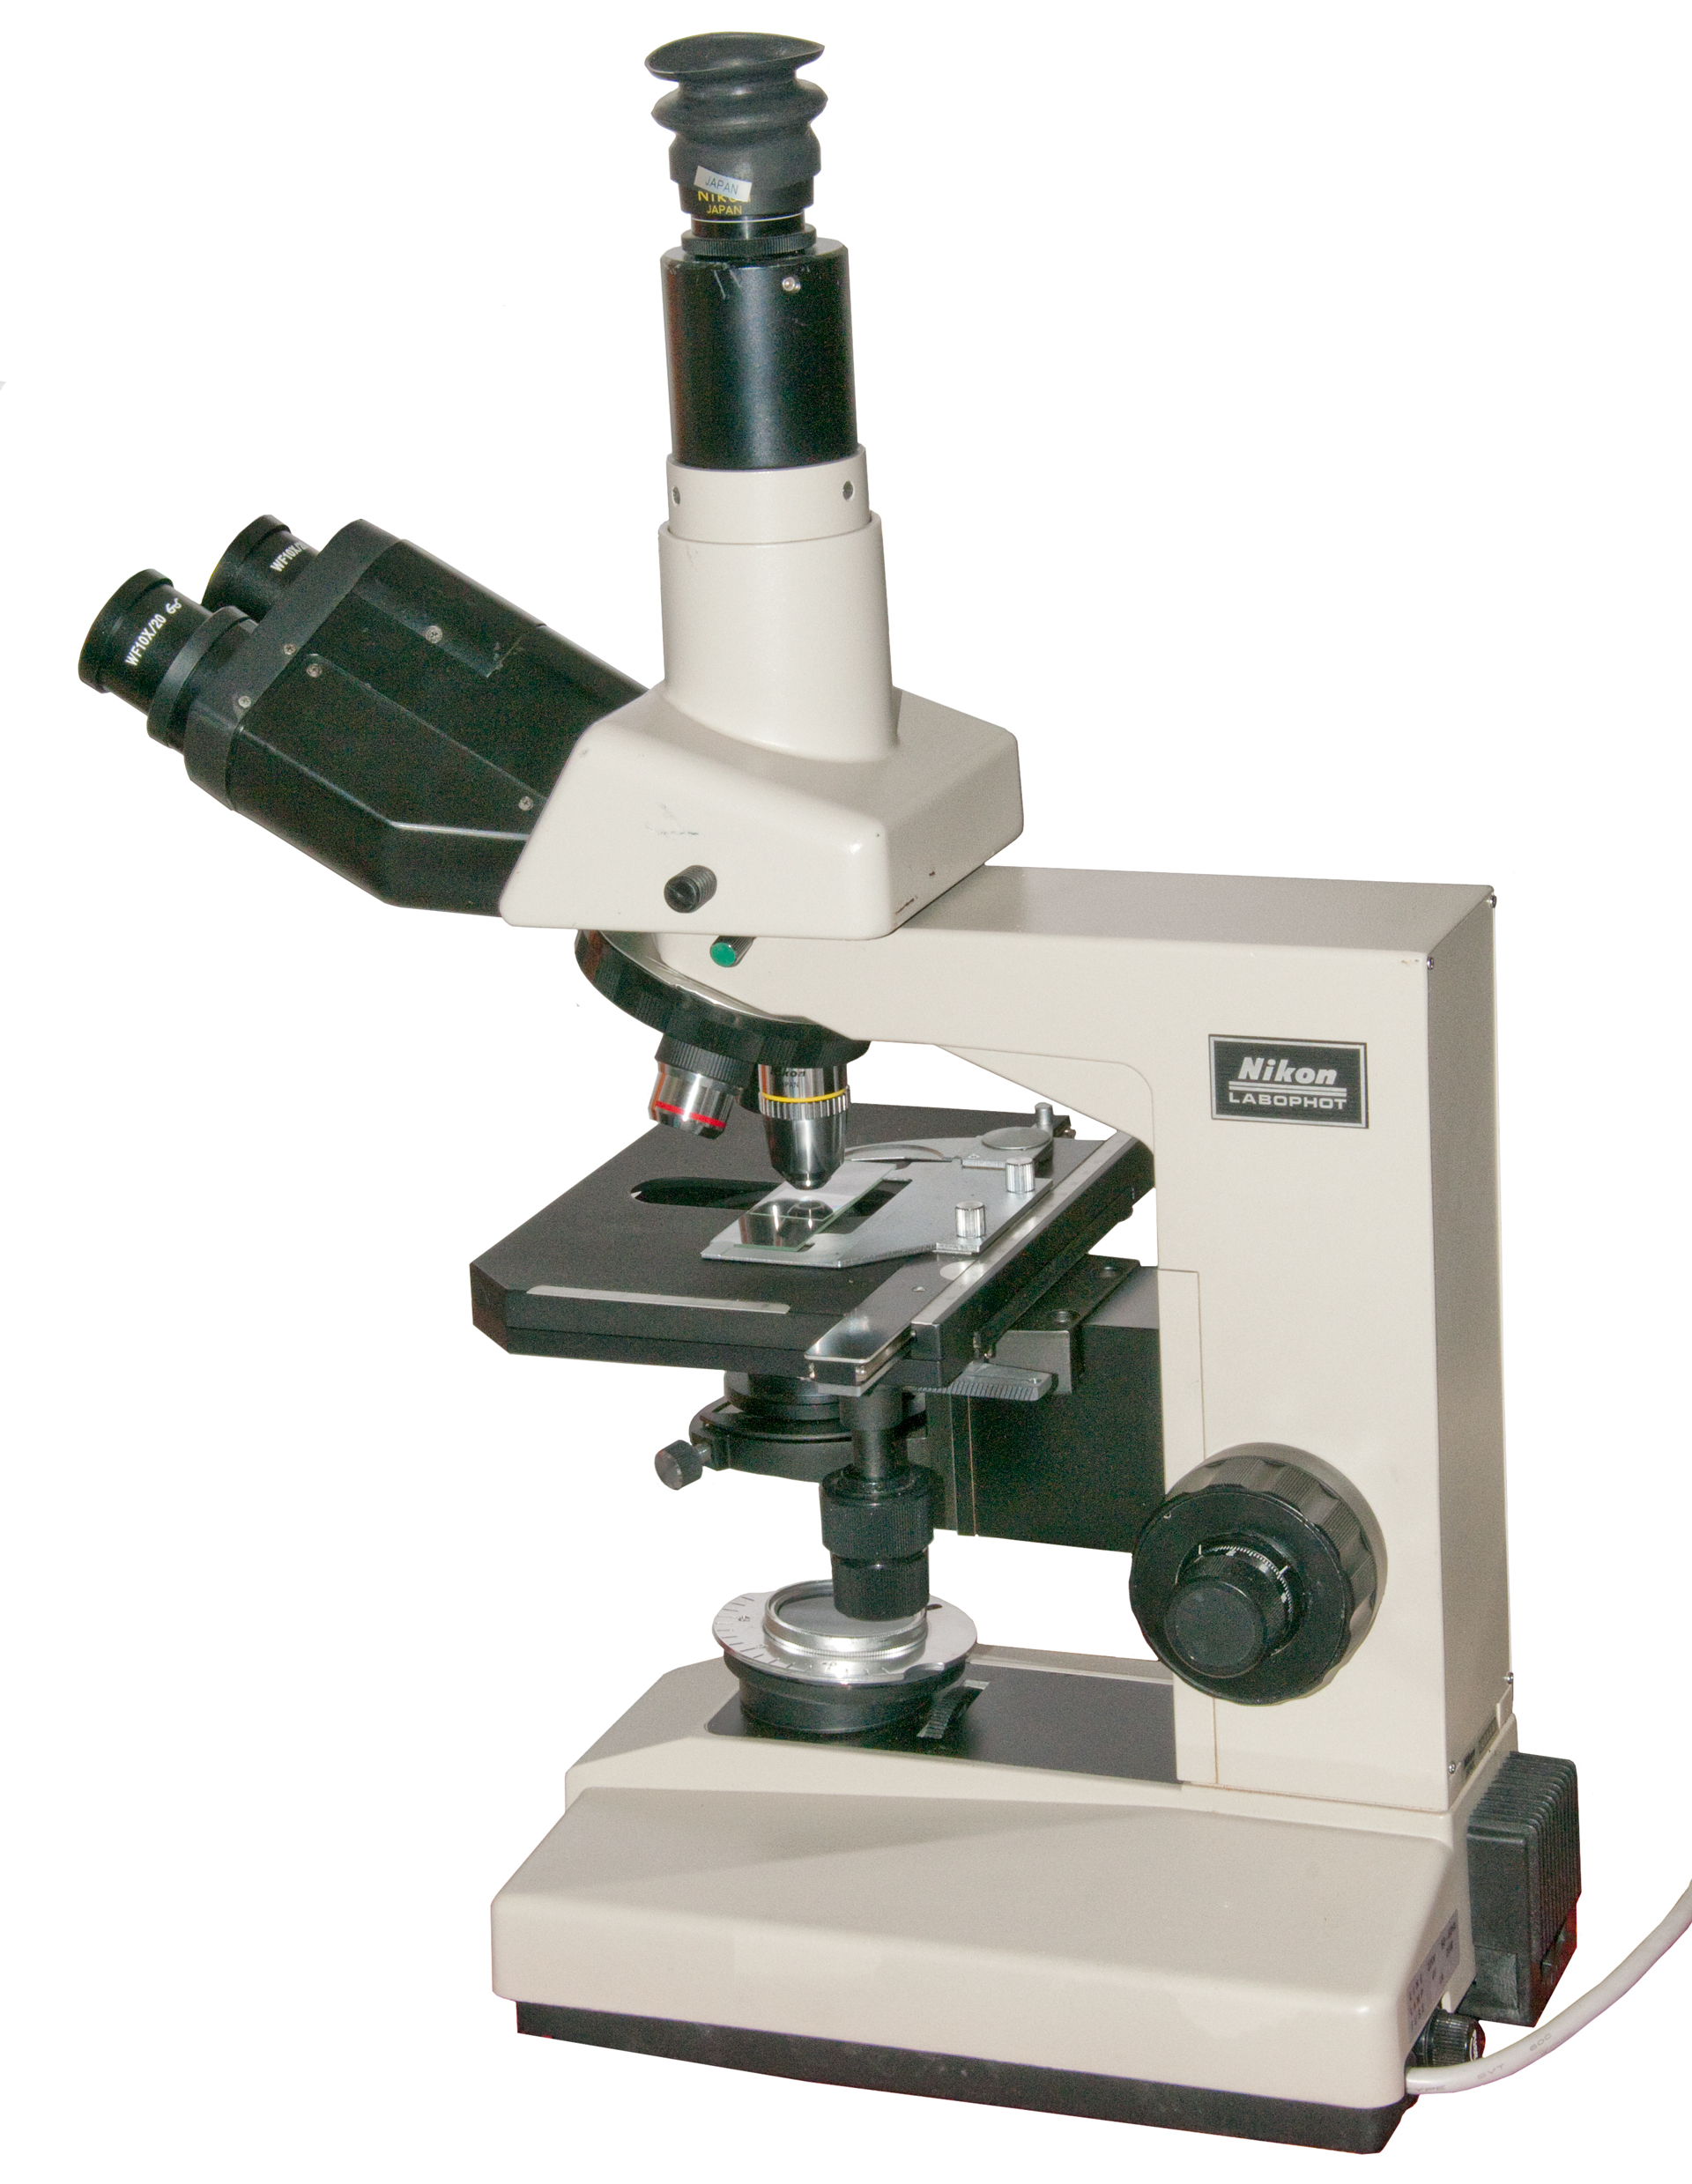
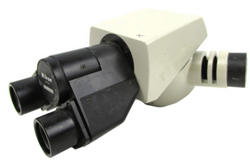
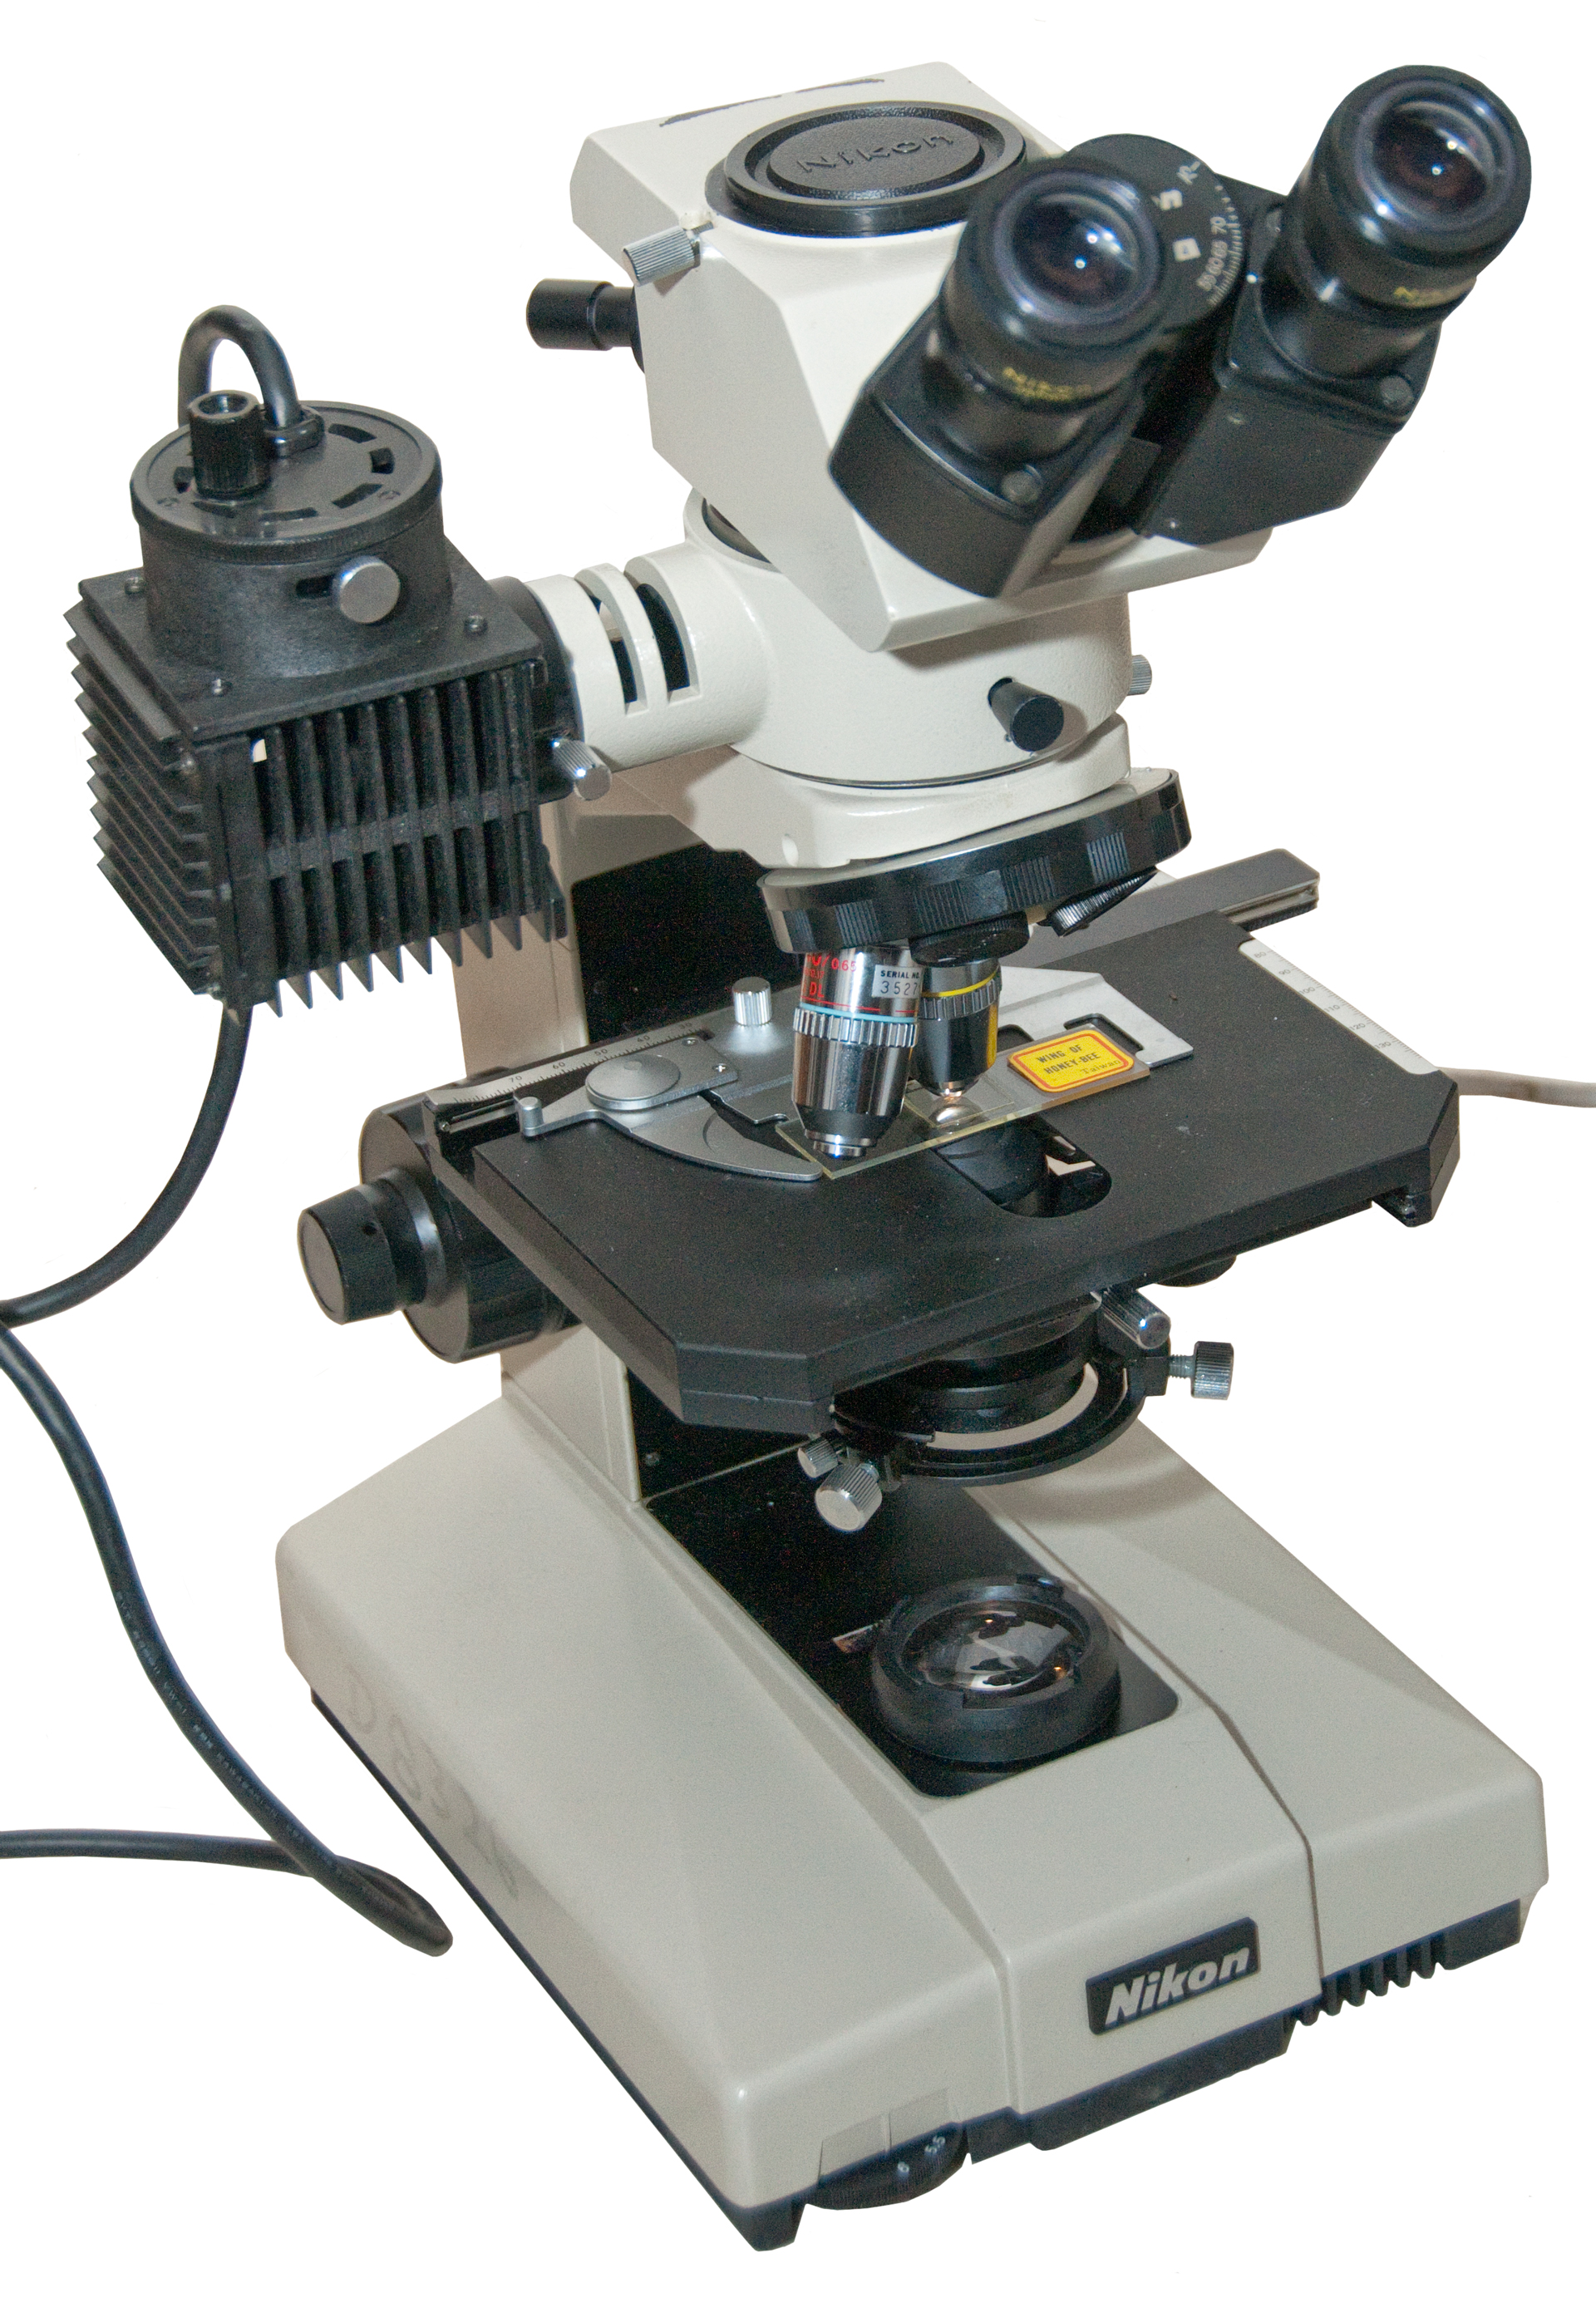
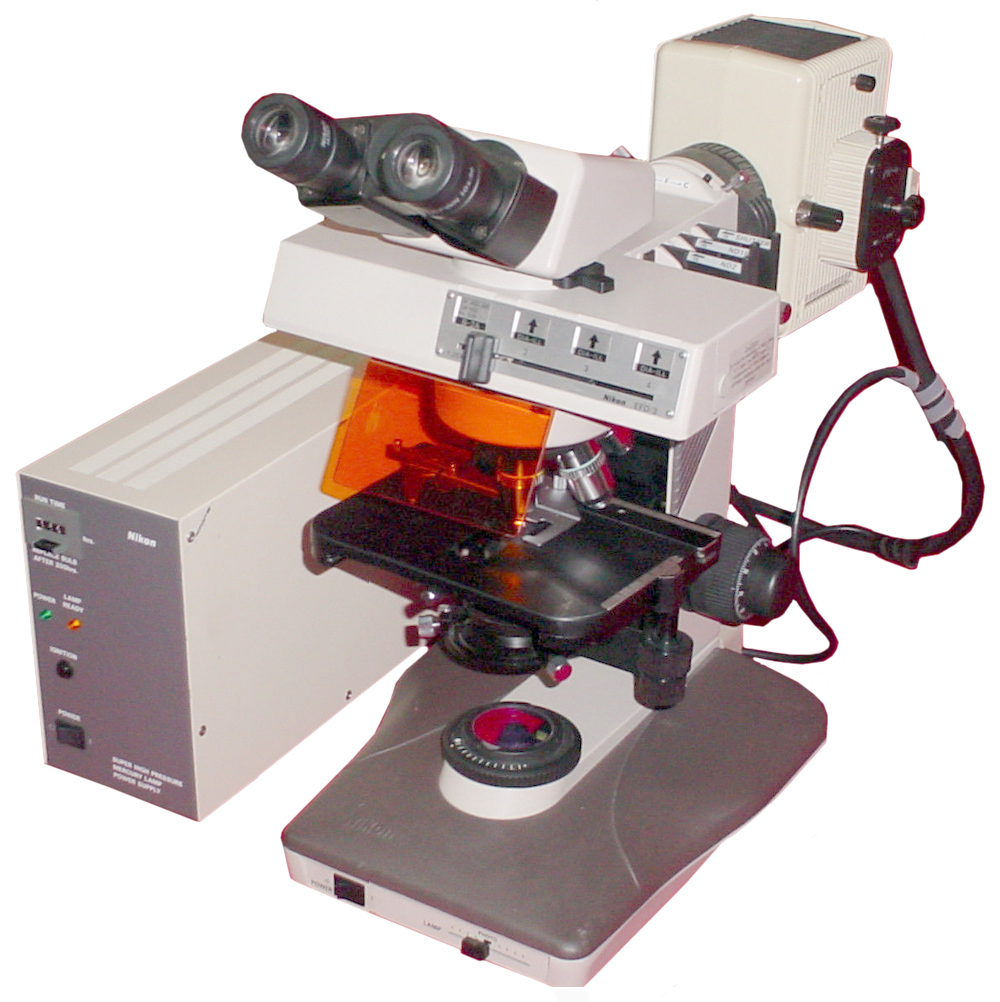
Nikon Labophot Microscope
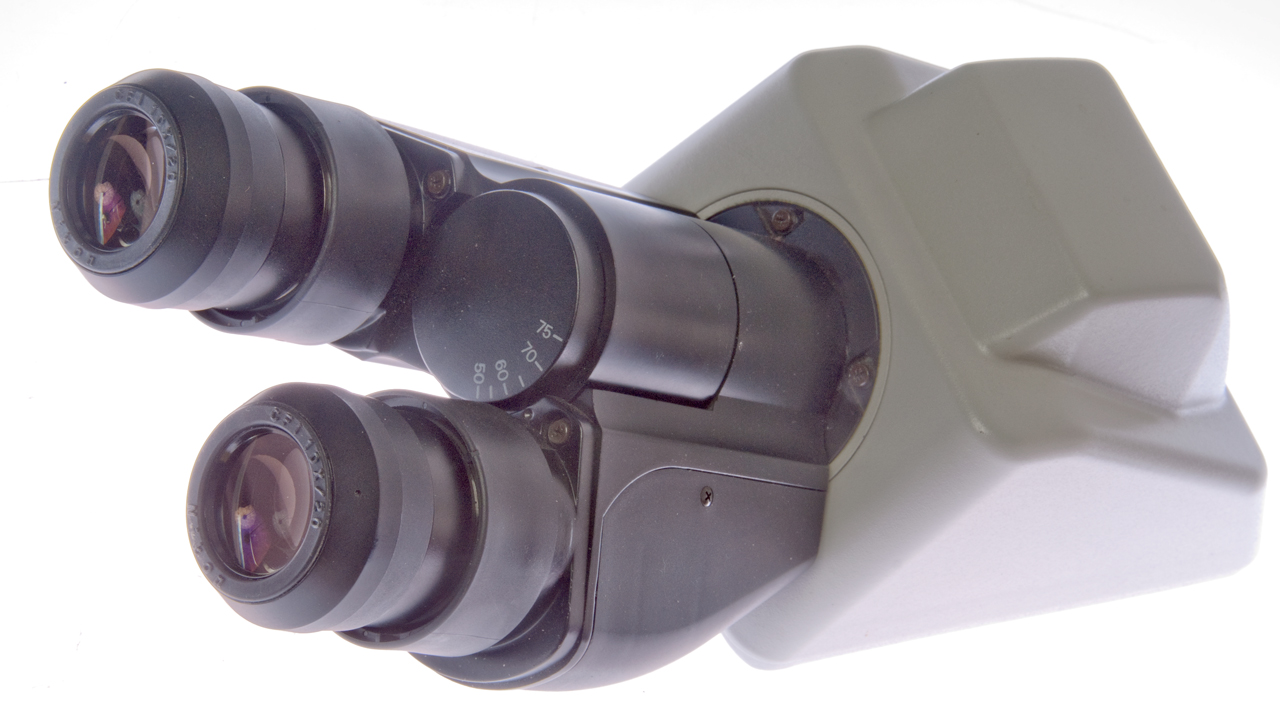
© Brooke Clarke 2014Fig 1 |
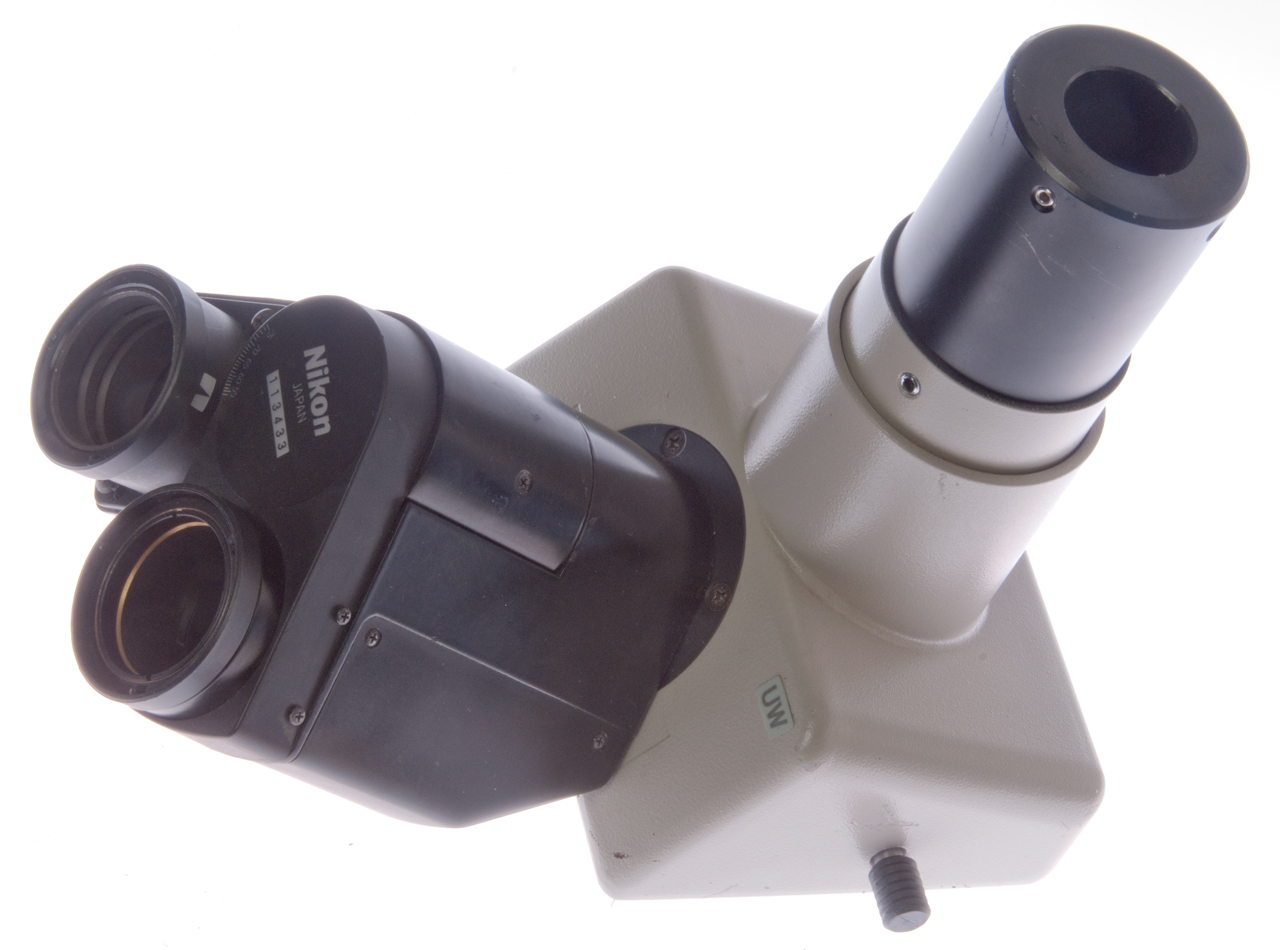
Fig 2 |
| Fig 1 |
Fig 2 |
Getting this microscope came about because of my interest in Macro photography (Digital Photography 202: Close-Up, Macro & Micro, Nikon Multiphot) developing into an interest in Micro photography. Some of the methods of Micro photography add a camera to a microscope and the old Unitron microscope I have is not suitable because when a camera is mounted on the tube it pushes the tube down.
The newer microscopes have the eyepiece fixed to the microscope stand so it does not move at all. This allows mounting a Nikon DSLR camera on a microscope.
Because I've used Nikon cameras for over 50 years I choose Nikon as the brand of microscope I'd like to get. They have been making them for a long time.
The Nikon booklet How To Use A Microscope and Take a Photograph is based on the "phot" family of microscopes and CF optics. But it was also written when film cameras were the only type there was.
You can easily see 1 um features (see: calibration photos in camera adapter comparison) using a 10x objective and 10x eyepiece or a 2x camera adapter. With a 100x objective you should be able to see details at the level of 0.1 um or 100nm.
This is a compound microscope (Wiki). Simple Microscopes have a single lens yet high (>20x) power than magnifiers (Wiki). Another class of optical microscope is the stereo microscope that allow 3D viewing, necessary when working on small parts, like Surface Mount Technology.
Microscopes (Wiki) were popularized in the late 1600 by Antonie van Leeuwenhoek (Wiki). These allowed seeing never before seen views of pond life. They consisted is a single spherical lens made by forming a ball on a very narrow diameter piece of Borosilicate glass in a Bunson burner (Wiki). These were called "simple" microscopes because of the single lens.
Later the "compound" microscope (Wiki) became the standard type of microscope. It has separate objective and eye piece optical elements mounted in a hollow tube. In 1896 the Royal Microscopical Society (Wiki: RMS) specified many of the dimensions of the compound microscope so that parts would be interchangeable (Wiki). So the development of the compound optical microscope started in 1896. For many decades the design looked very much like the Unitron.
It's my understanding that virtually all the dimensions were standardized making this design very flexiable.
For example the source of light might be a flat/concave mirror, an A.C. line powered lamp (shown at right) or a LED based light. In a similar way a standard 1" x 3" glass slide can be held by a couple of leaf springs (shown at right) or an X-Y stage can be fitted to make searching the specimen easier. Later X-Y stages were calibrated in distance to make finding something easier. The newest X-Y stages are computer controlled to support automated operations.
The hollow tube is part of the 160mm tube standard. The "power" of the objectives and eye pieces are found by dividing the tube length by the focal length of either of the optics. So a 16mm FL objective or eye piece would be labeled as 10X.
When they are mounted in the tube the overall power is 100X.
At this time the optical corrections were implemented using a combination of the eye piece and the objective so you needed these parts to be from the same manufacturer and maybe even same model series.
The Nikon model G (1960s & 1970s) and model S (1960s) are an improvement on the Unitron in that they have the eyespiece and objectives fixed to the stand (i.e. only the stage moves for focus), but otherwise they are very similar.
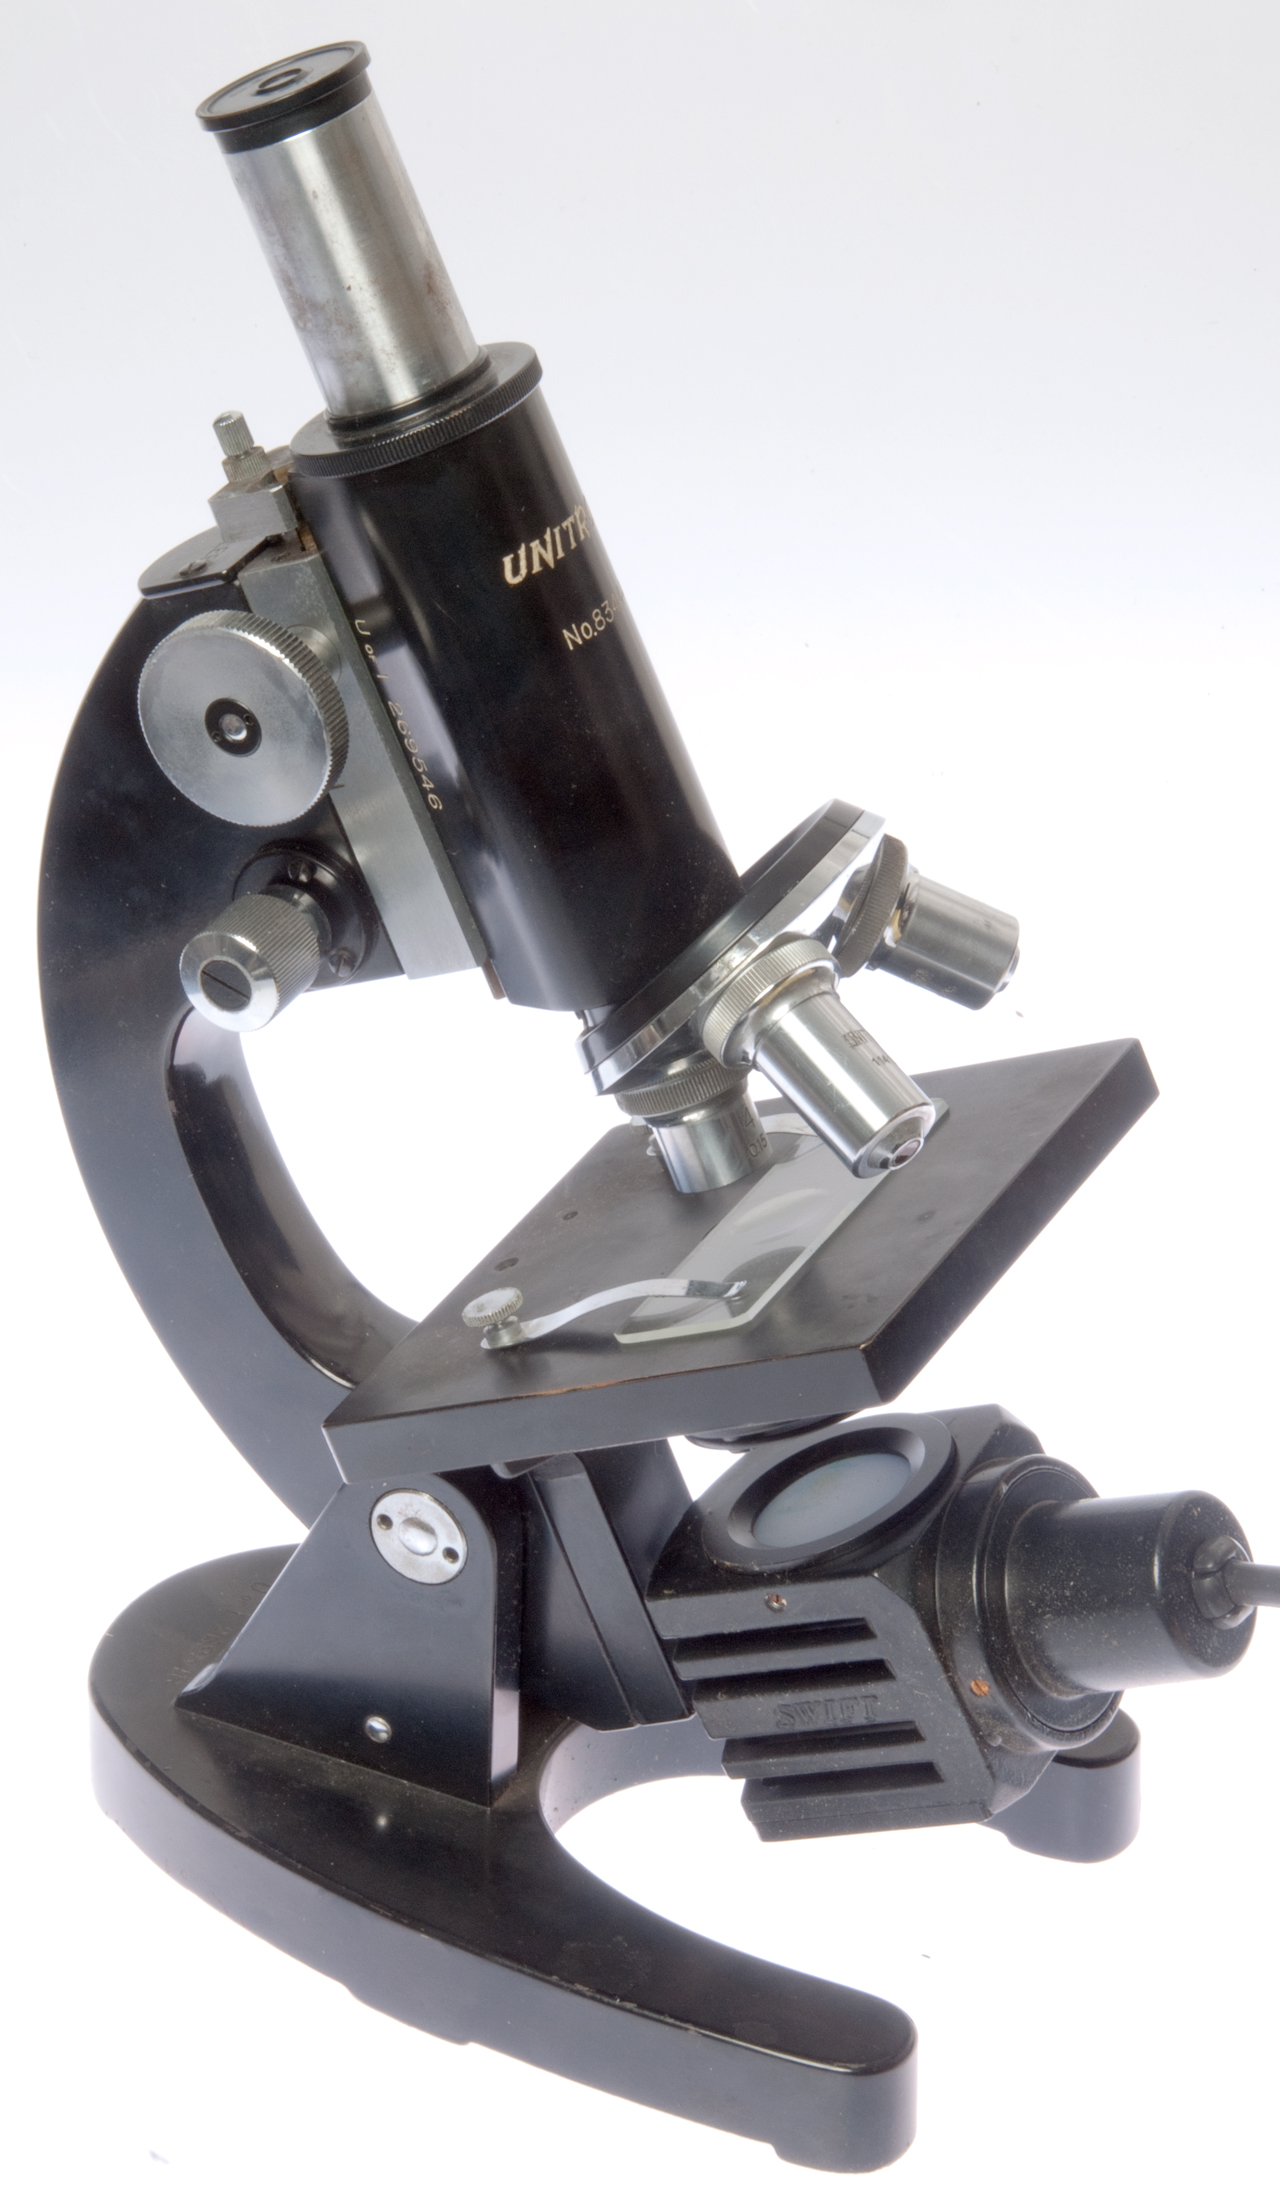
Classic Unitron Compound Optical Microscope
circa 1950 - 1960
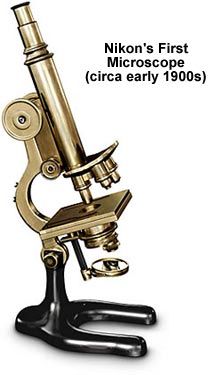
The first Nikon microscope was made in the early 1900s and fundamentally it is identical to the much more modern Unitron.
So, for at least the first 70 years microscopes were pretty much the same.
Nikon Product History: stereo microscope 1954, phase contrast compound microscope 1955
1976 marks the introduction of the Biophot and Metaphot microscopes that use the Chrome Free (CF) objectives and eye pieces. These still use the standard 160mm tube length and they also use the DIN standard 45mm parafocal distance (Wiki) (objective mounting flange to focused point).
See my list of the "phot" microscopes that all used this technology. The "phot" means microscopes that were designed to support photography. But at that time this meant 35mm roll film, 120 roll film or 4"x5" sheet film since digital cameras were a long way in the future. This means that there was a lot extra effort required to support things like getting good focus, the correct exposure and the correct scale factor.
Note:
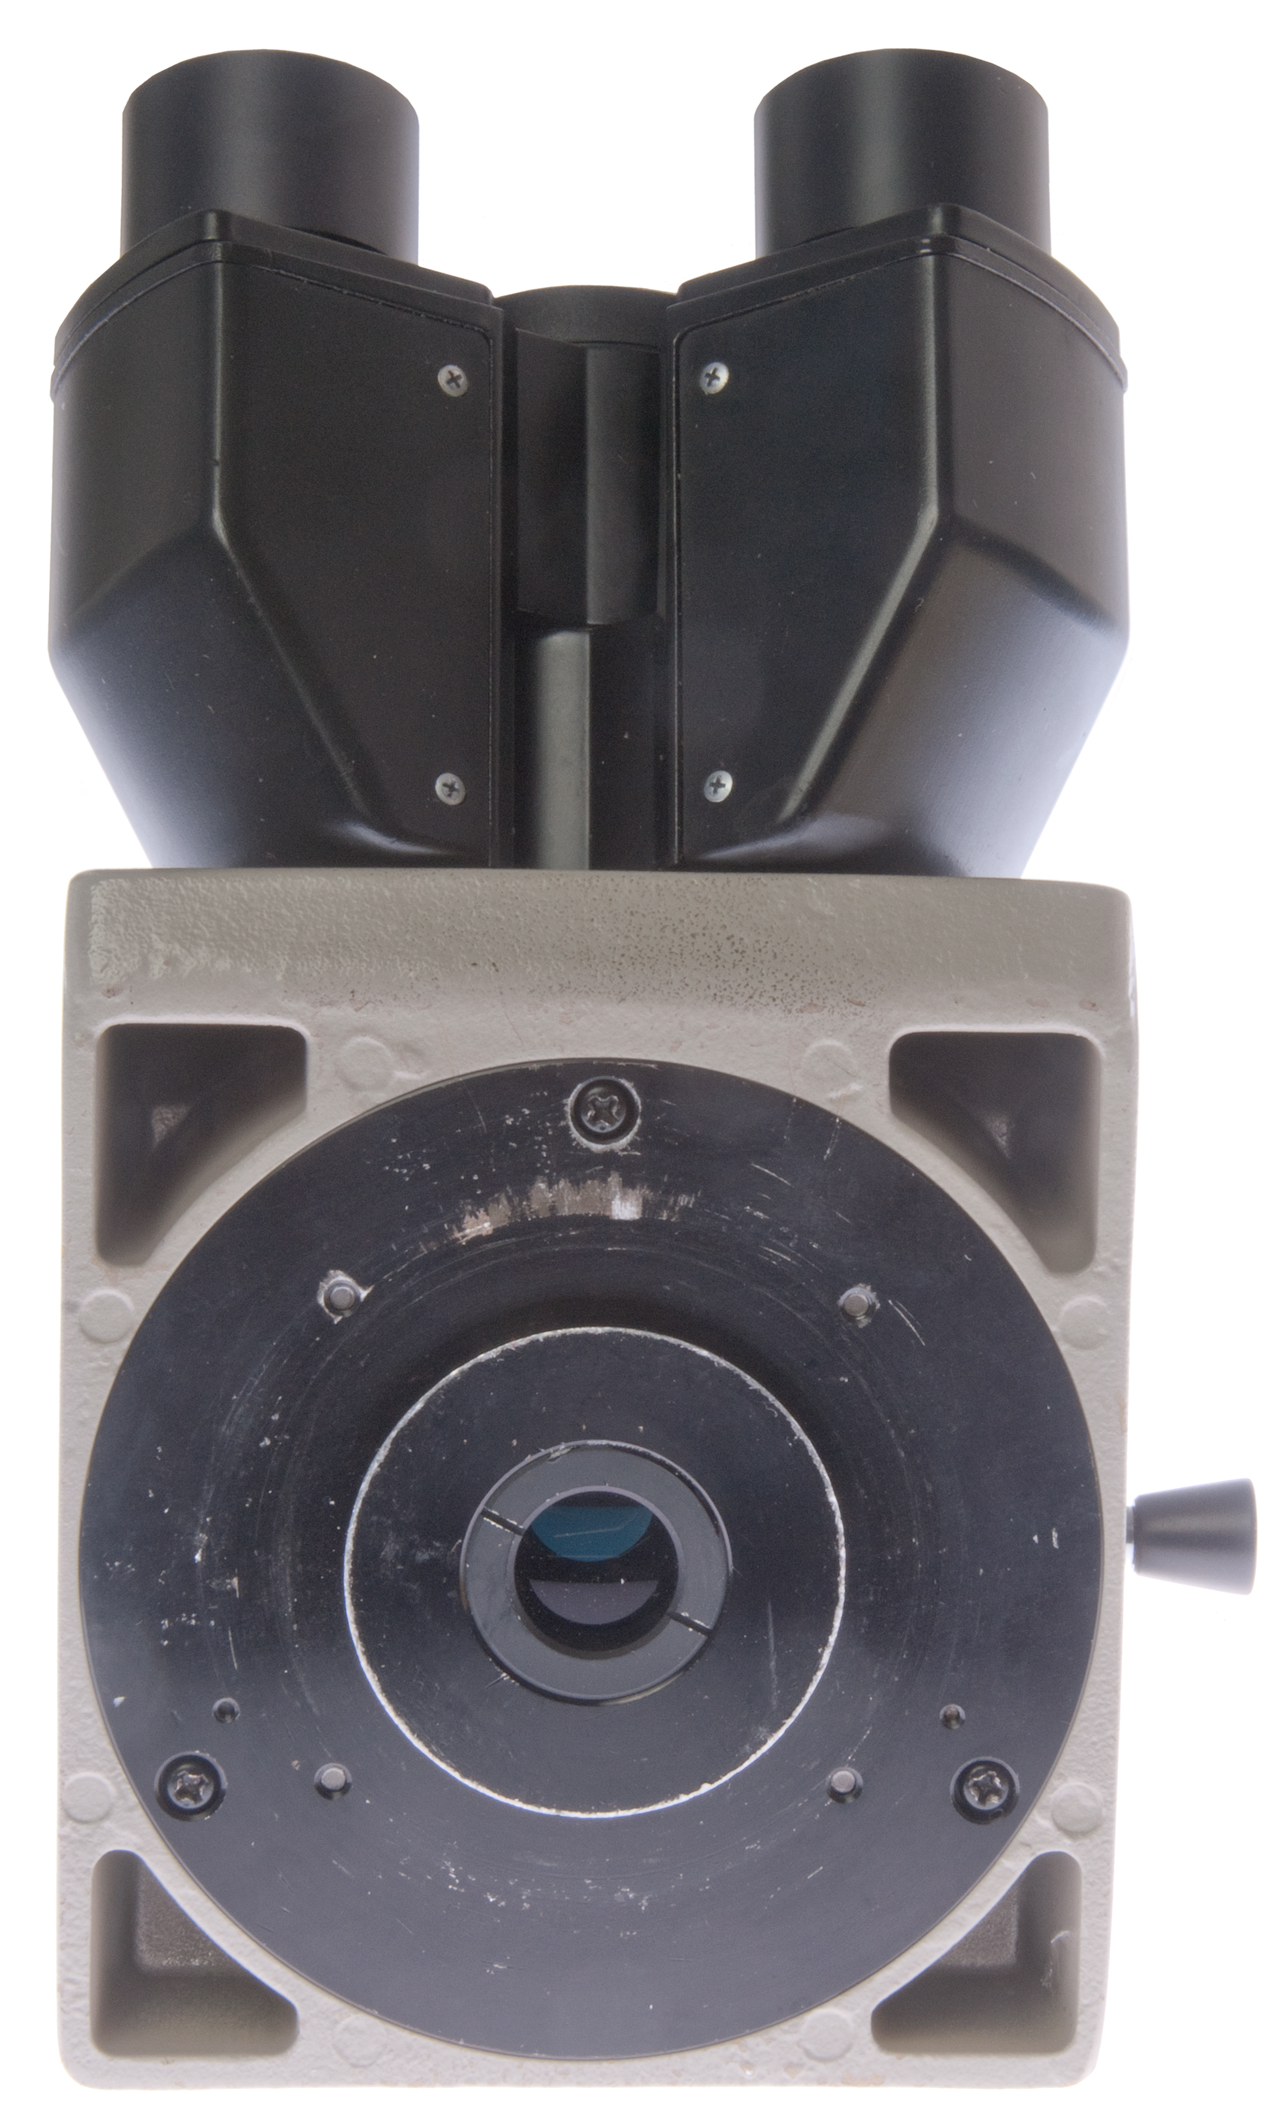
The head sits in a fixed position on the stand, it does not move up and down when the focus is changed. Focus only moves the stage that holds the specimen. In a like manner the objective is fixed to the stand.
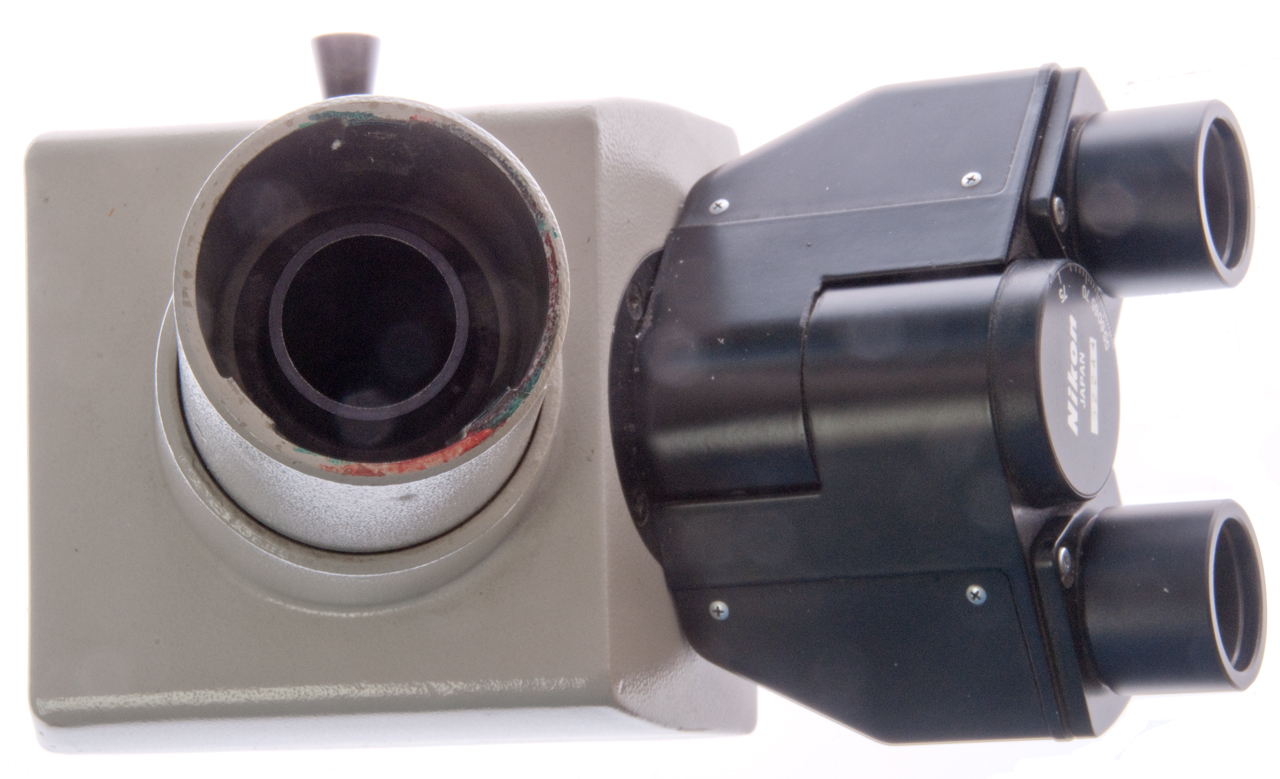
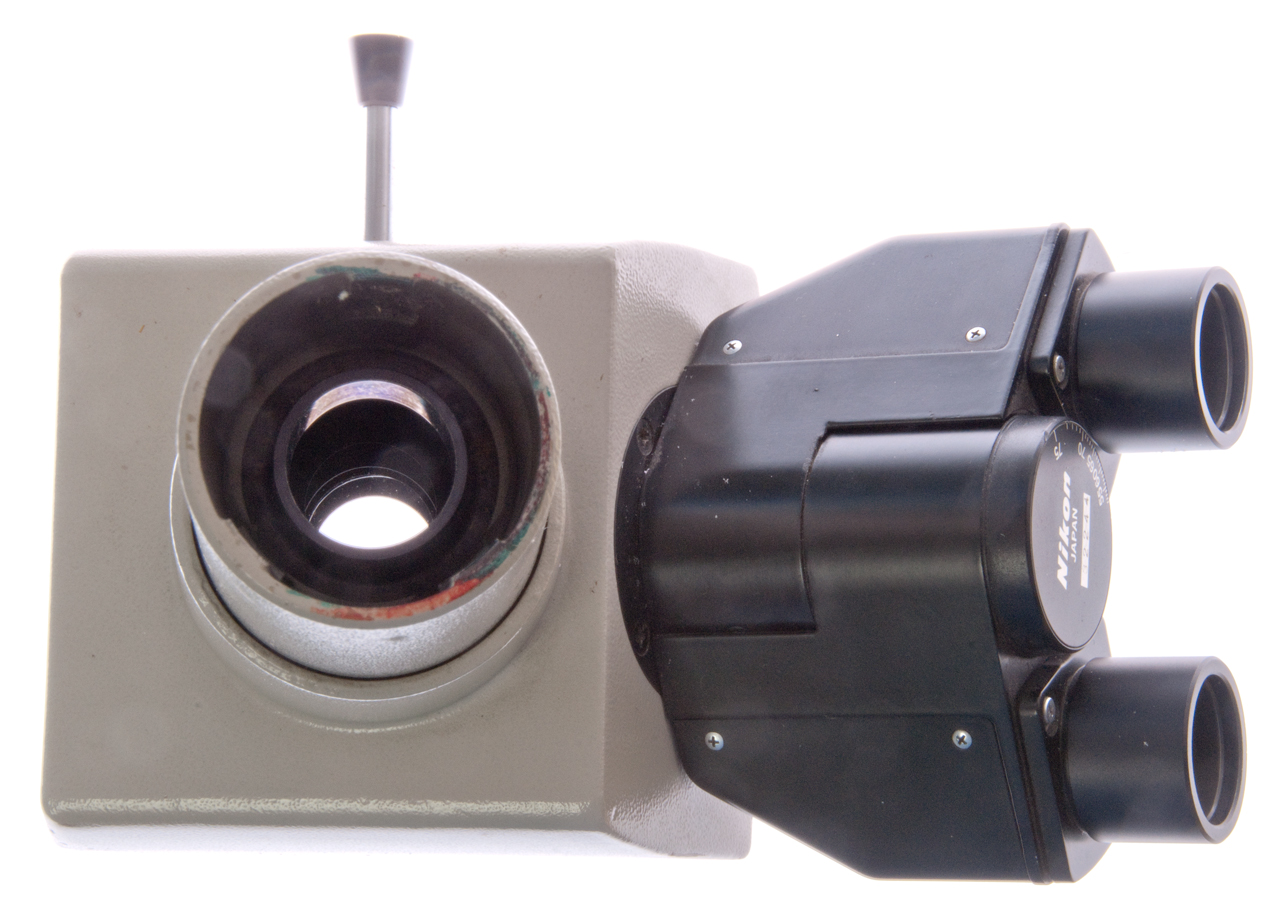
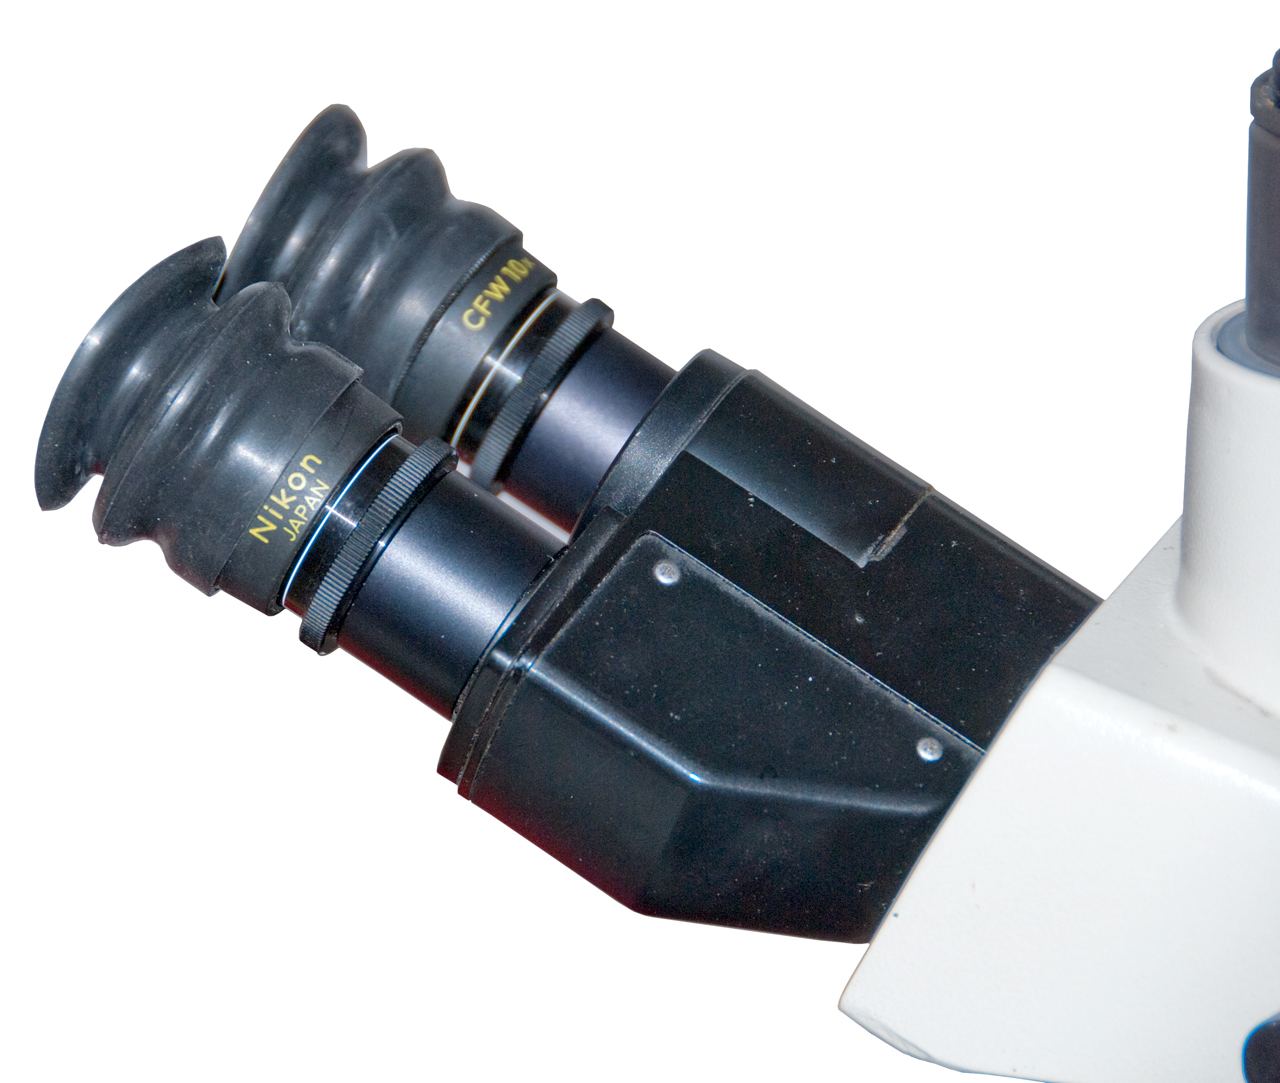
The T version eyepiece tube (head) is trinocular, i.e. two oculars for eyes and one ocular for a film camera.
The head can be interchanged with other heads, or can be lifted up and other optical elements inserted such as a vertical illuminator.
The lamp house is at the lower center rear and the light passes through a series of filters that can be switched in or out (buttons along right side of base). There's room above where the light shines up and the bottom of the stage to insert various optional condensers.
All these things are not needed when a modern Digital Single Lens Reflex (Wiki: DSLR) camera is used that has built-in exposure control and "Live View" mode with magnification to allow accurate focus on the imaging chip.
Starting in the 1990s Nikon introduced the Eclipse series microscopes. They use Chrome Free Infinity optics (CFI60). The 60 refers to the parafocal distance which was changed from the DIN 45mm parafocal distance to a Nikon 60mm parafocal distance. There is no longer any standard tube length instead the light output from the objective is in parallel rays that require a "tube lens" to be brought to a focus for the eye piece or camera. This allows more room for optical elements and makes for a higher quality image because putting glass elements into a converging light path, like the 160mm system, causes distortions which the infinity system eliminates with the parallel rays.
The Eclipse microscopes and their optical elements are still current and so expensive.
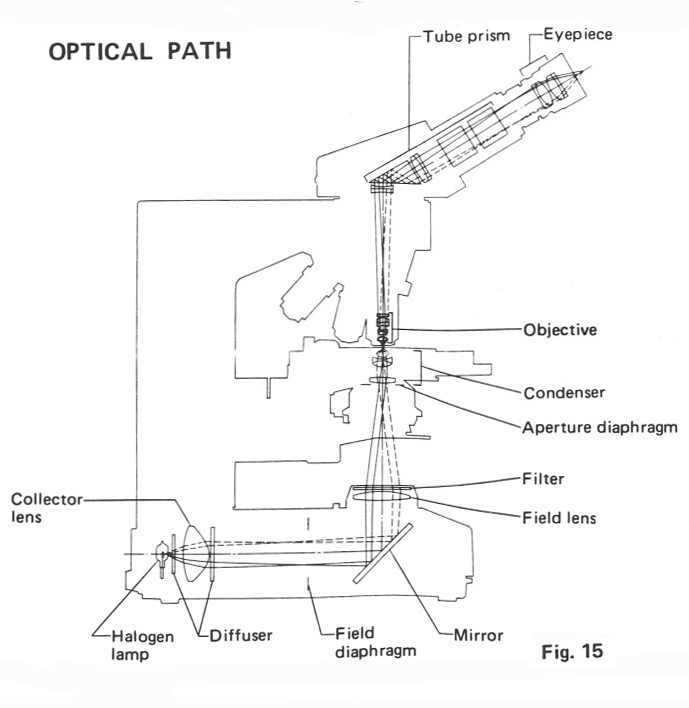
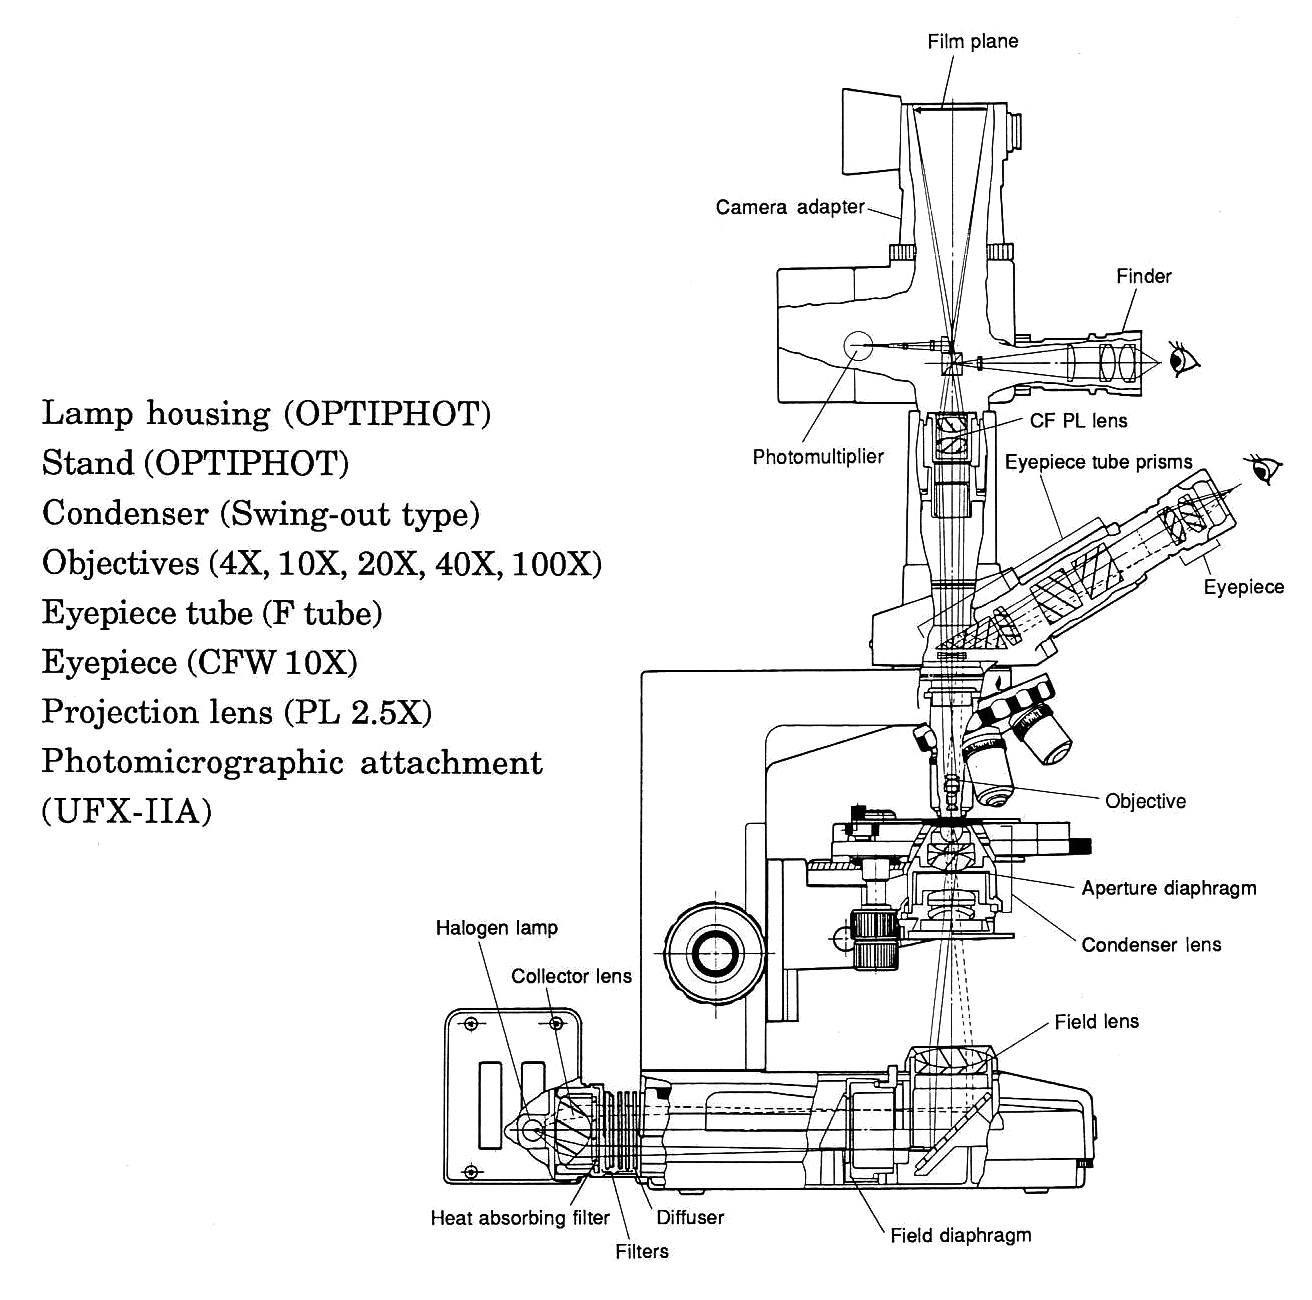
Labophot Microscope Manual Fig 15 Optical Path
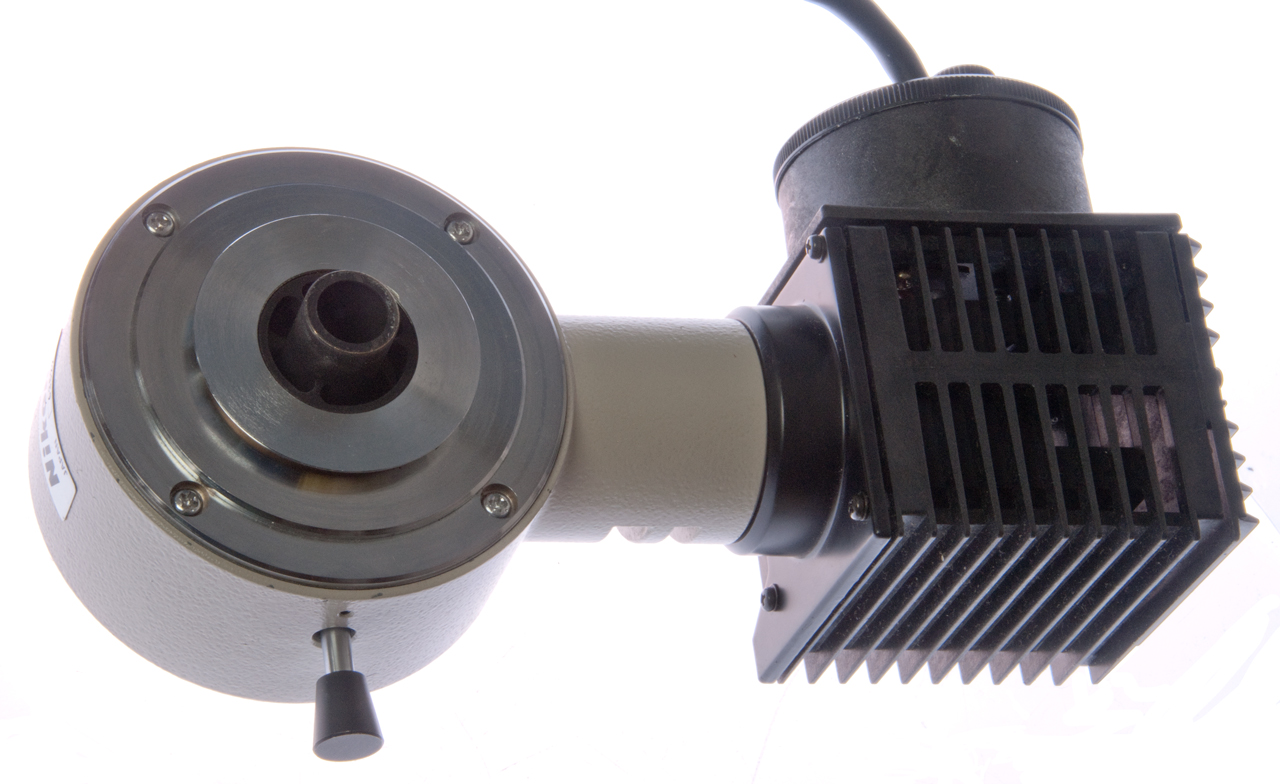
The lamp is mounted to the heatsink/lamp house at the rear center. It comes out with the heat sink.
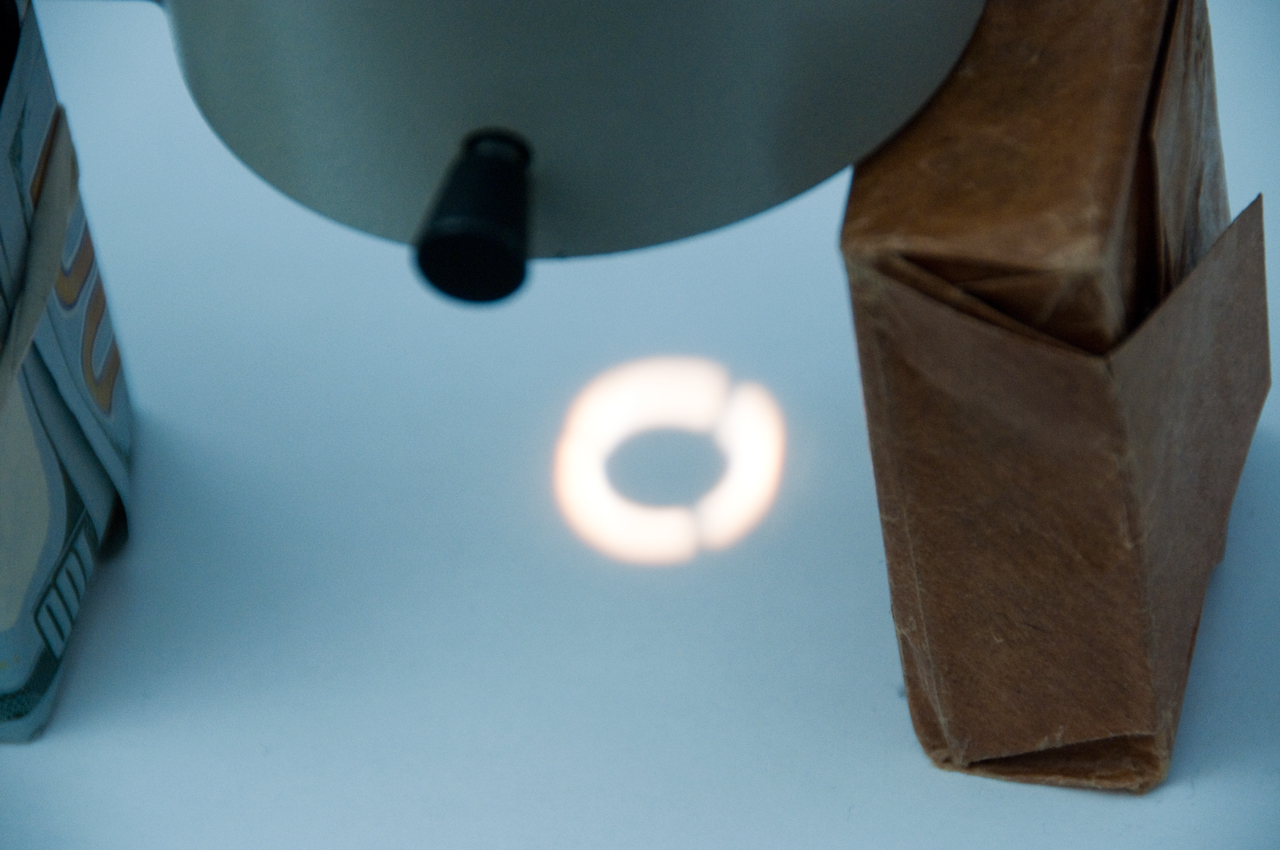
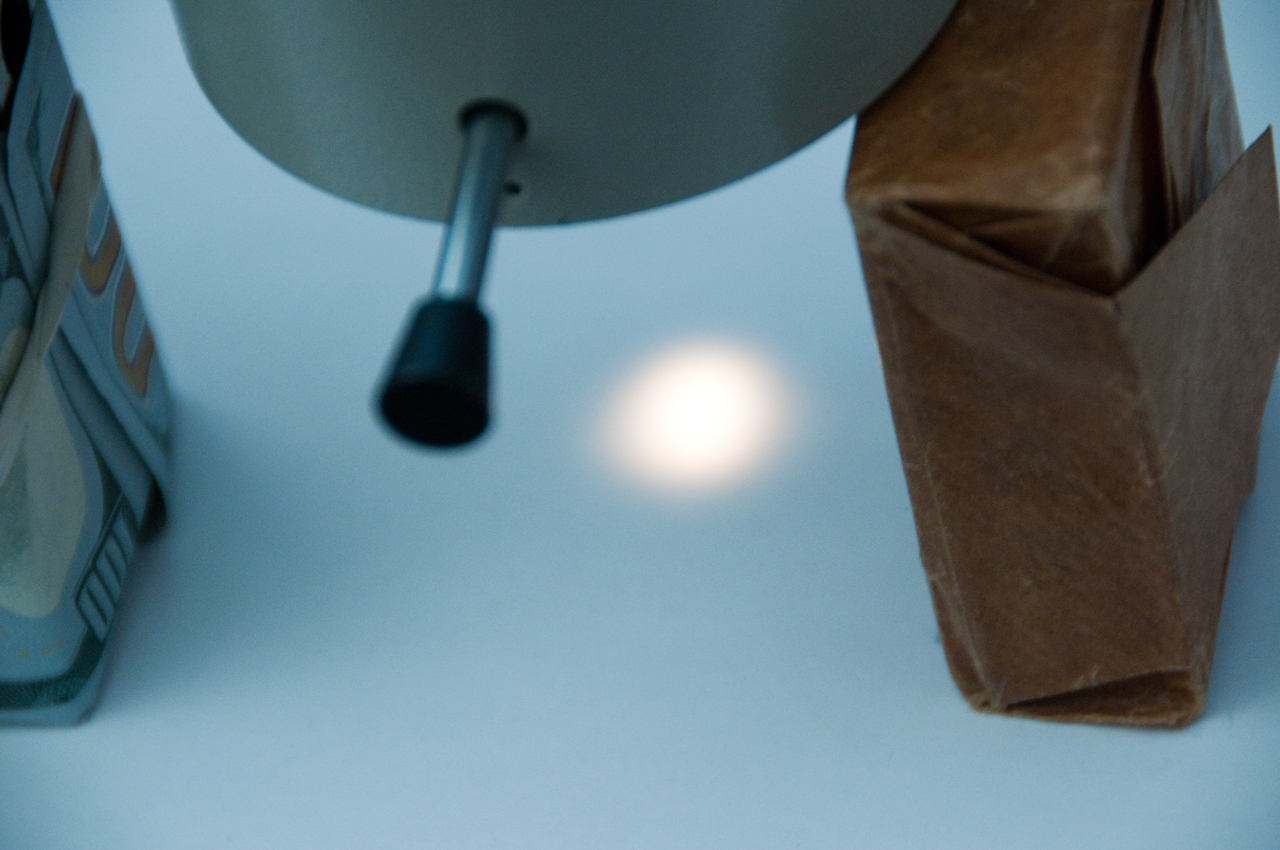
If you look at the diagram the Field diaphragm is shown a little to the left of it's adjusting knob which is located just behind the Field lens and filter holder, see Fig. 1 where the top of the adjustment knob just sticks up a little.
The field lens is at the front center pointing up for diascopic (transmitted light) illumination. A daylight color correction filter can be placed on top of the lens if needed for photography with daylight file, but with a digital camera shooting RAW images there's not need since color correction can be done in Photoshop.
This a a 160mm tube length system and it uses the DIN parafocal distance of 45mm. The objective threads are RMS.
Note when an accessory is installed between the stand and eyepiece tube (head) it has optics that correct for the change in distance to maintain an optical 160mm tube length. With the new CFI60 system these correction optics are no longer needed.
One thing that will be checked is the use of an infinity objective with RMS threads on the Labophot. I've been told that it works even though the optical system is missing a Tube Lens.
A number of the Nikon "phot" family of microscopes seem to be very similar. The Biophot, Fluophot, Alphaphot, Metaphot, Labophot and Optiphot all seem to have a stand that's based on a common design, interchangeable heads and other accessories. If you have a catalog that covers this please let me know. Like the first compound microscopes there seem to be many Nikon standards and so this microscope has many options in terms of how it's configured. But I expect only a very few of these options cross brand name boundries.
Like all the phots the Labophot was designed to support micro photogrphy and to use the Chrome Free (CF) eye pieces and objectives (CF 160mm/45mm). But it will also work with the CF objectives that are the infinity type since these have the RMS threads like the other CF objectives. The newer CFI60 objectives can not be used because they have larger (25mm) threads.
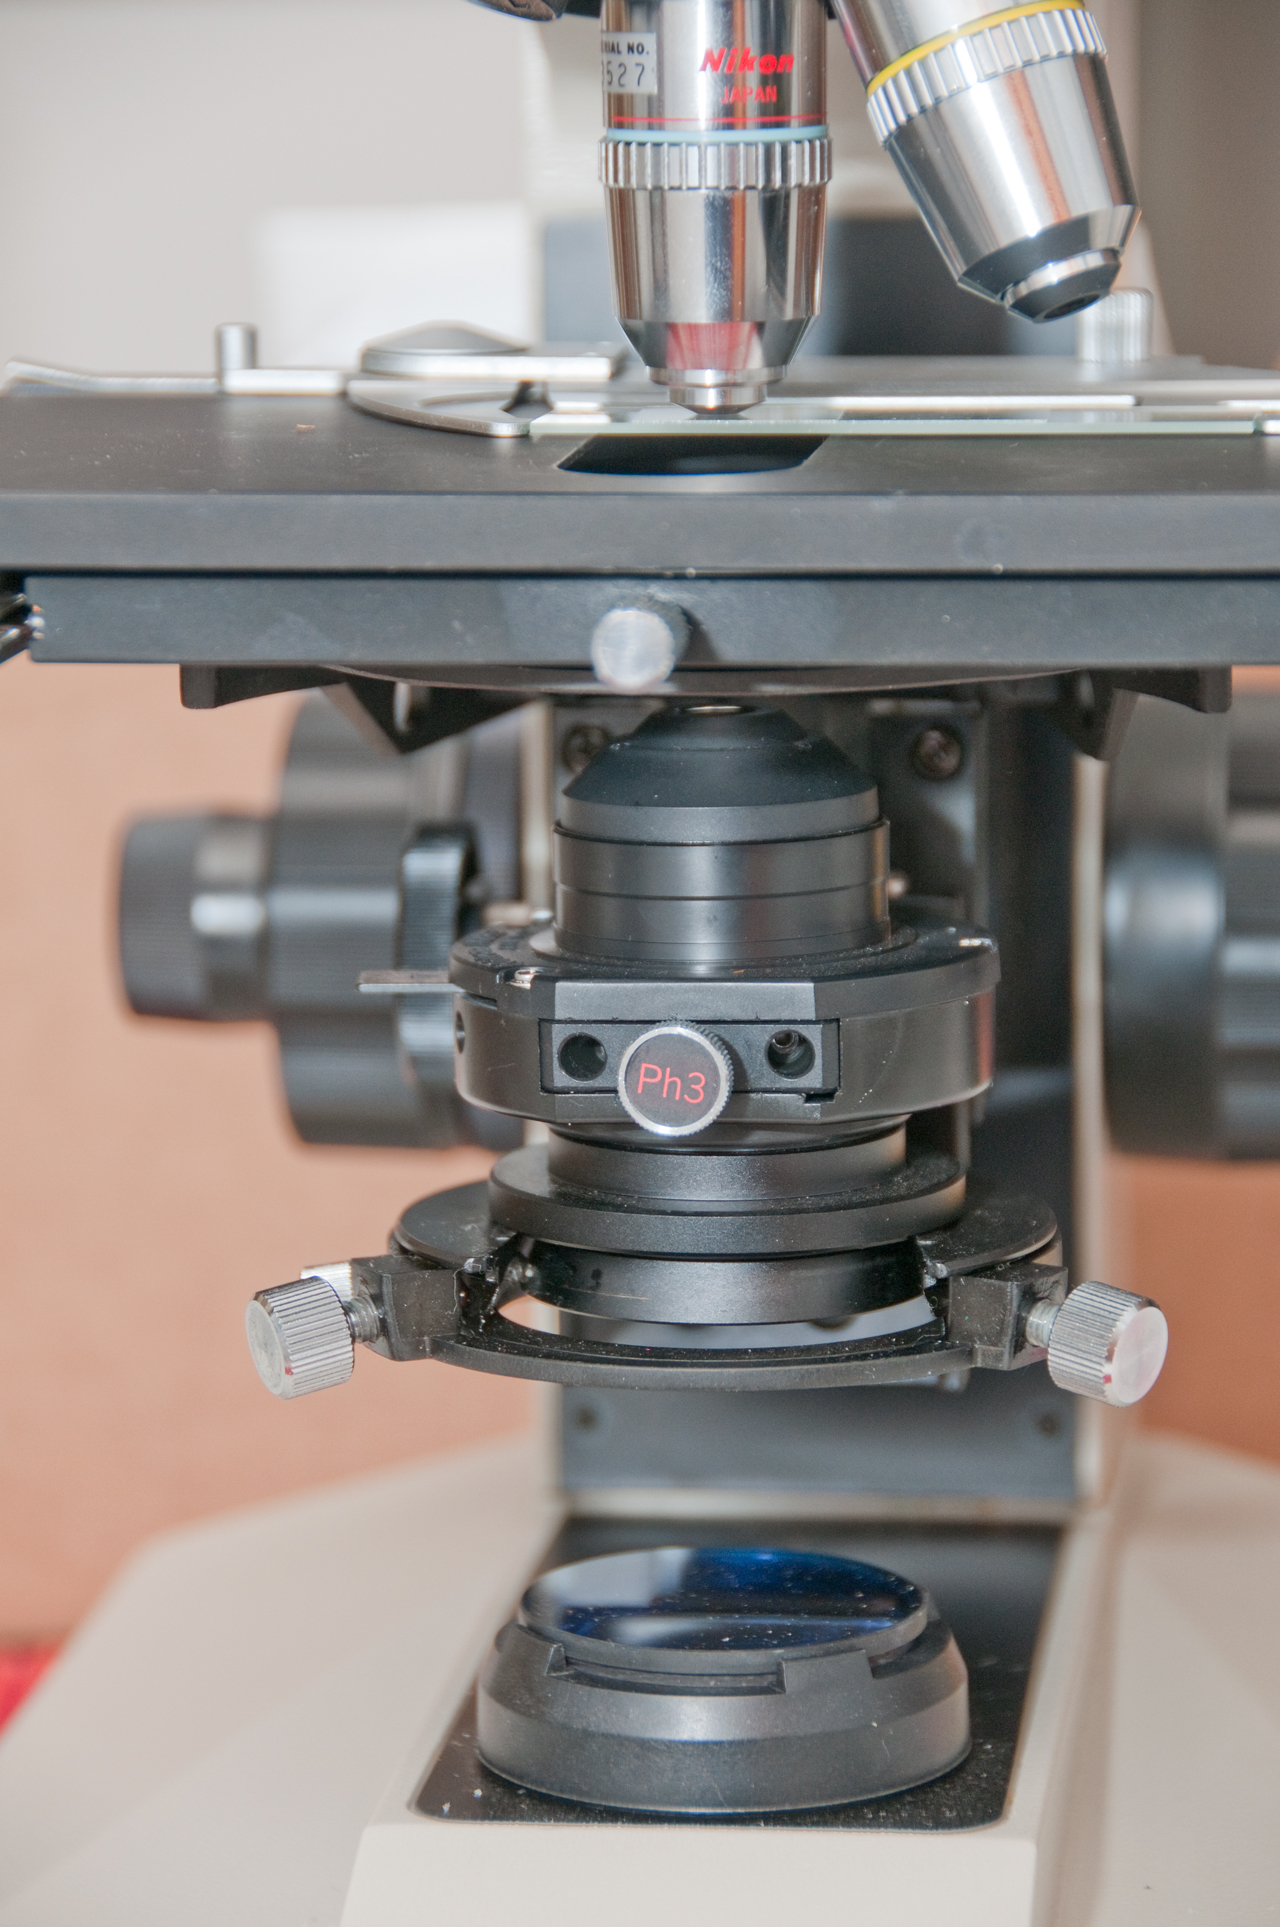
The stock illumination system in the Labophot is diascopic (transmitted light). There is provision for using any one of a number of alternate condensers. An optional vertical illuminator can be fitted to support episotic (reflected) illumination like would be needed to metallurgical work. Or an optional Fluorscense vertical illumination can be fitted and there are maybe three models that hold one, two or four filter/beam splitter cubes. In addition Phase Contrast (Phase 3 fitted to this scope) and/or Differential interference contrast (DIC) optics can be fitted. Polarized light is another option.
There are a large number of CF objectives that optionally can be fitted.
Versions
This is a plain Labophot, but there's also a Labophot 2.
The Labophot 2 has a different fine focus drive that was supposed to resolve the problem with the first fine focus drive, but it didn't work, so they both have a habit of breaking the small plastic gear. There are probably other differences. See Problems.
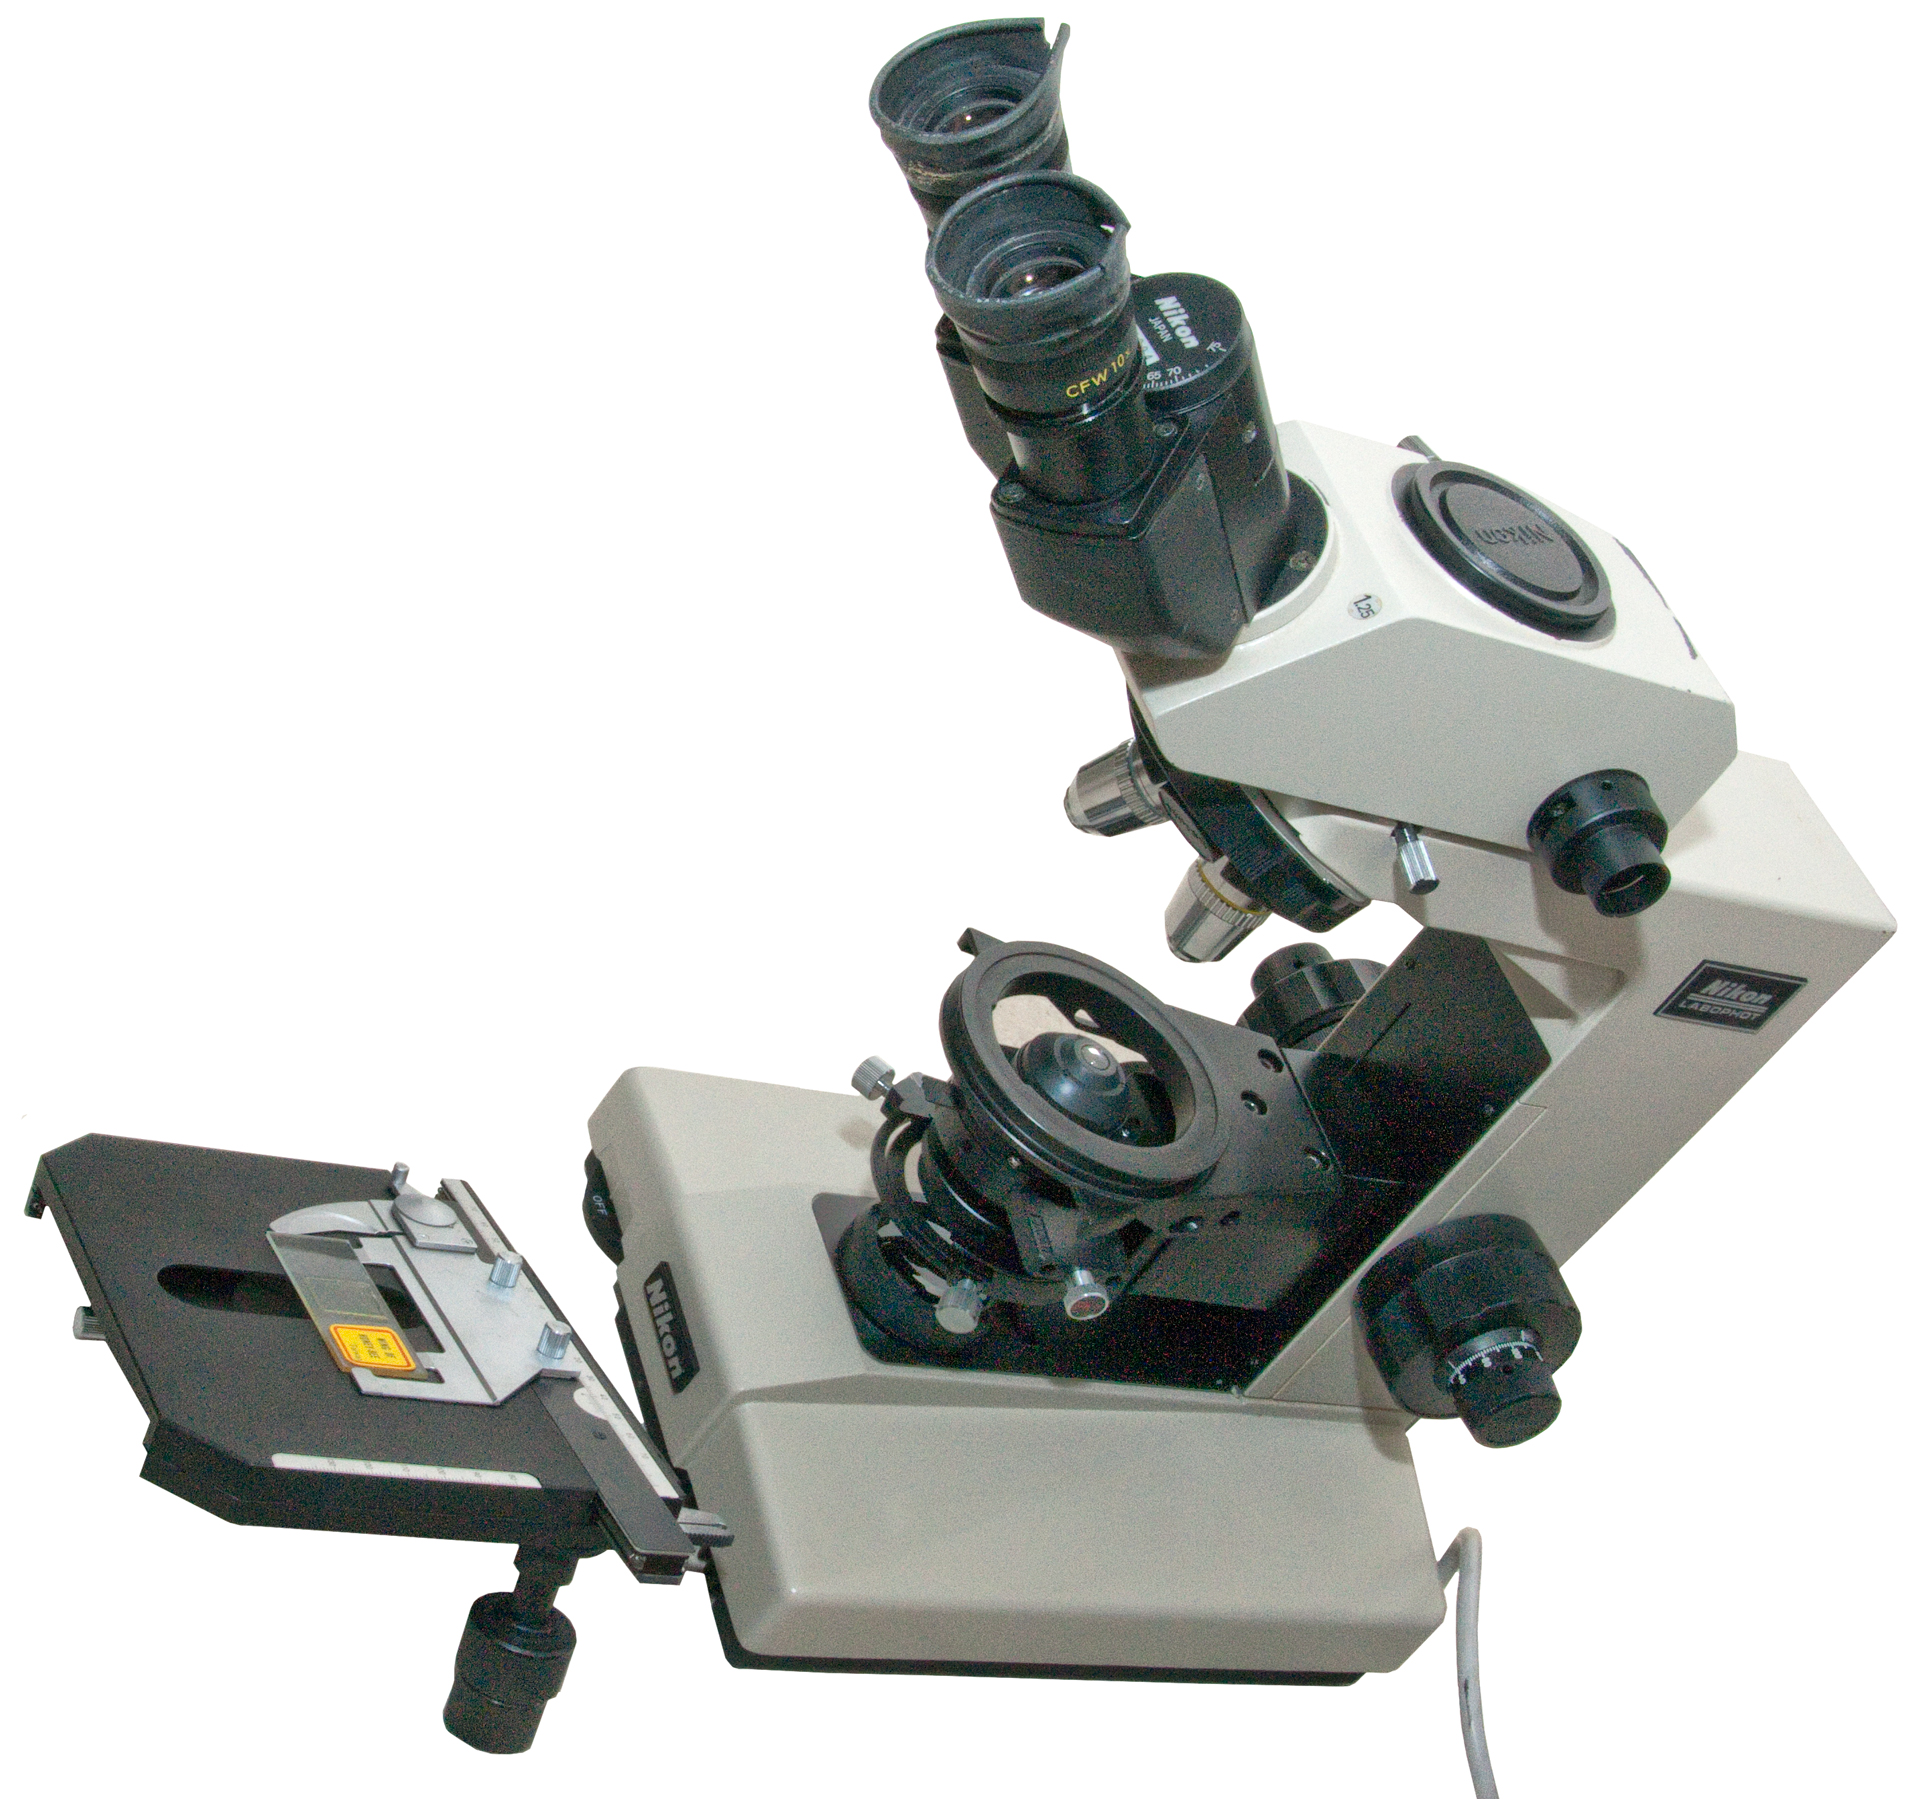
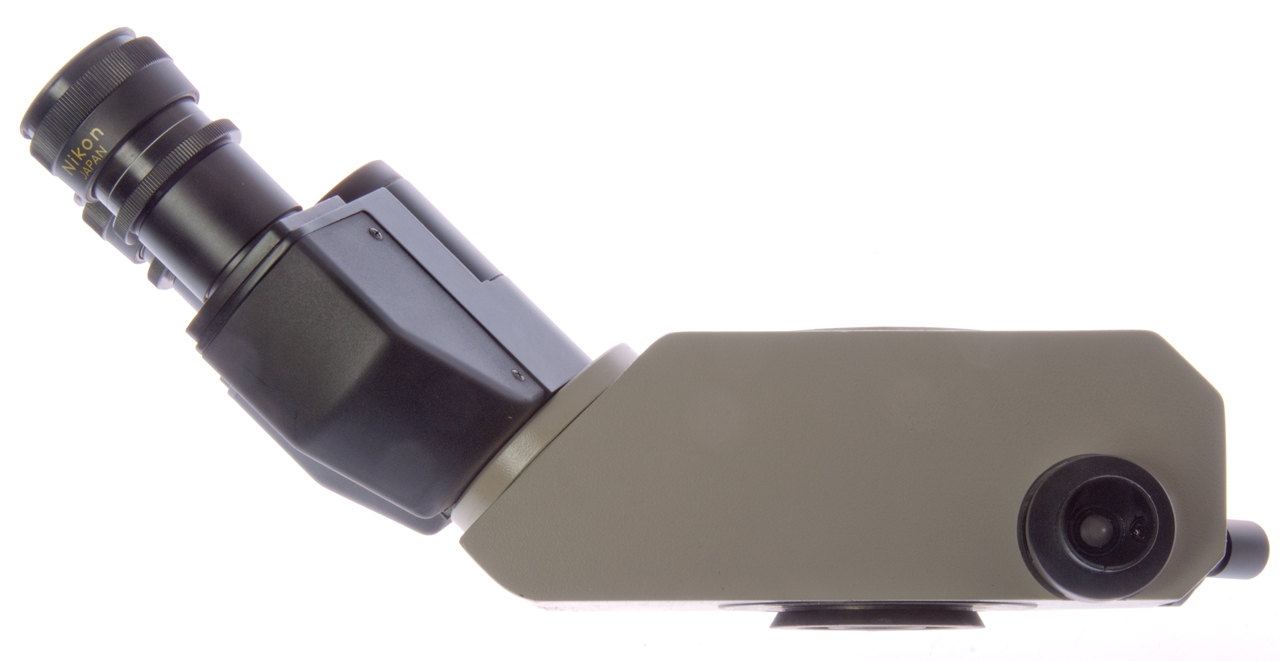
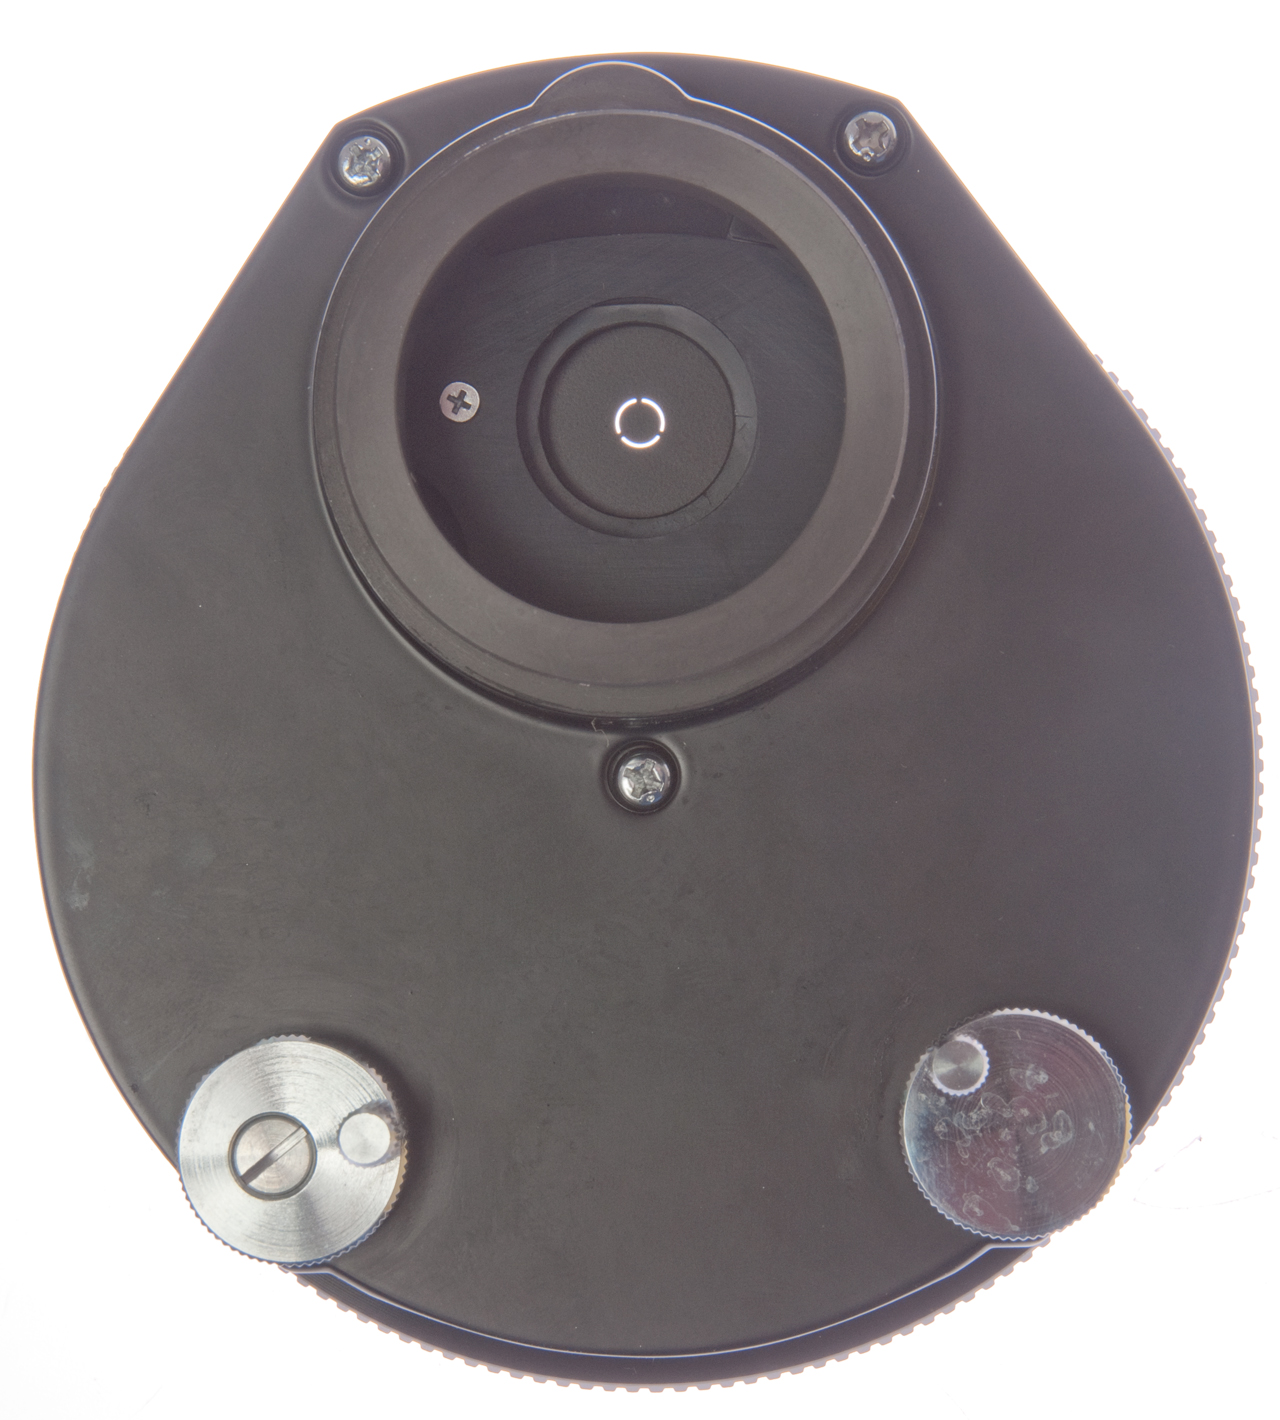
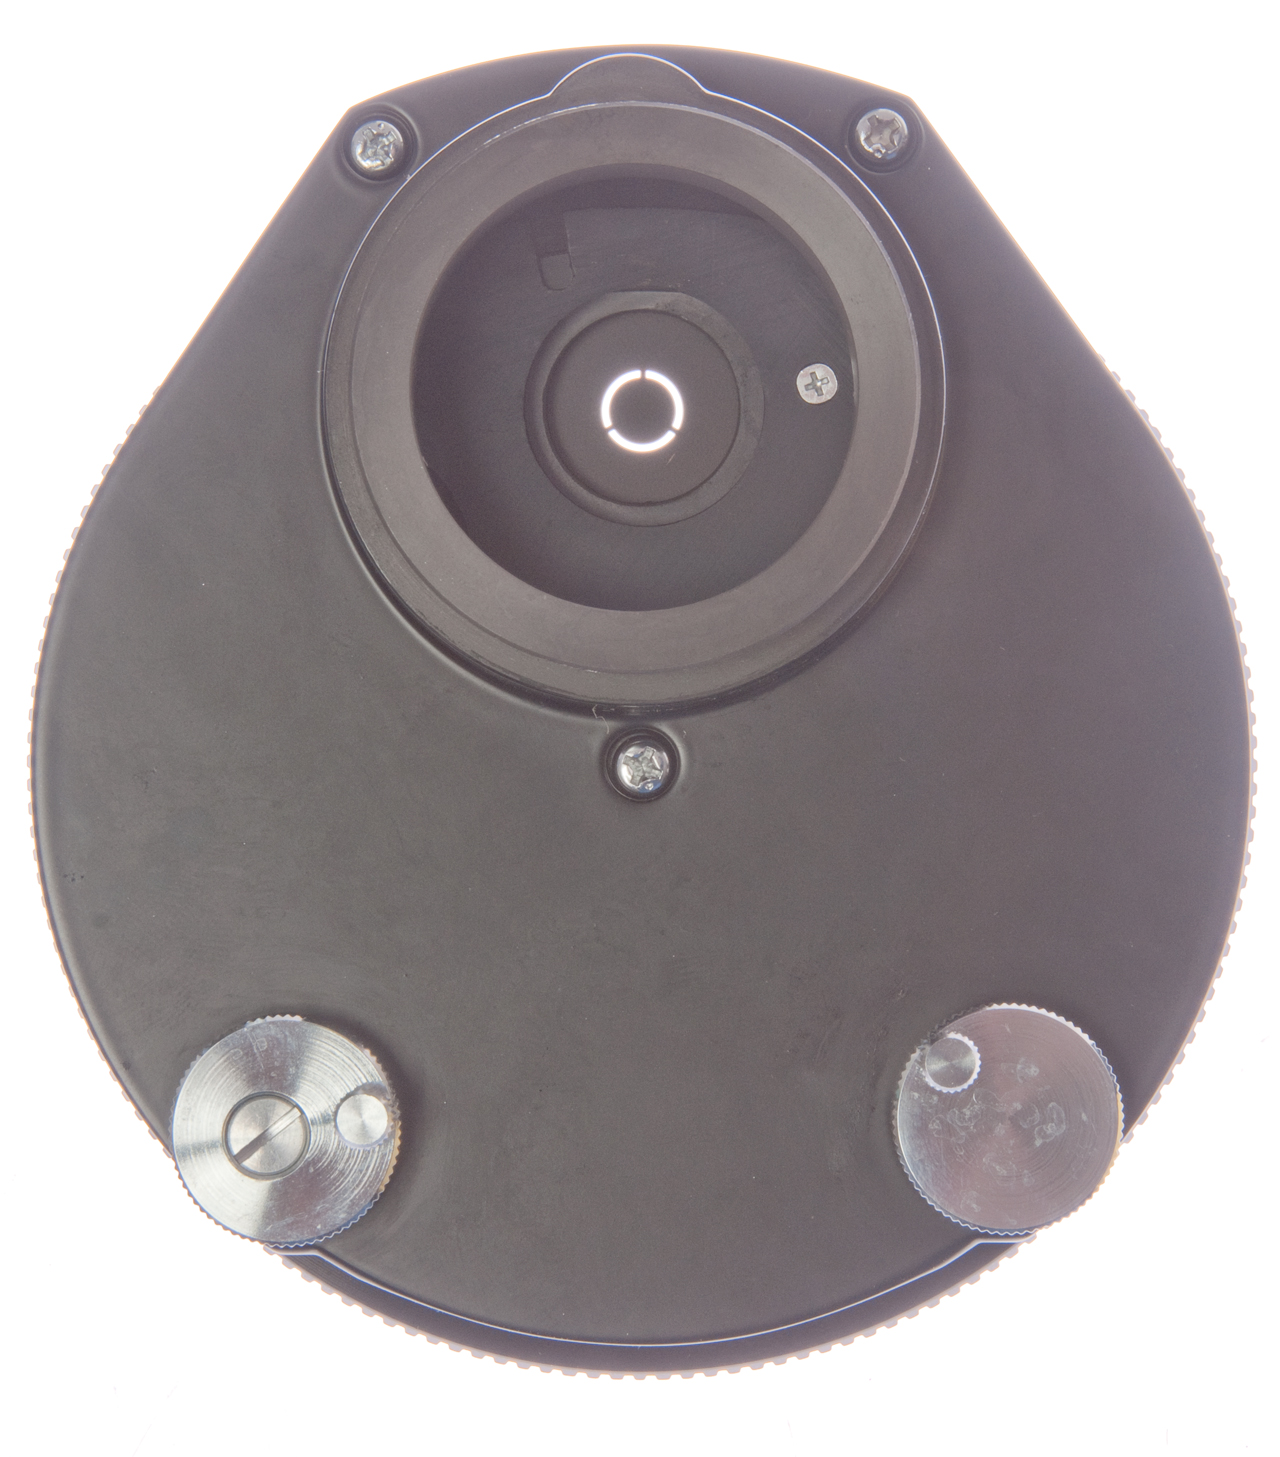
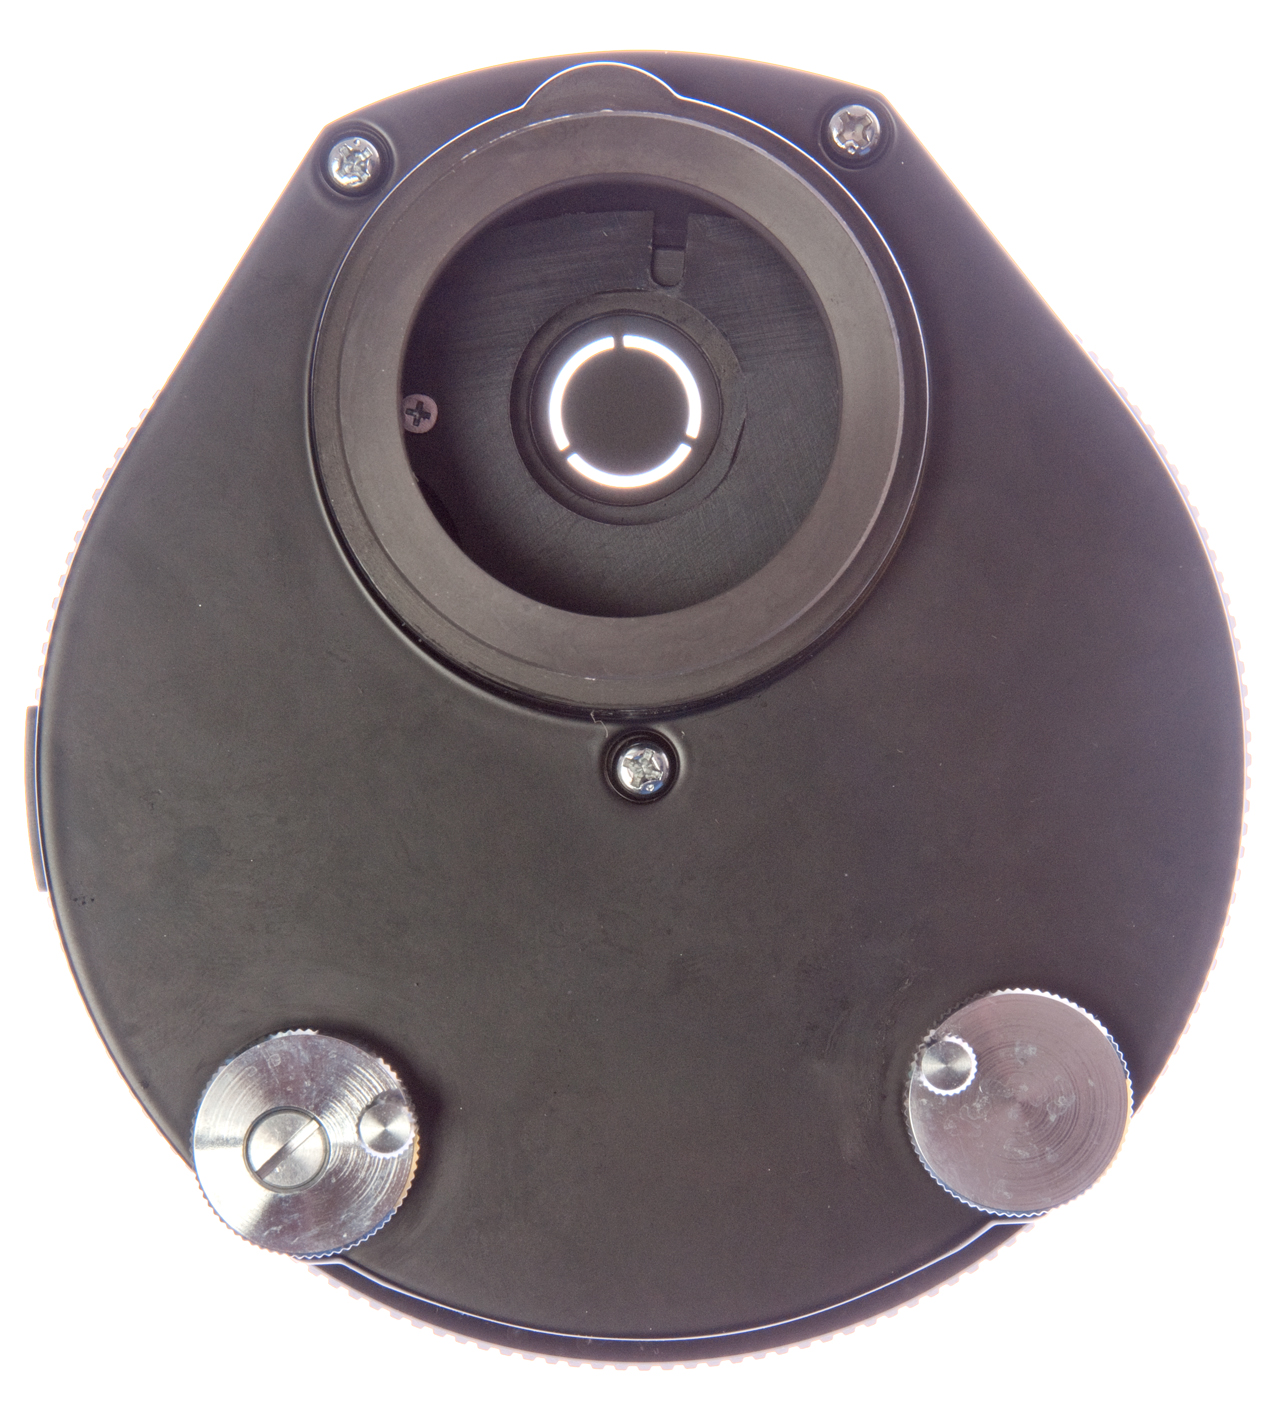
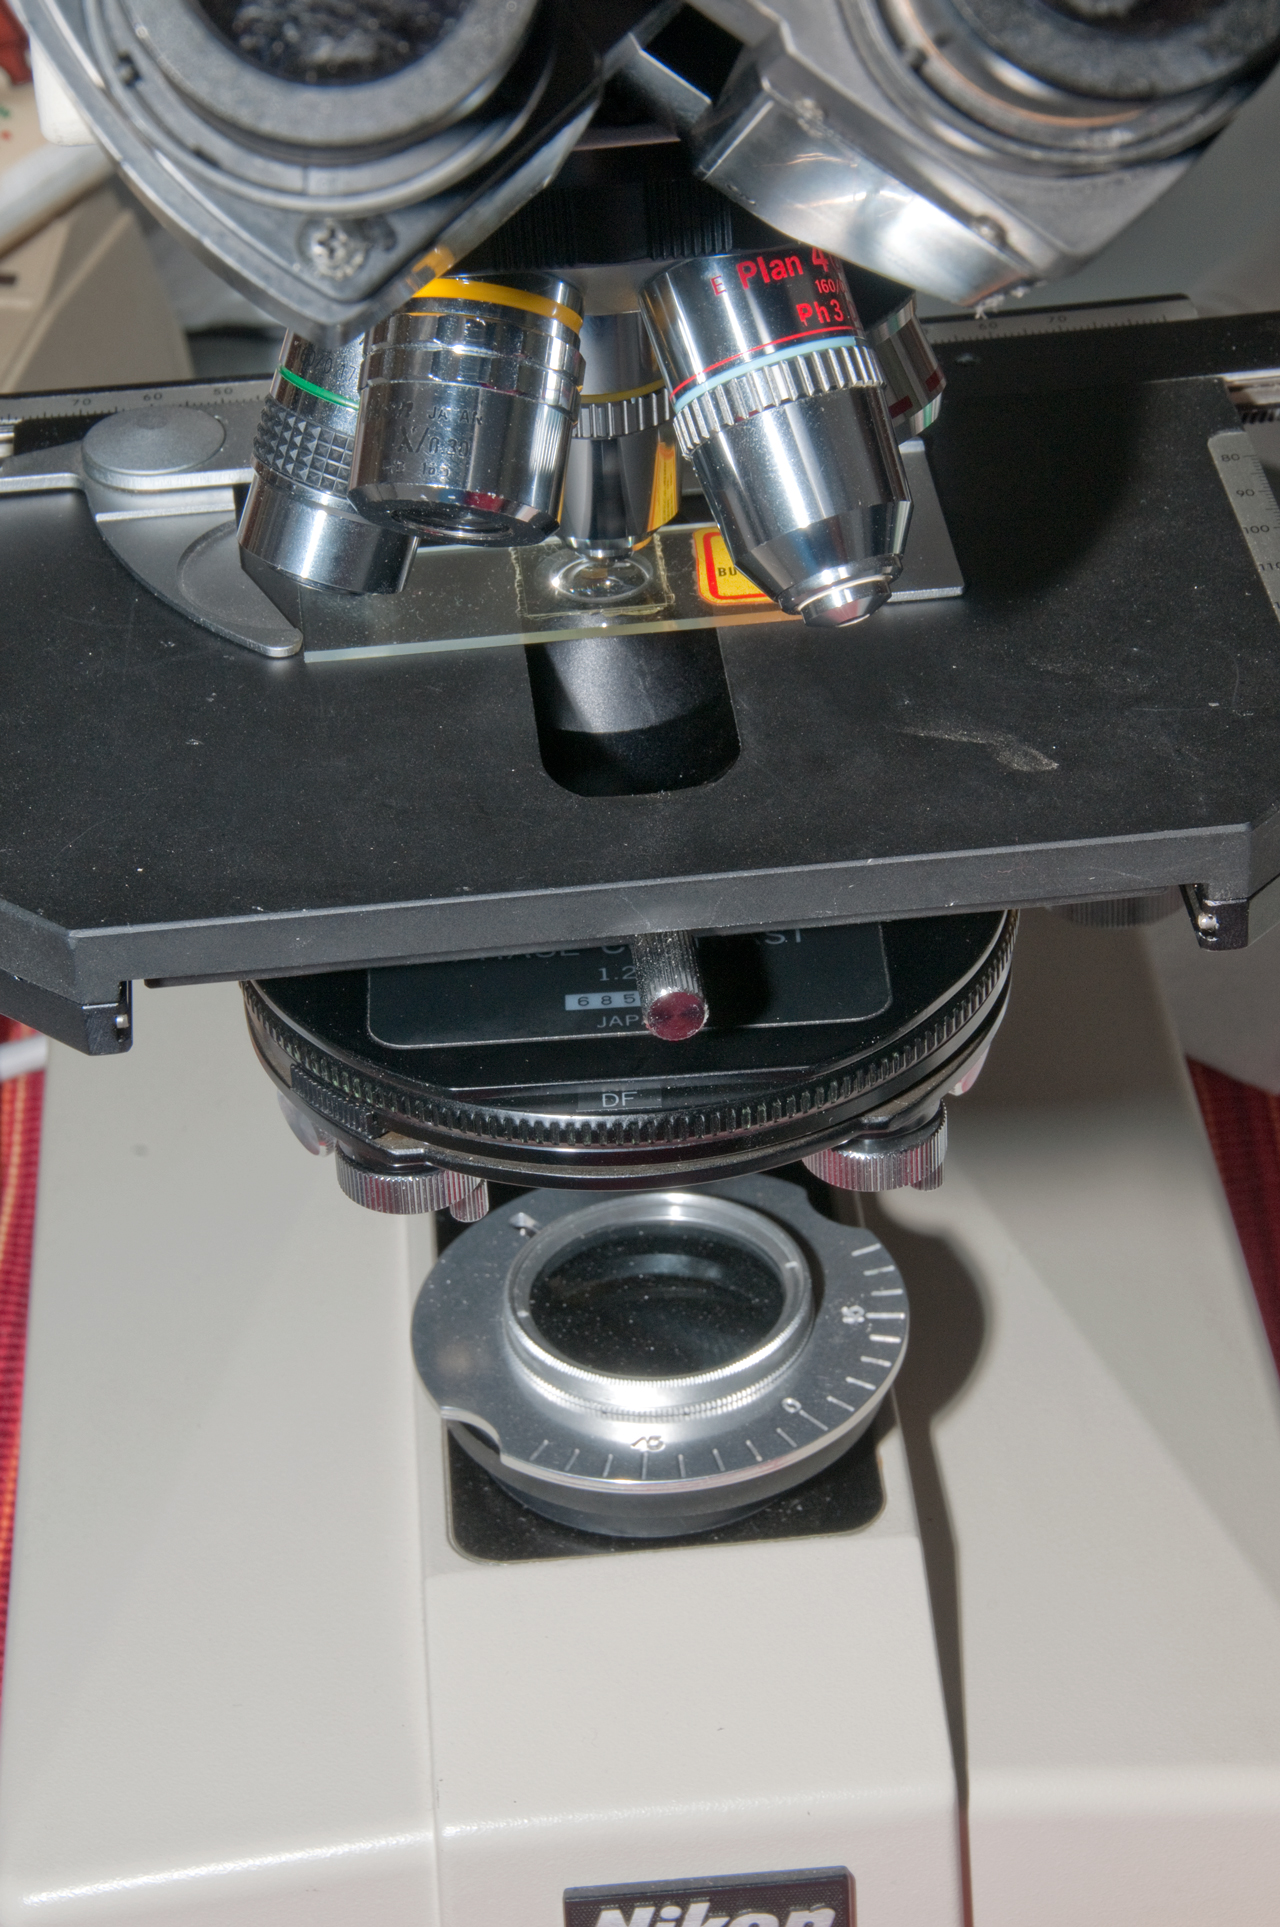
Fig 1 Right side
Fig 2 Front
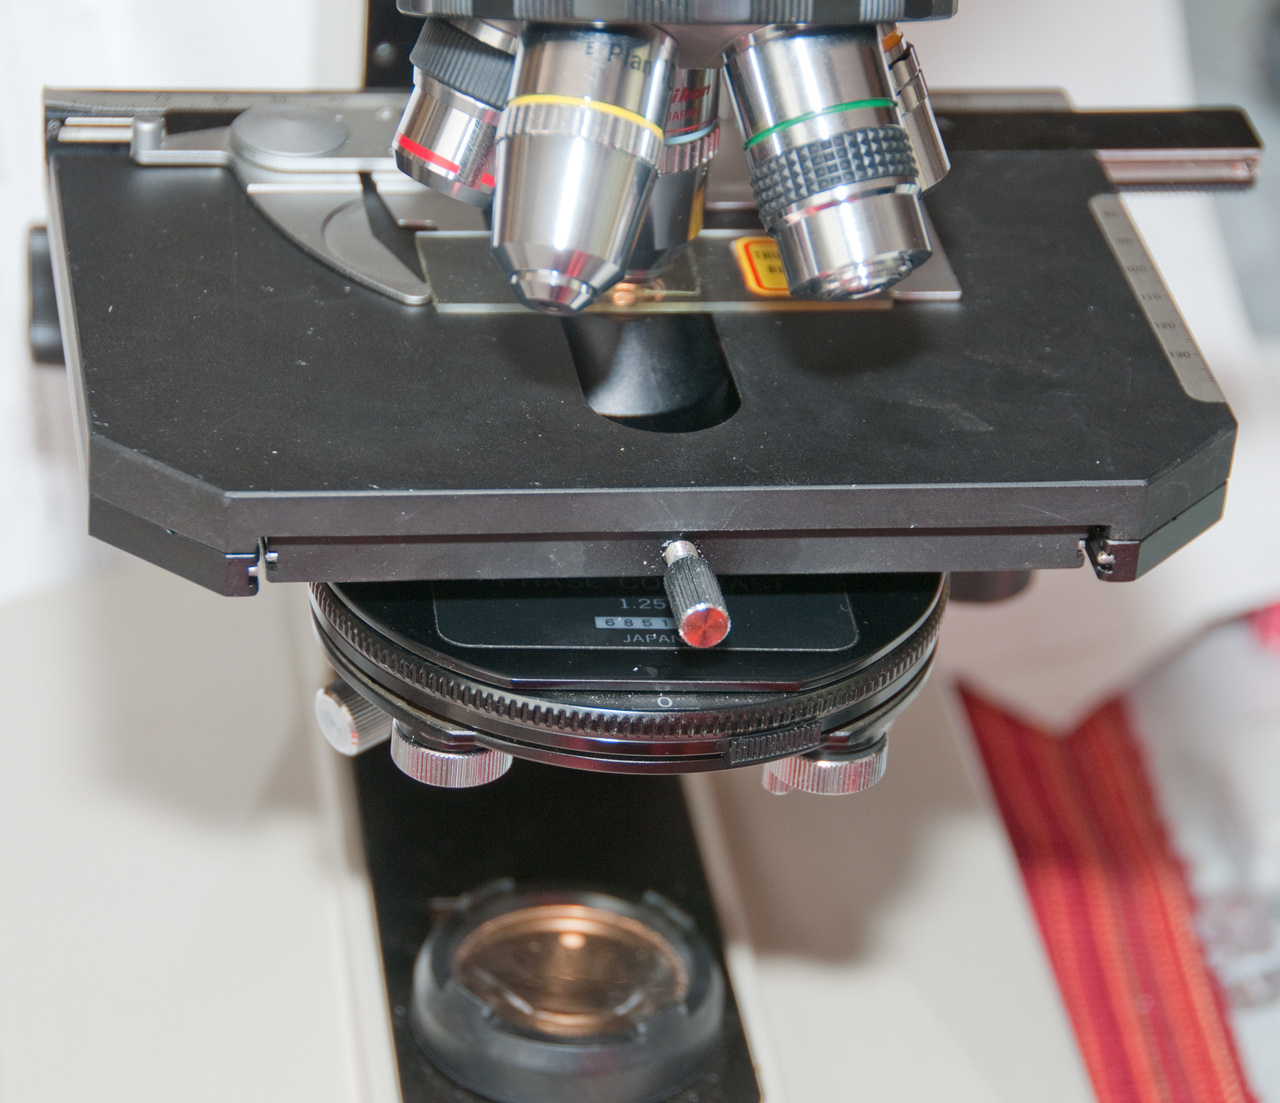
Fig 3 Condenser and stage
Fig 4 Left side
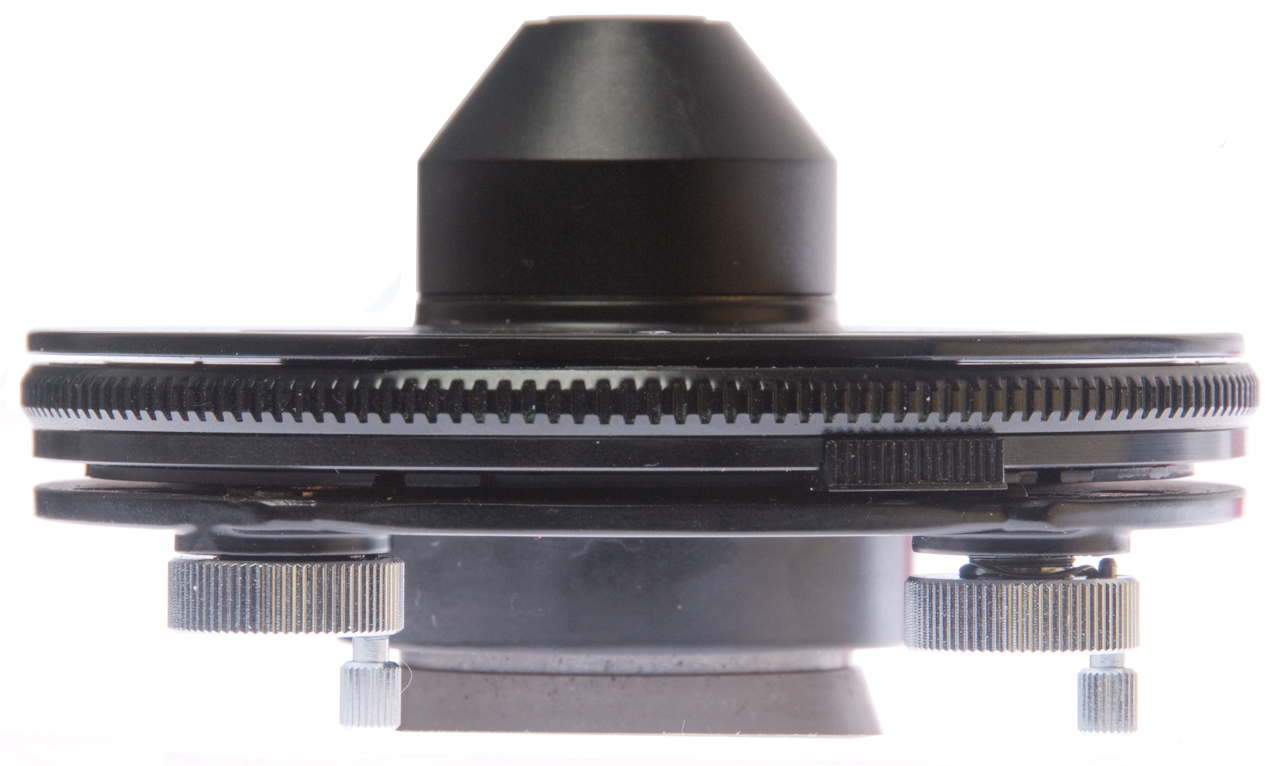
Fig 5 Stage Removed
Note the pinch screw at the center front of the stage when screwed all the way in locks the stage, but when backed off
a little allows the stage to rotate (note the circular support structure in the photo below. When the screw is backed off more the stage can be removed as shown below (note the screw is still installed).
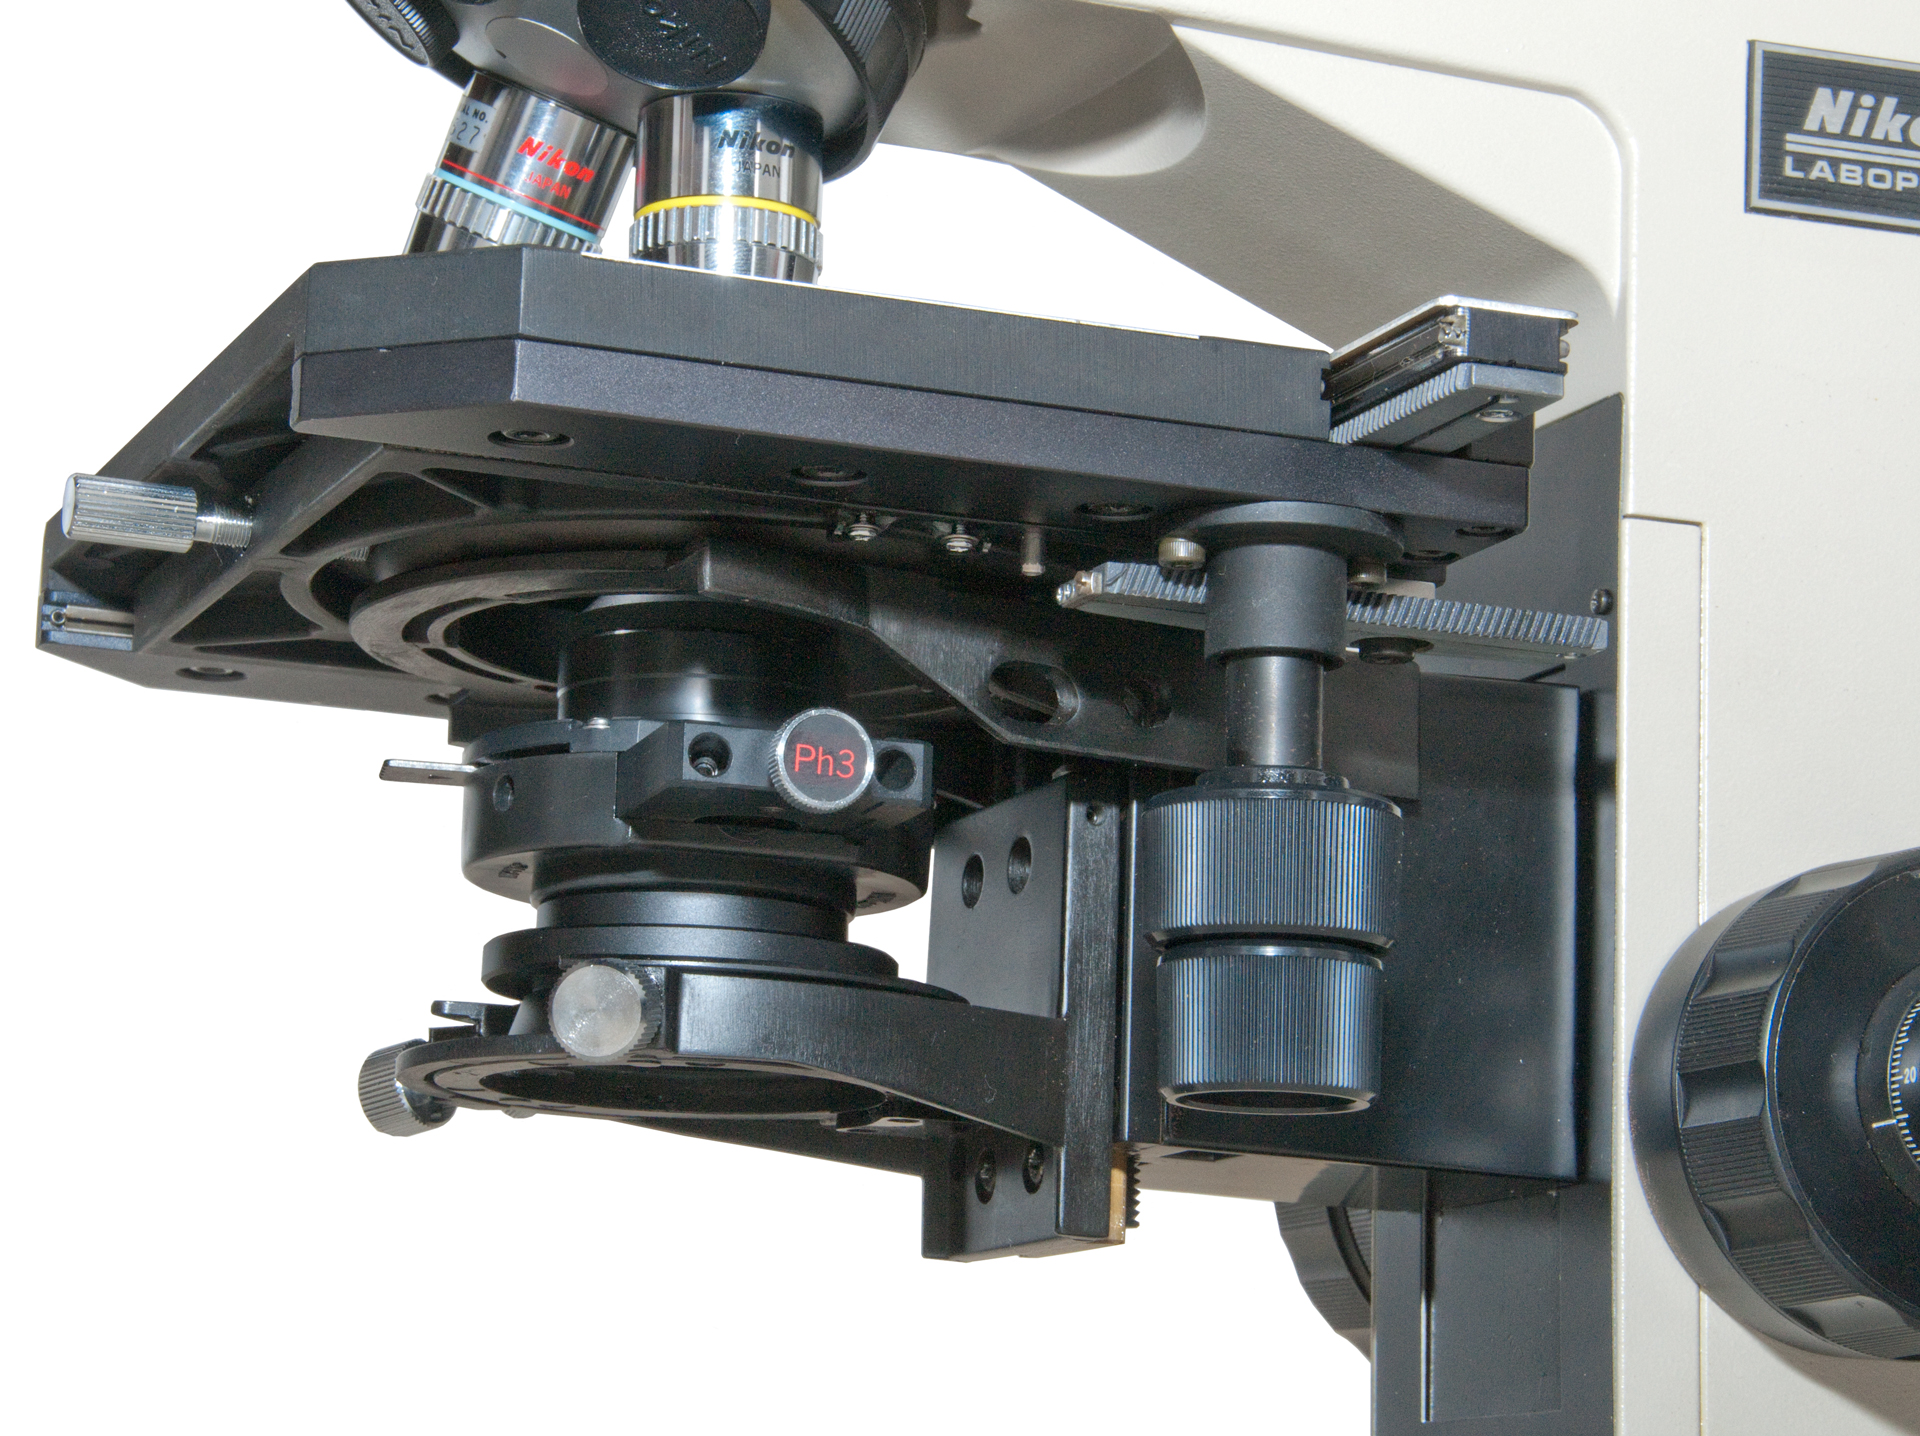
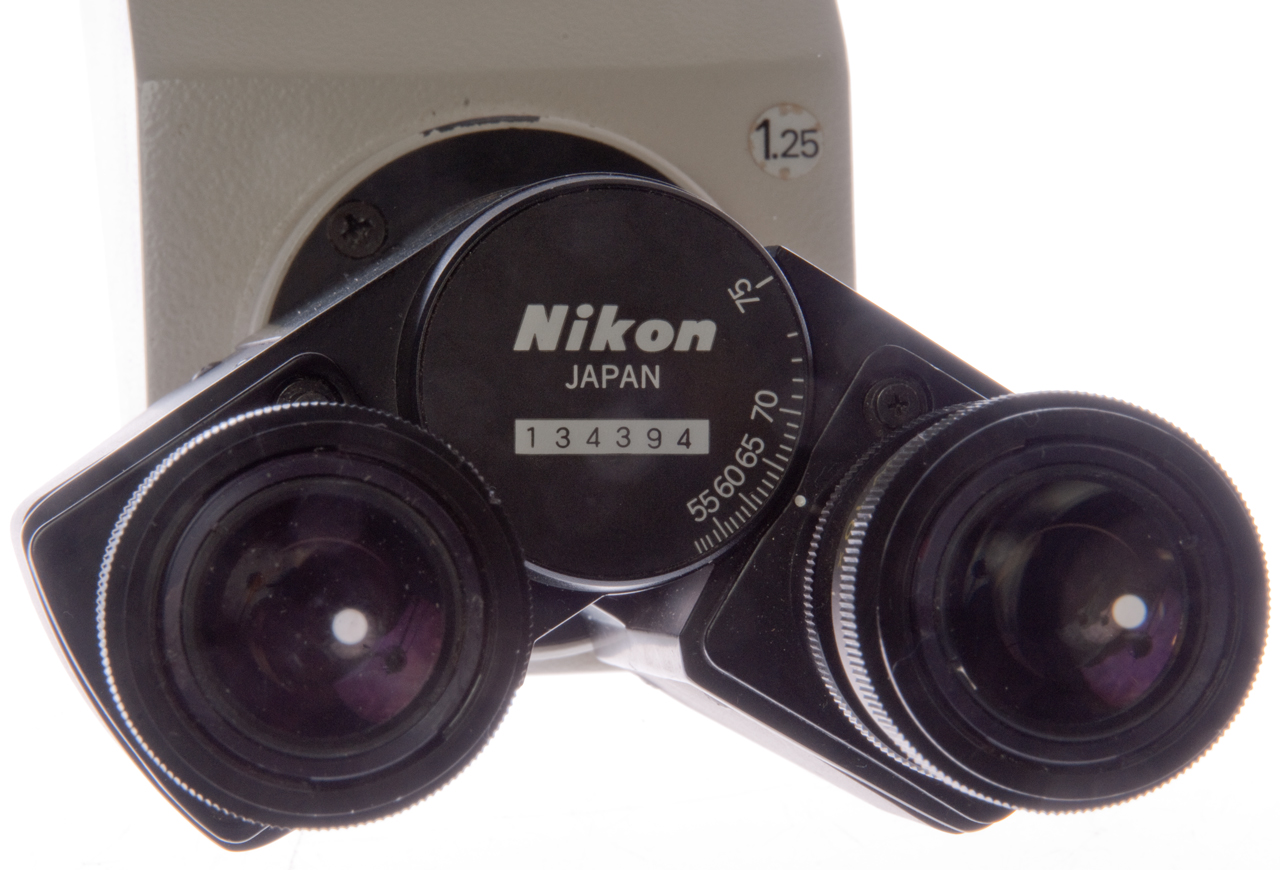
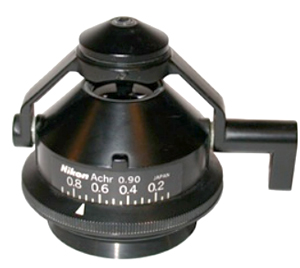
Fig 6 Abbe 1.25 Condenser & Ph3 slider
The lever in the front can be moved left or right to adjust the N.A.
I suspect there are other sliders that have Ph1, Ph2, Ph4 inserts and/or the inserts are available separately.
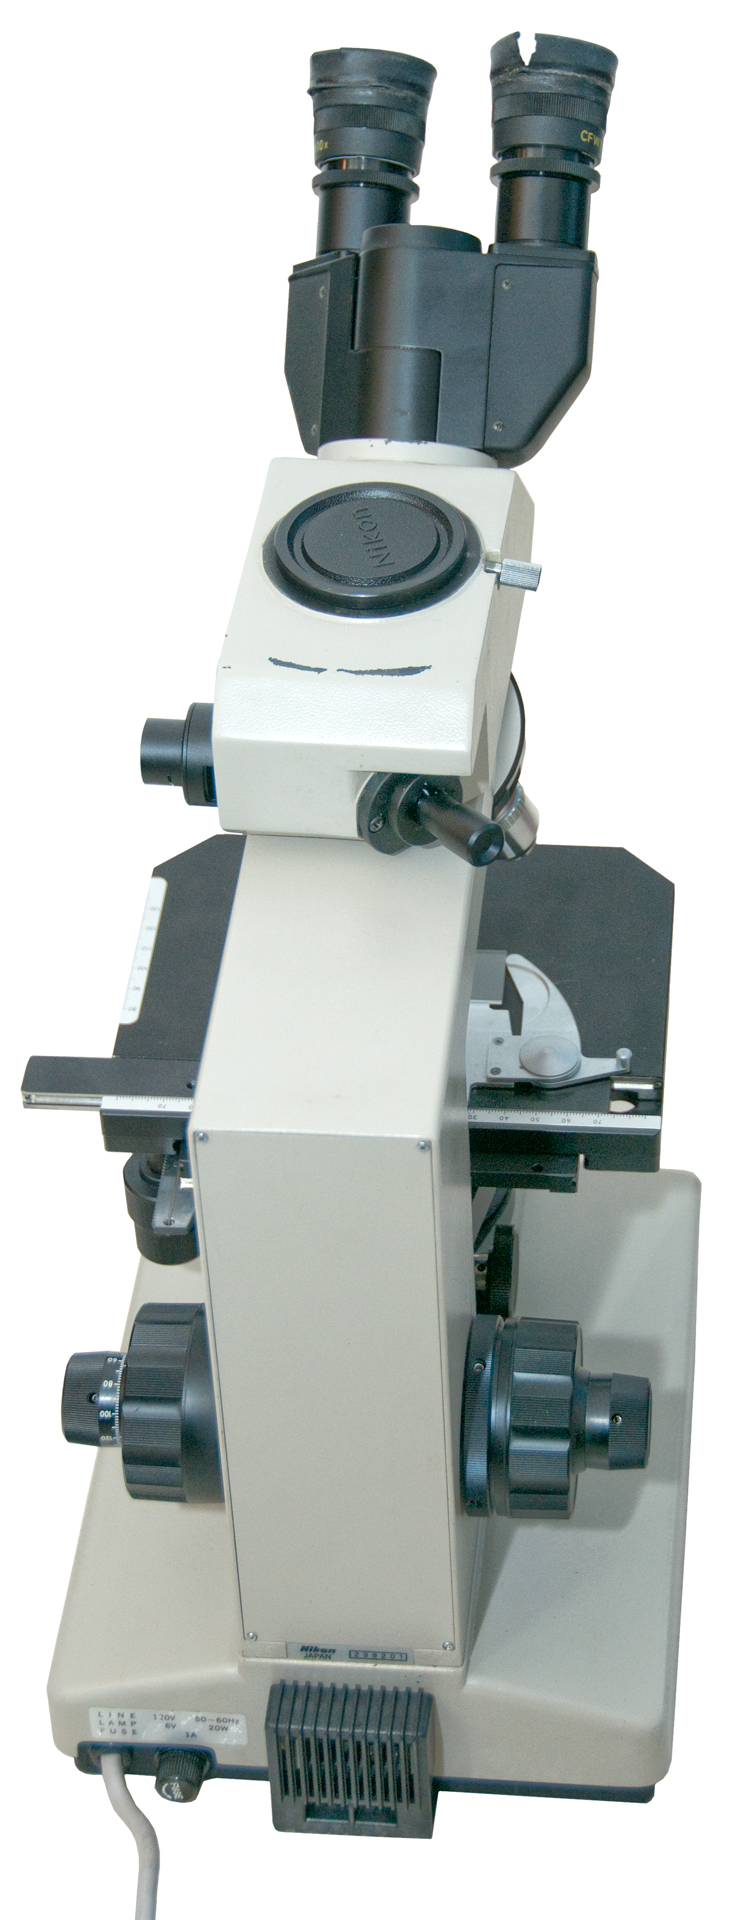
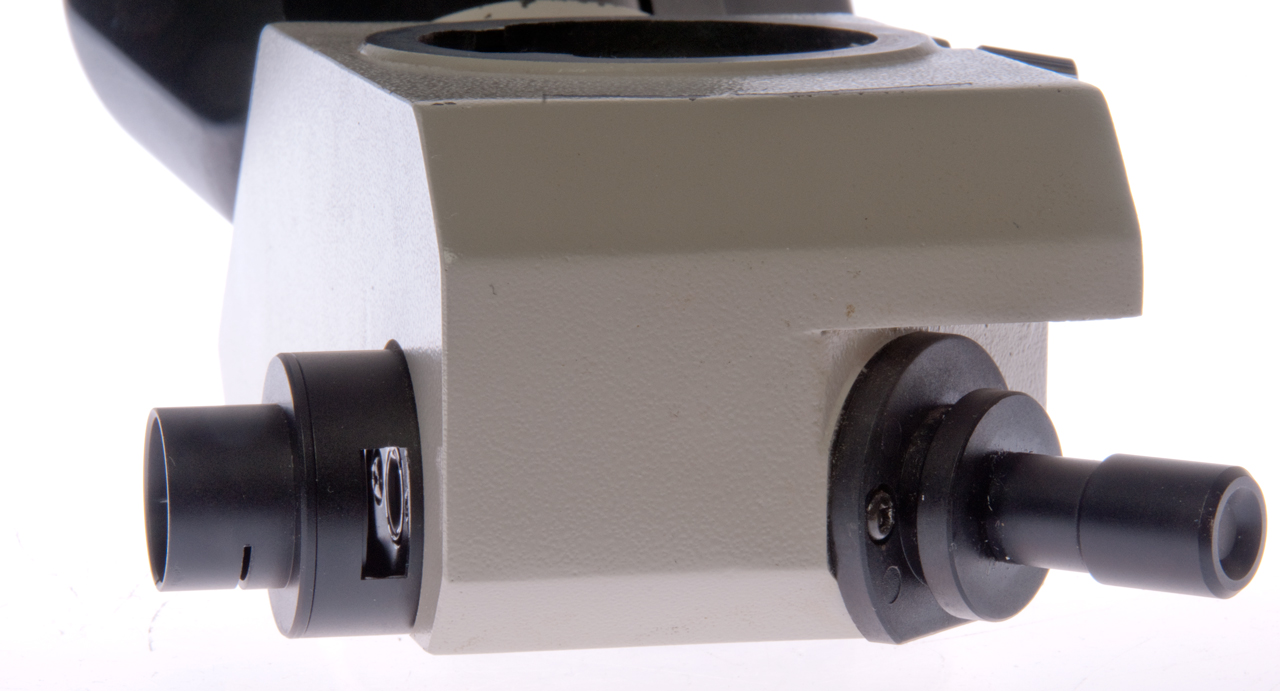
Fig 7 Back
Between the coarse focus knob at the right in this view and the stand
there is a narrow knob. When this narrow knob is turned CCW
it moves away from the stand and jams up against the coarse foucs
knob, locking the coarse focus knob. But after doing that the stage
still drifts down. Problem was broken fine focus plastic gear.
The lamp house is at center rear at the bottom.
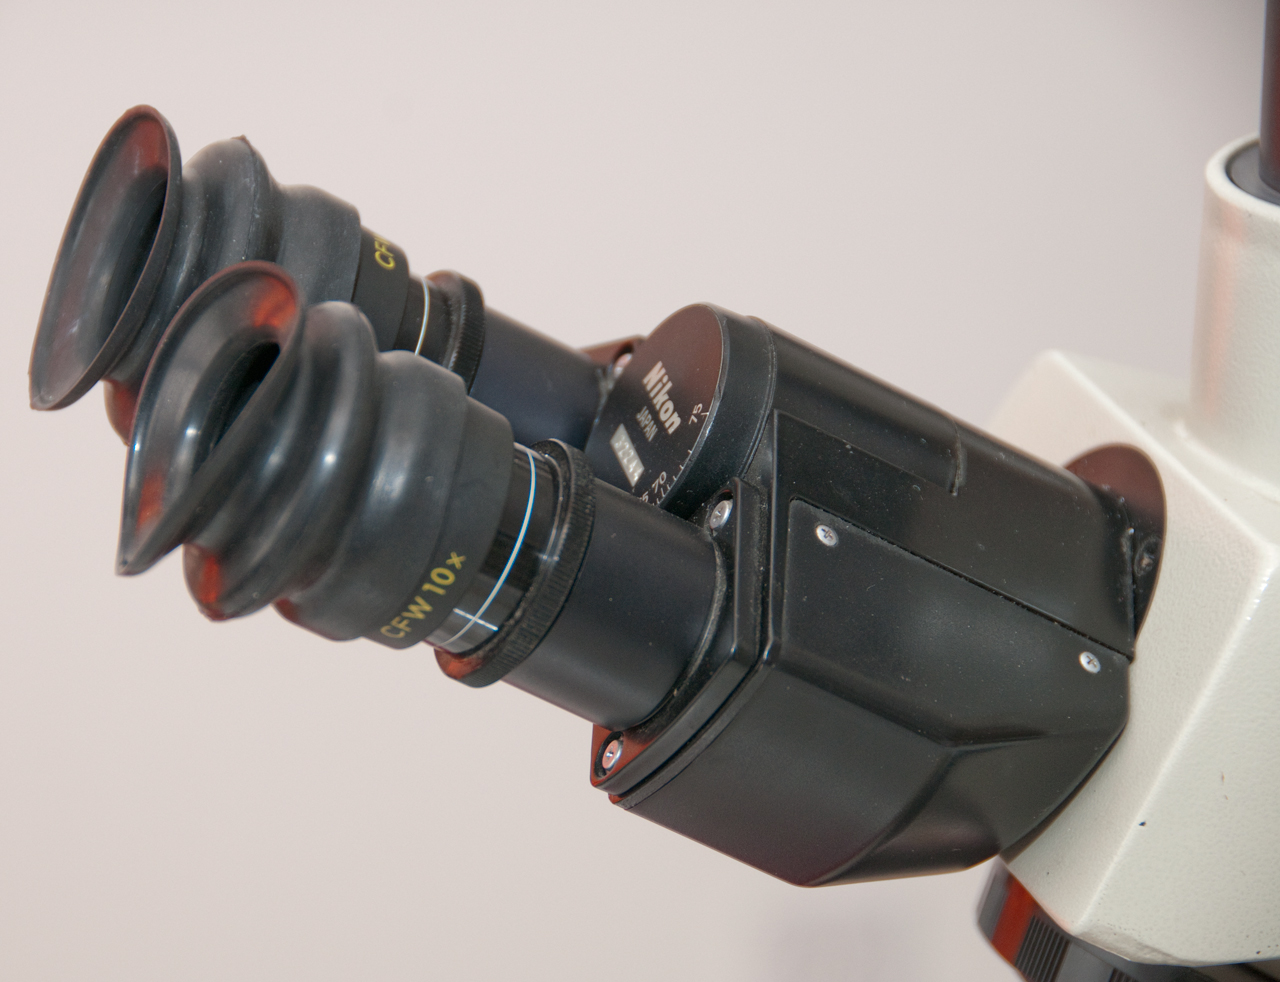
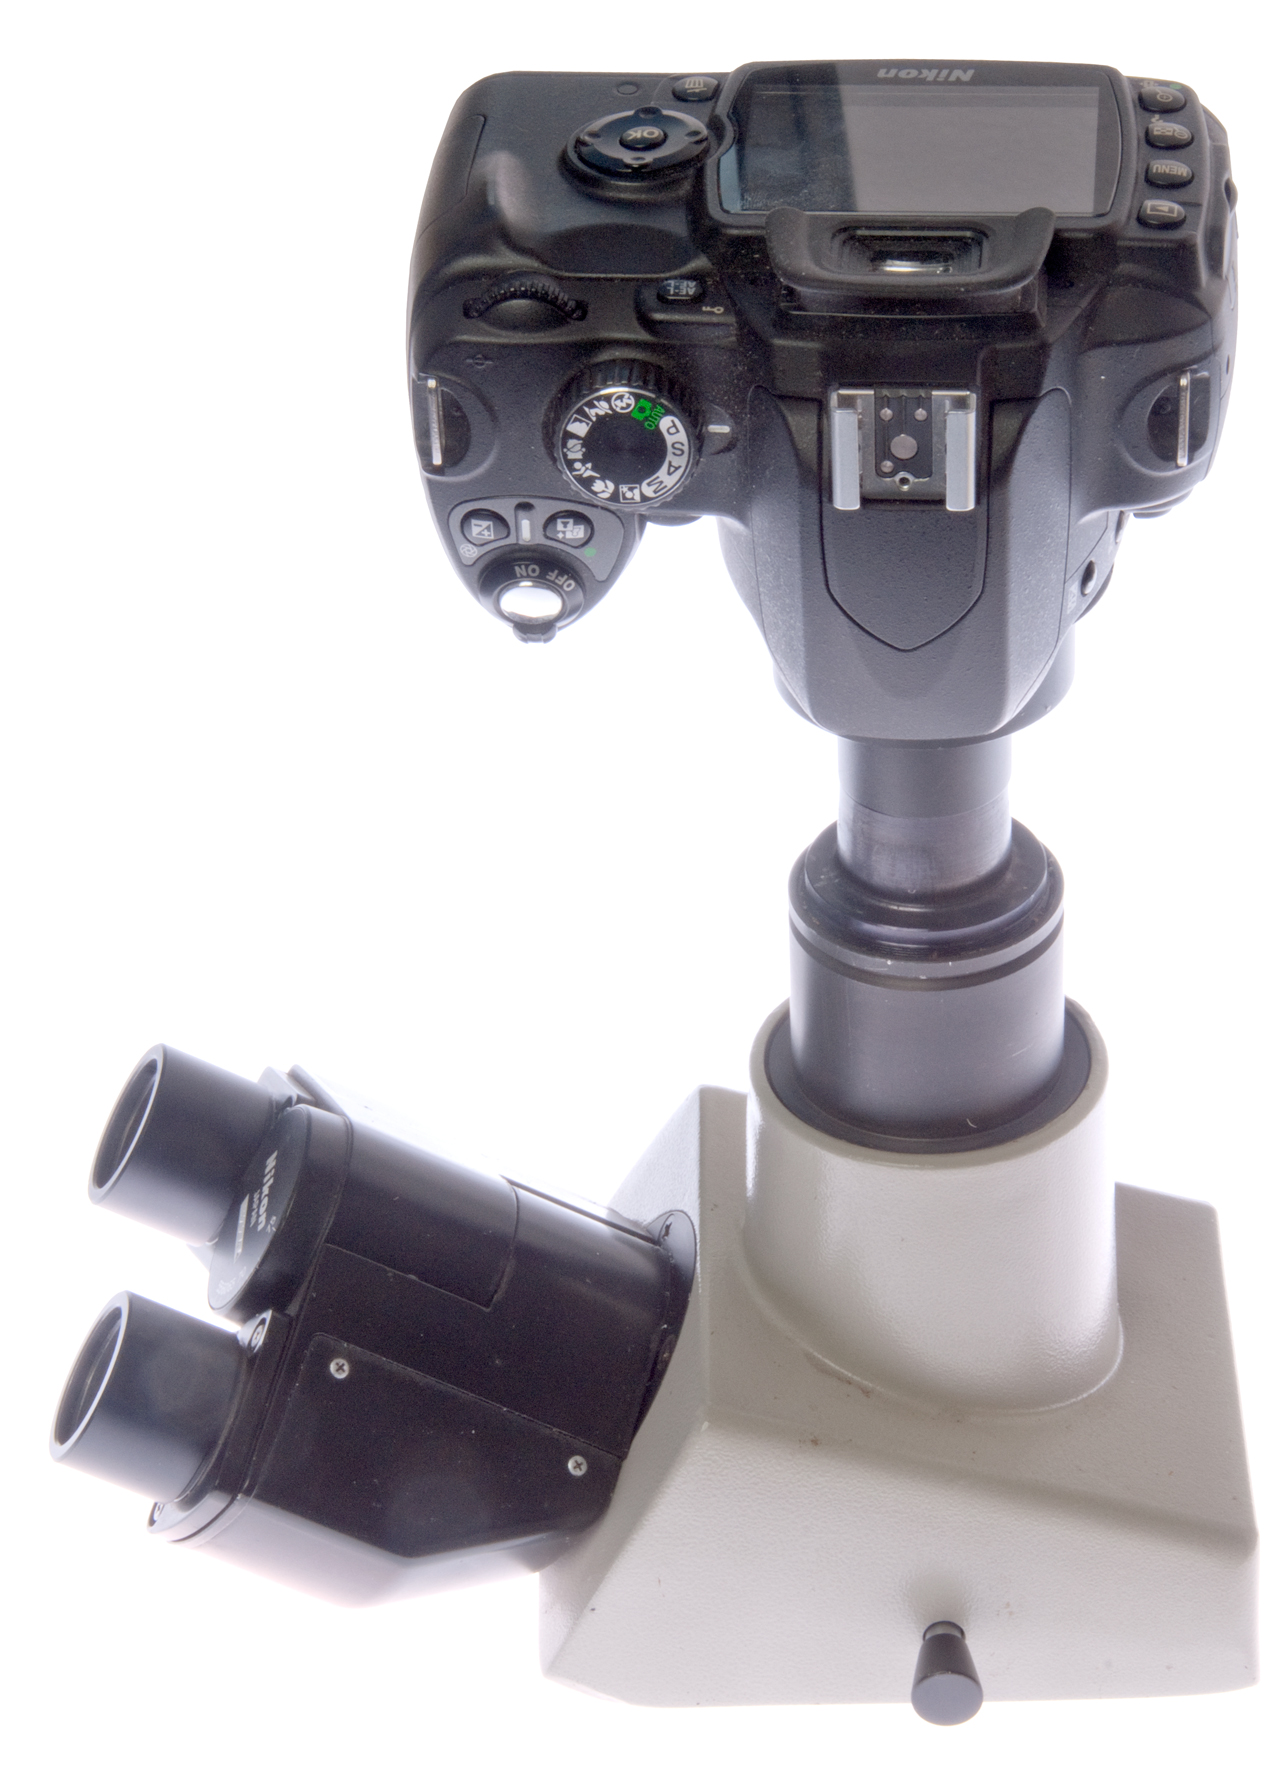
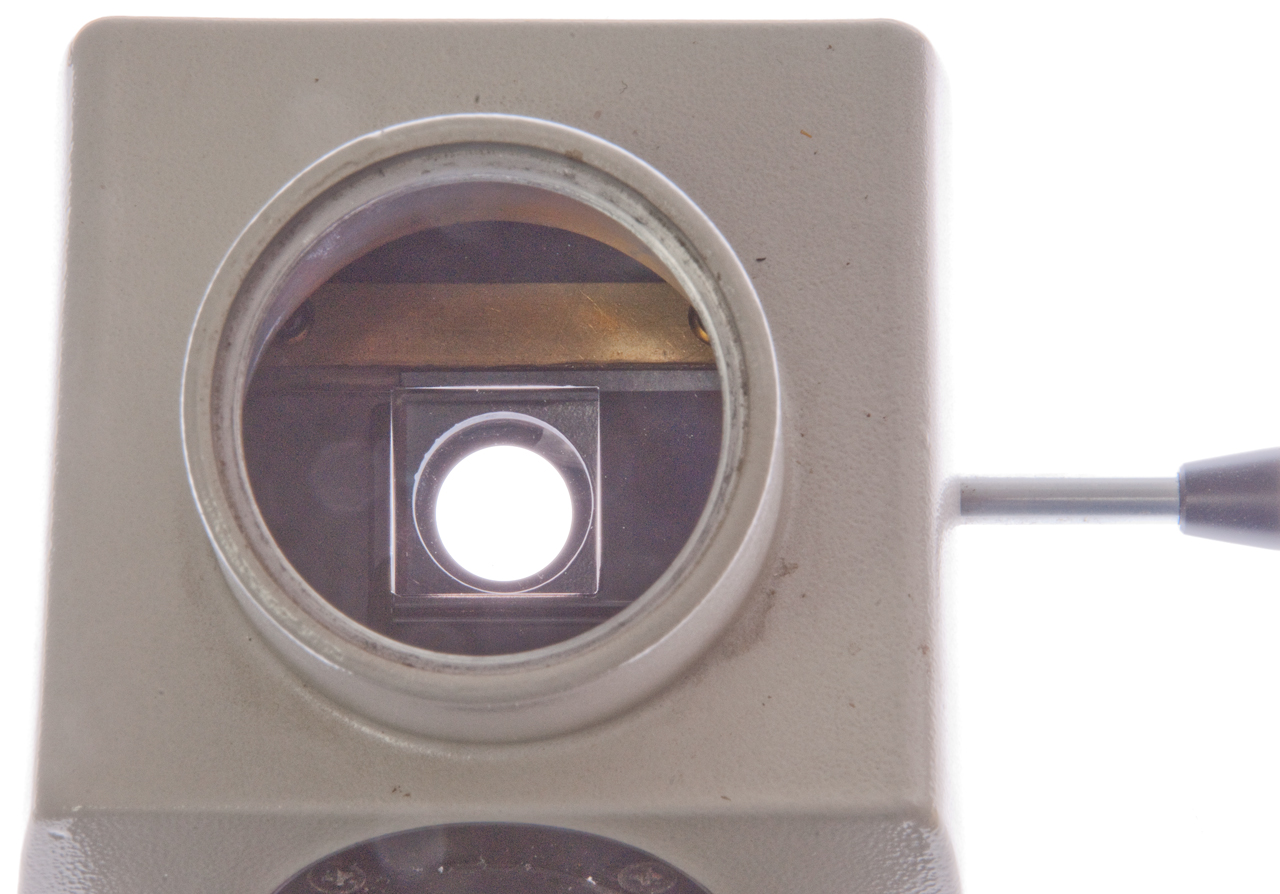
Fig 8 With Nikon camera using eyepiece adapter
Used to take Subject photo 1 with D300s.
Note you can not look through the other eyepiece when the camera is attached, hence the need for a trinocular head.
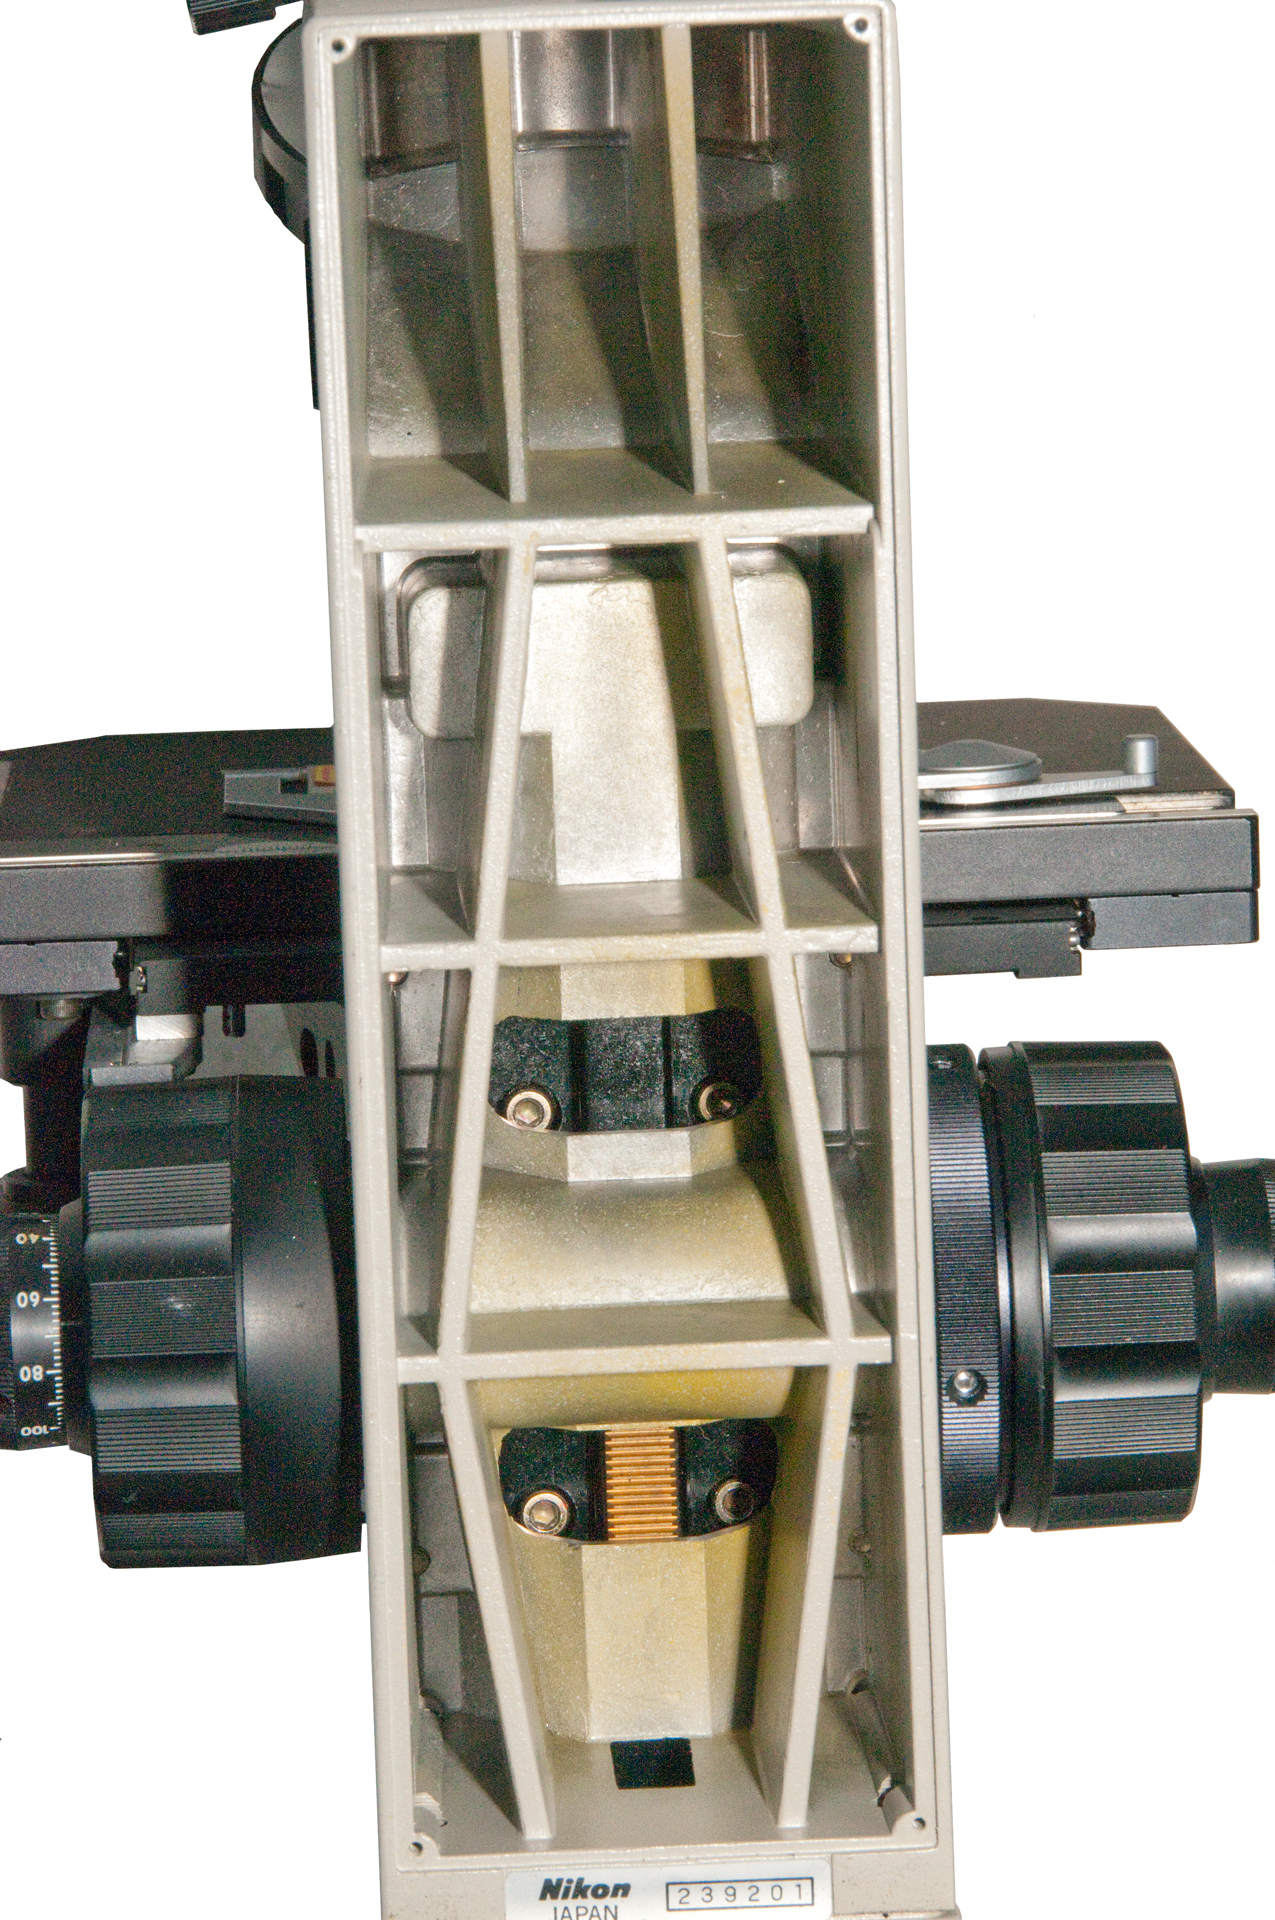
Fig 9 Inside Back
There are 4 hex bolts that can be removed. The focus rack is visible.
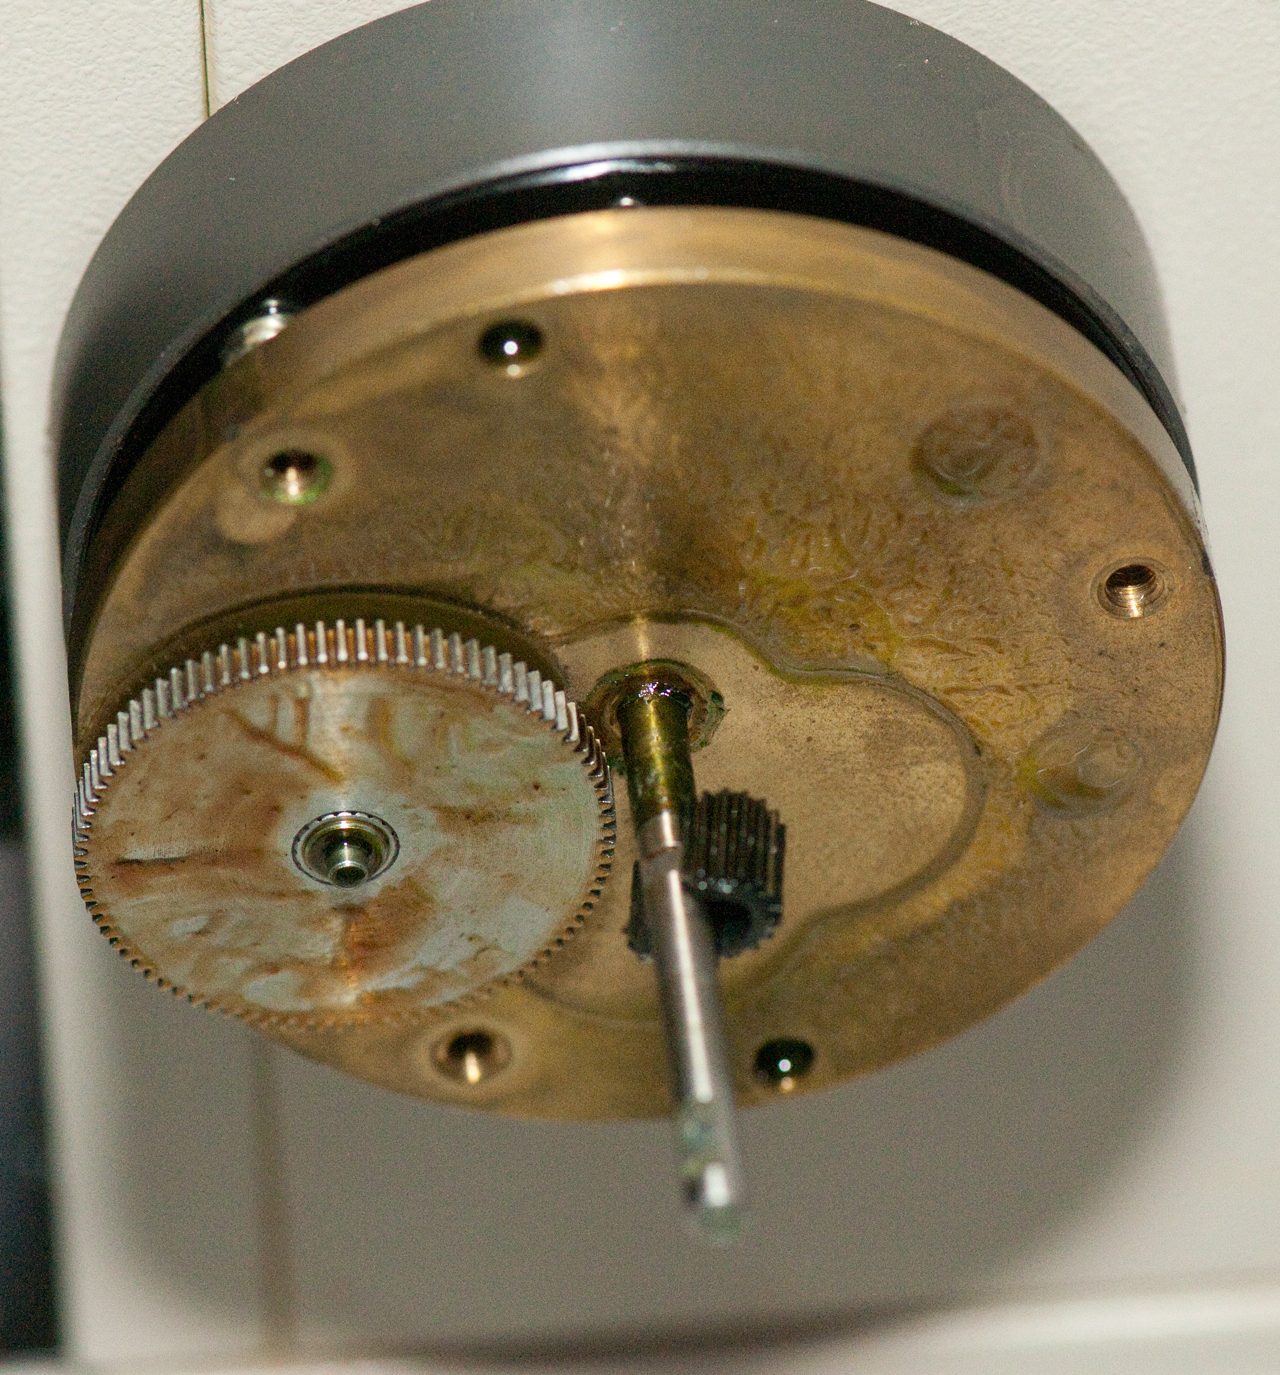
Fine Focus Plastic Gear
The coarse and fine focus controls work to raise and lower the stage. But when the stage is raised so the tip of the objective is just above the top of the slide and you let go of the knob the stage drifts downward a long way. On older microscopes this could be fixed by holding both the left and right coarse focus knobs and turning them against each other. But the Labophot manual specifically says not to do that.
Note: When the coarse knob was locked to the tension knob (or just by holding it fixed) the fine knob turns freely, i.e. there's no connection between the fine and coarse knob.
This tells you that the plastic gear is broken.
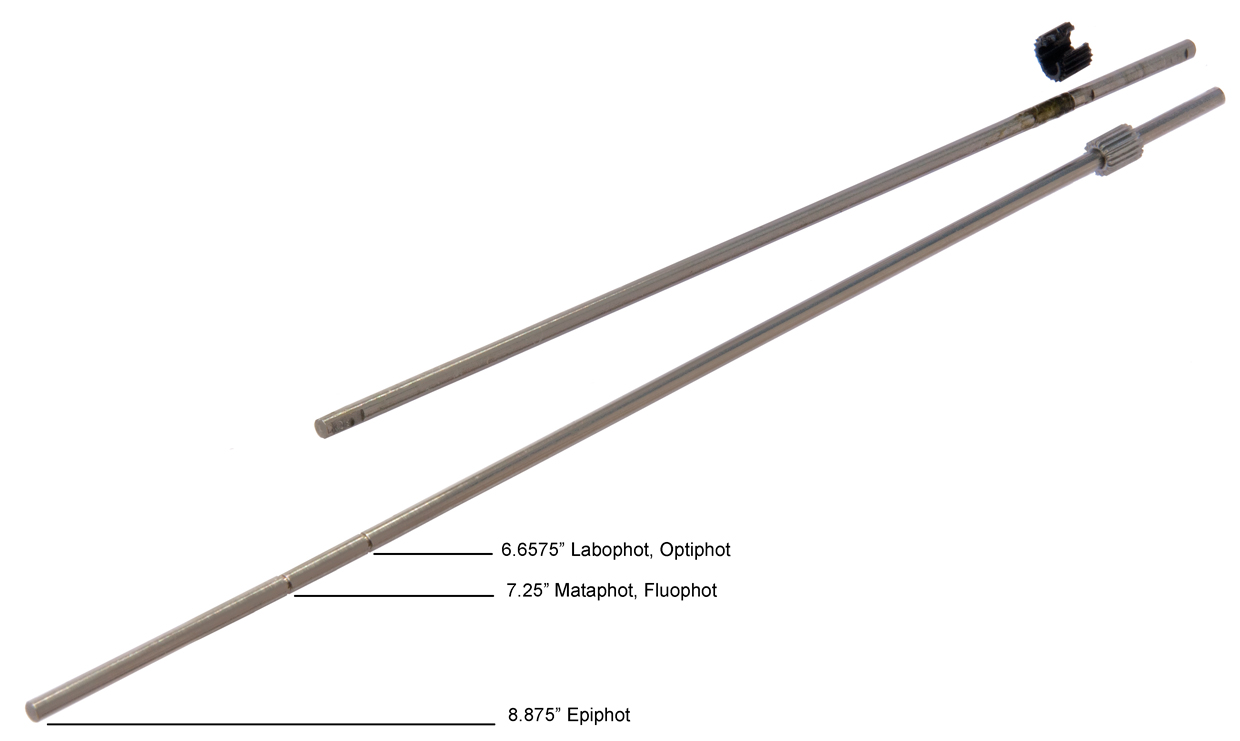
Microscope Solutions Labophot Fine Focus Shaft The shaft is longer and has break-off notches to it also works in other Nikon microscopes (they also make a replacement for the condenser gear.)
Fig 10 Broken plastic Fine Focus Gear
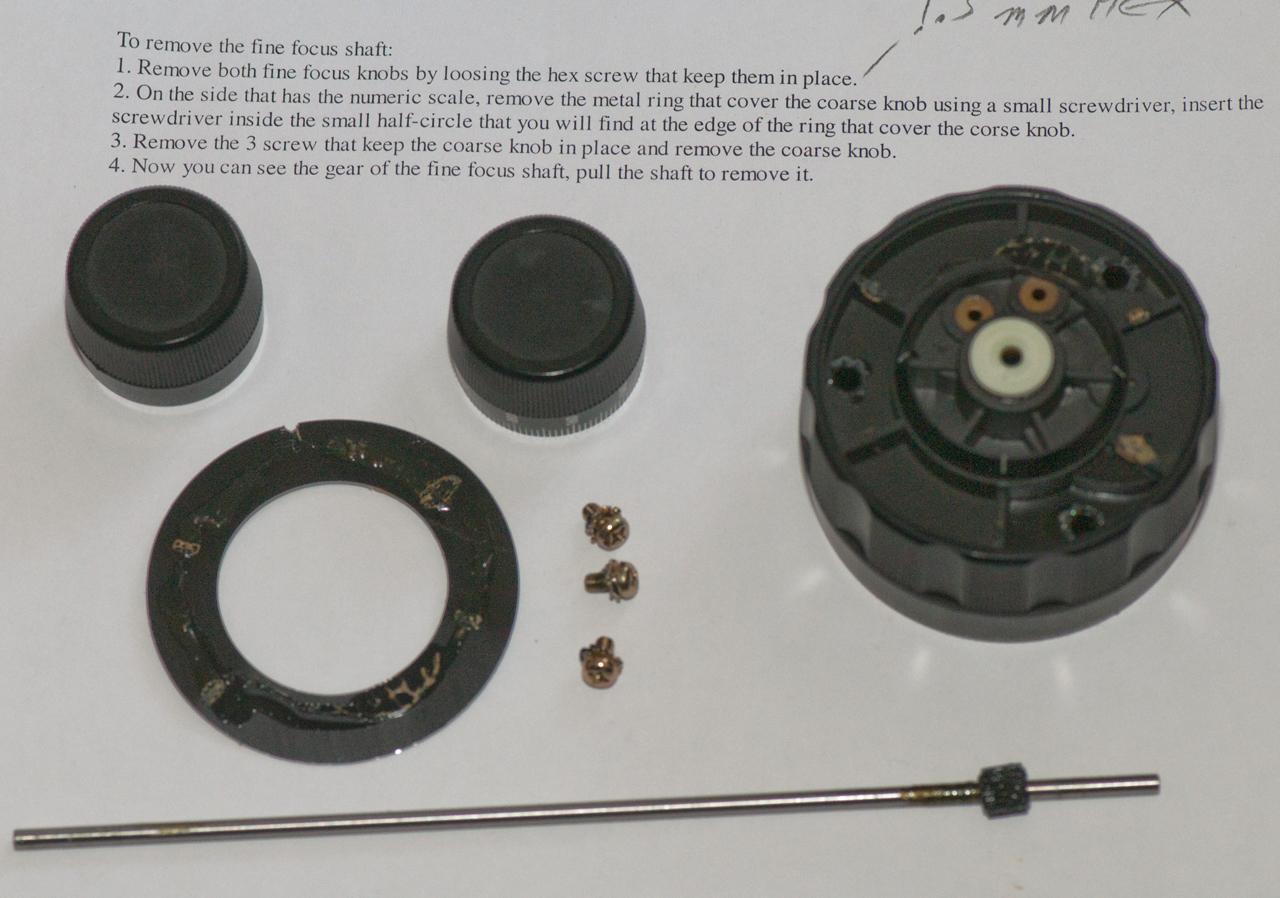
Fig 11 Procedure to remove Fine Focus Shaft
Fig 12 New & Old Shaft & Gear
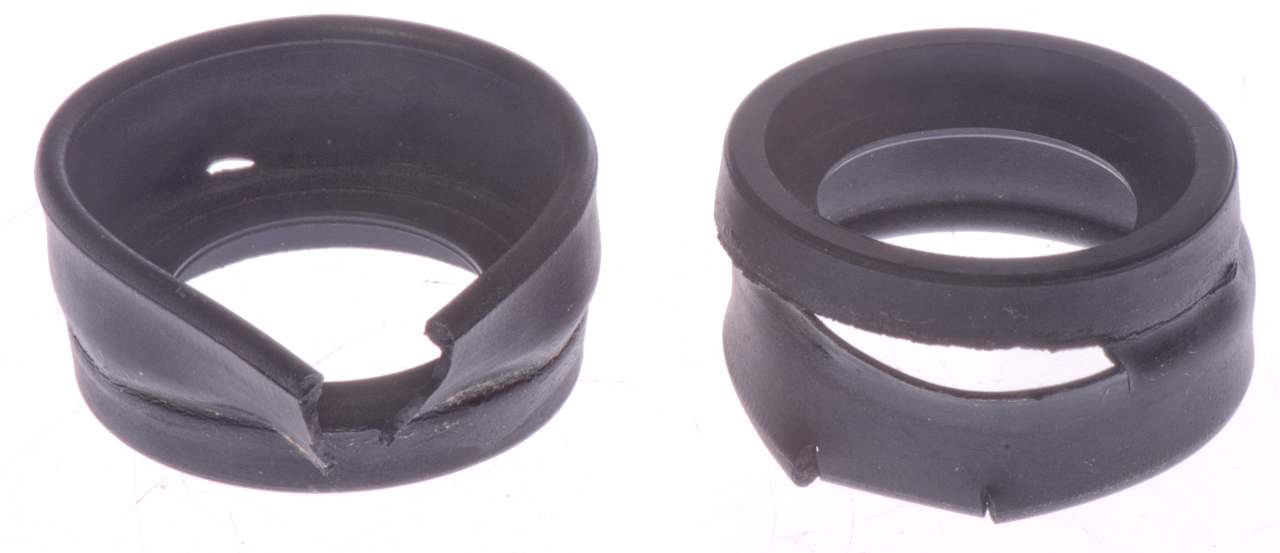
Rubber Eye Guard
As an experiment to replace the falling apart eye guards I've ordered a couple of Orion 1-1/4" telescope parts ($3 ea +s/h) which is a lot lower than purpose built versions.
They may or may not fit.
Old degraded eye guards
New eye guards from Orion
Condenser Pinion Plastic Gear
This is another weak link in the "phot" family of microscopes, but mine is OK. If it breaks I'll get the metal gear from Microscope Solutions.
Like most of my photos click for larger image. If your cursor is (+) click again for even larger image.
Prepared Slides
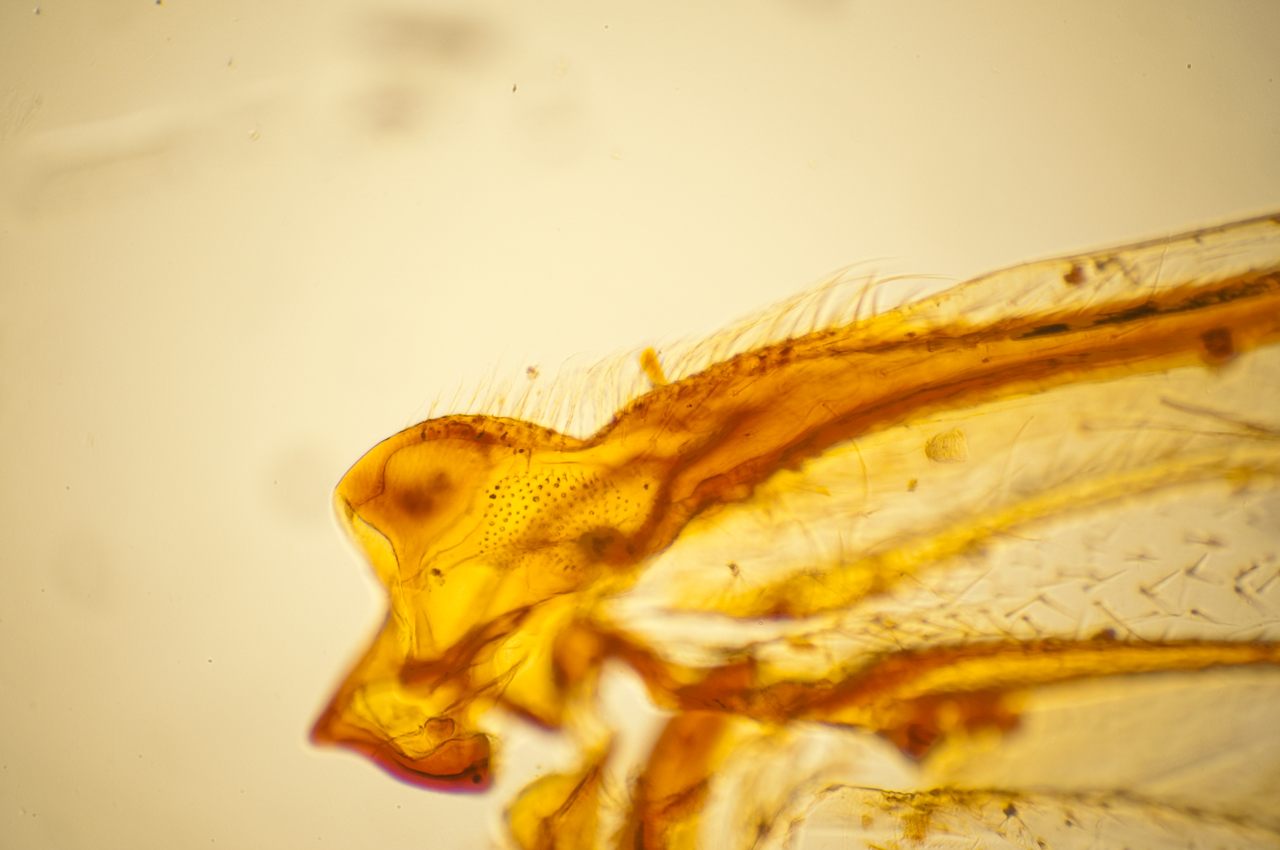
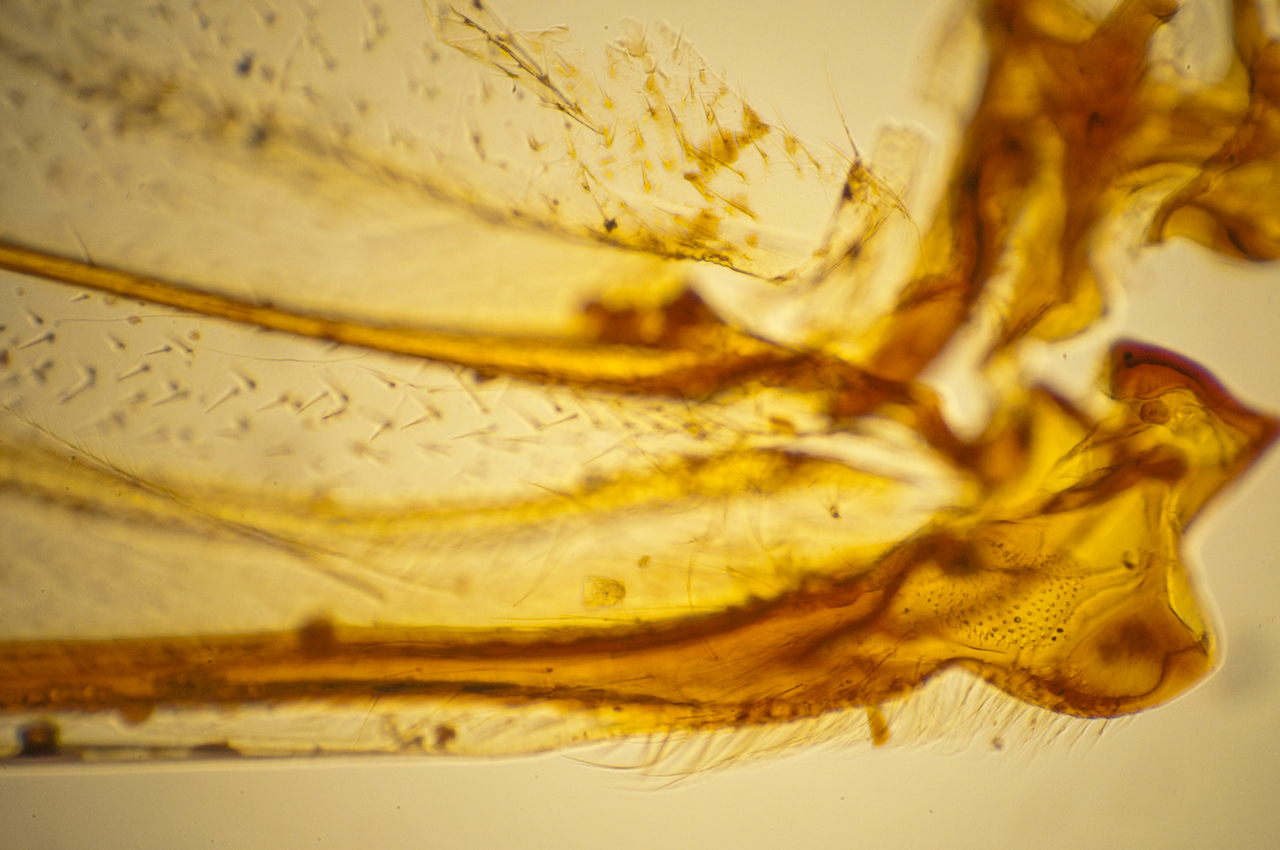
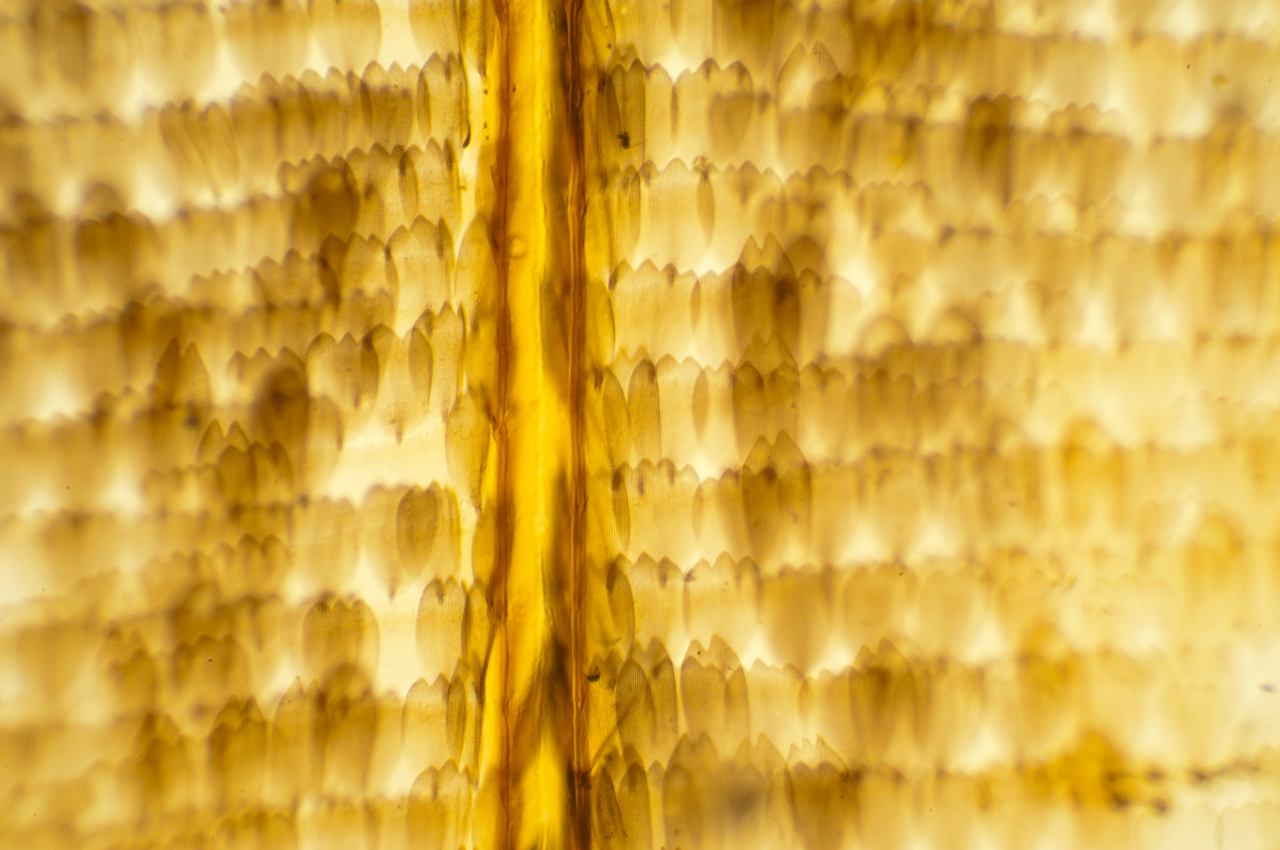
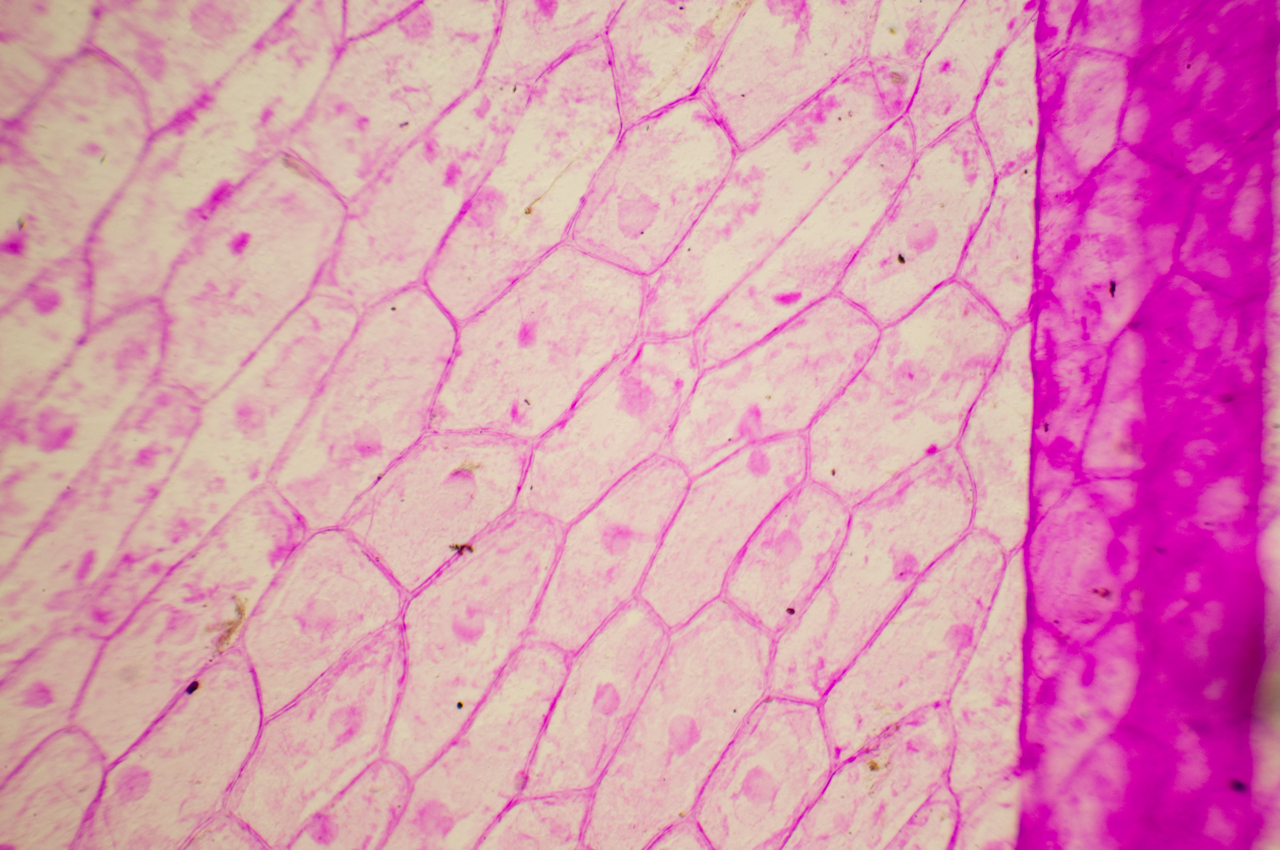
Labophot Image 1 Bee Wing
10X obj, EP camerea adapter
Would be better with focus stacking.
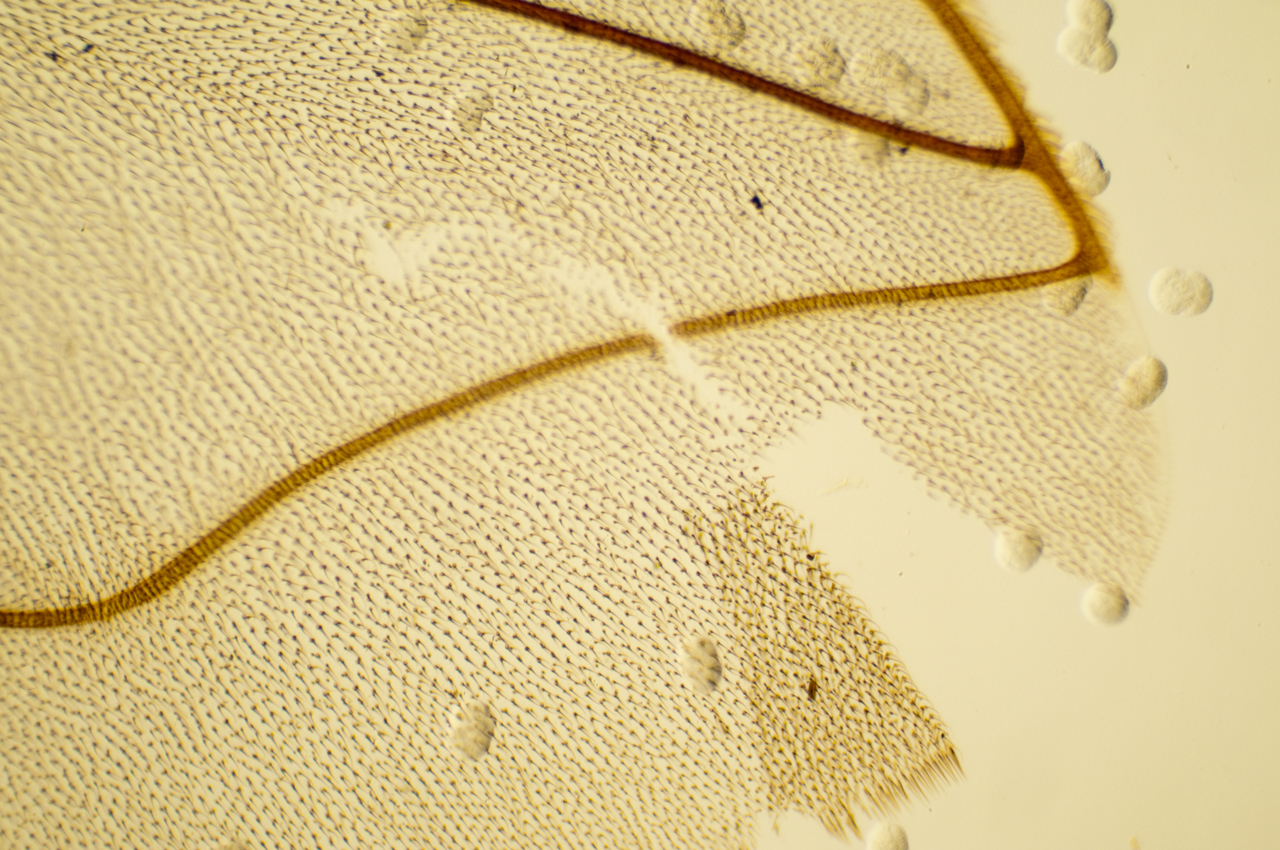
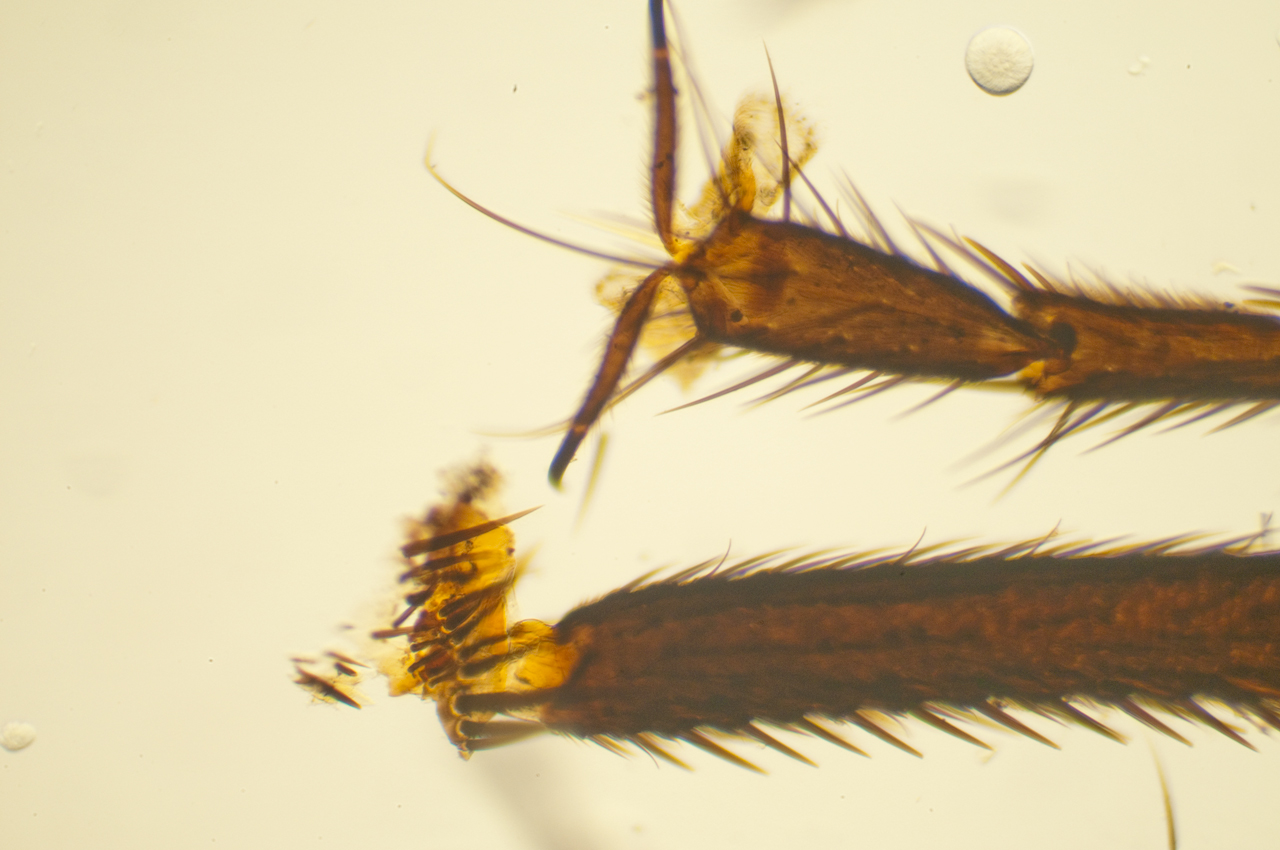
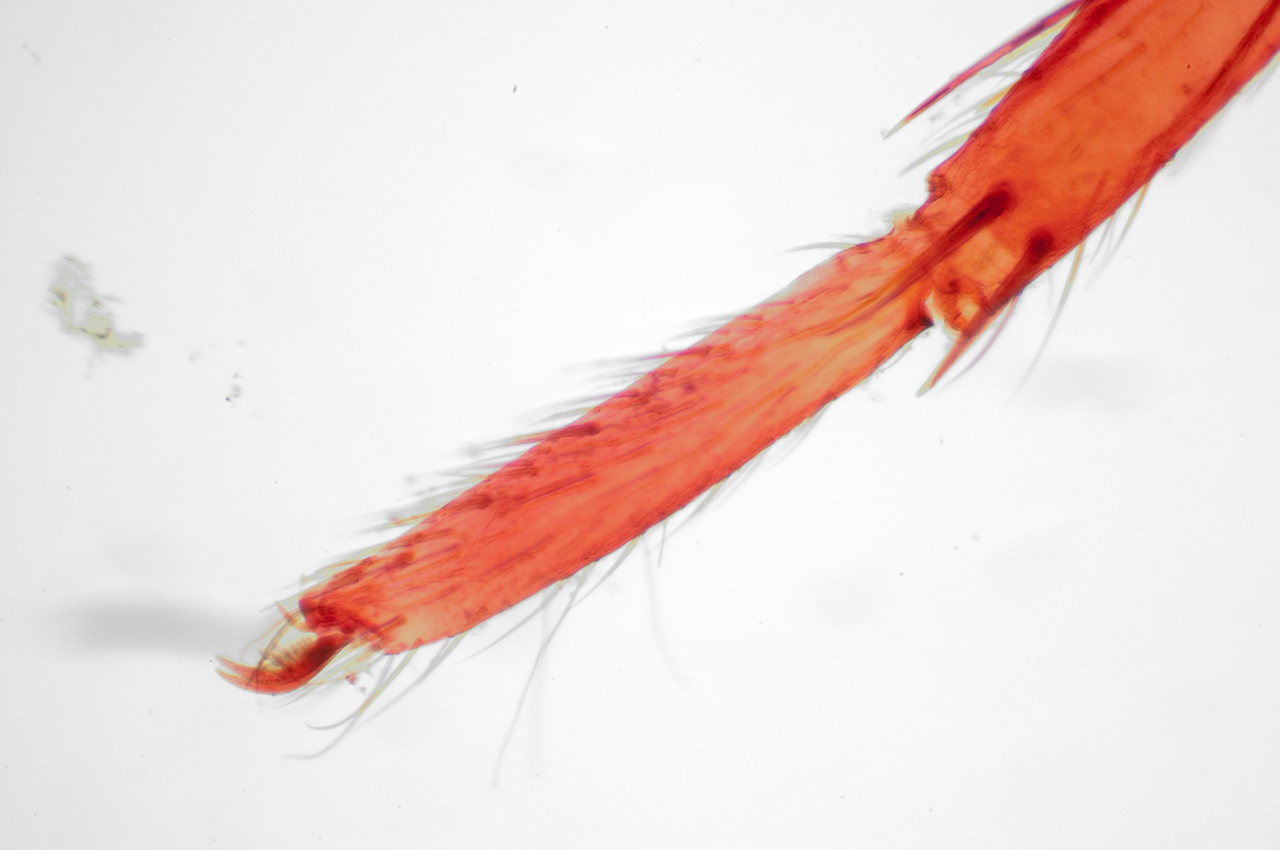
The following taken with E Plan 10/0.25 160/- objective, trinocular head, 23mm to Nikon adapter, Nikon 300s.
From a number of prepared slide sets.
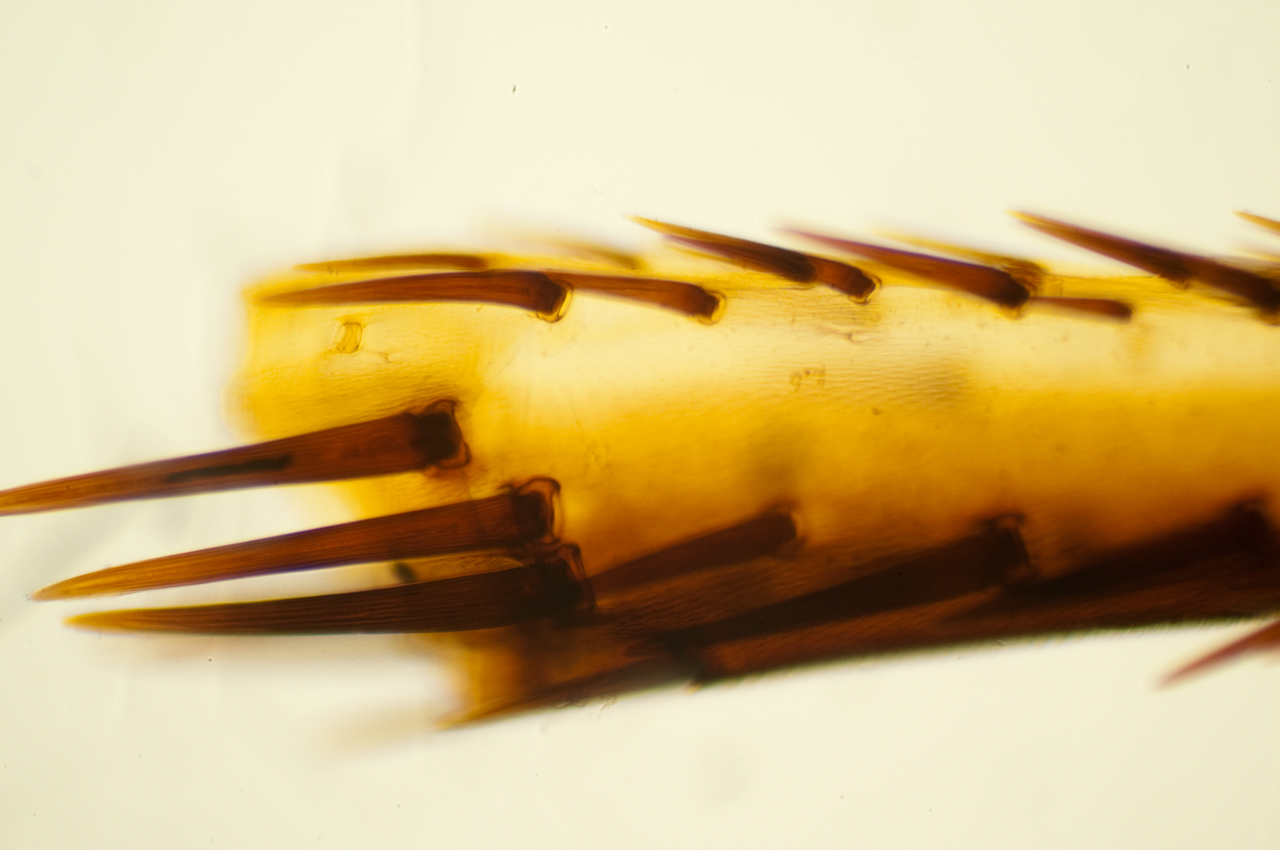
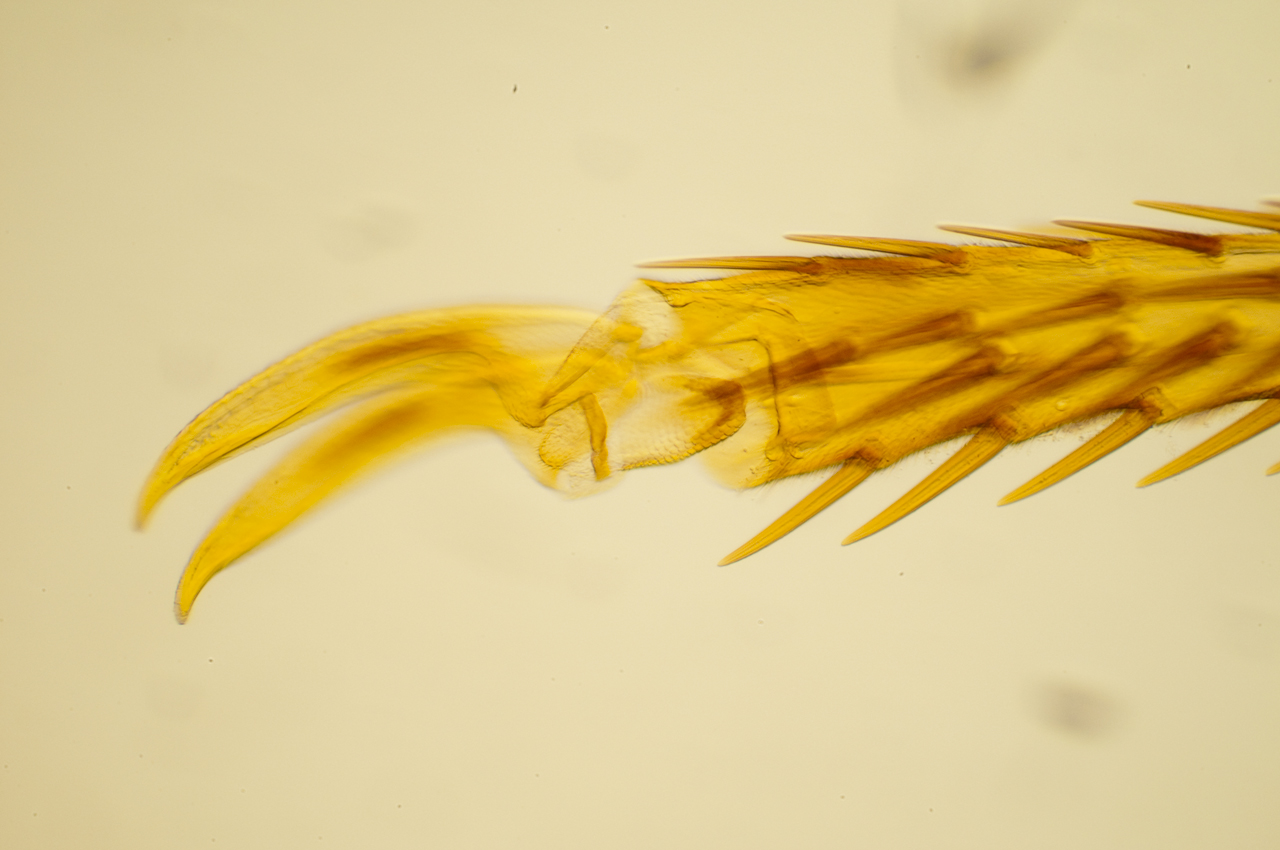
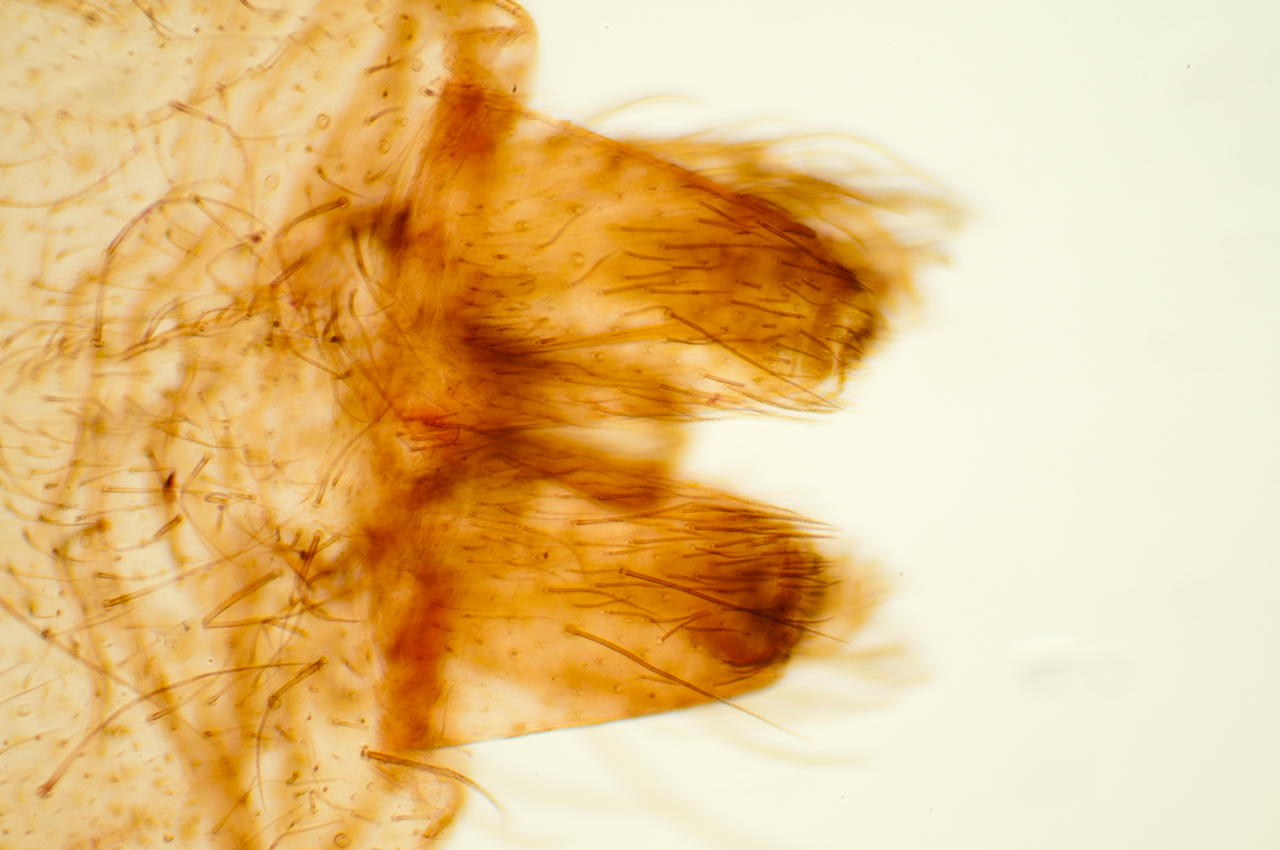
Butterfly First Leg (foot?)
Butterfly Second Leg (foot?)
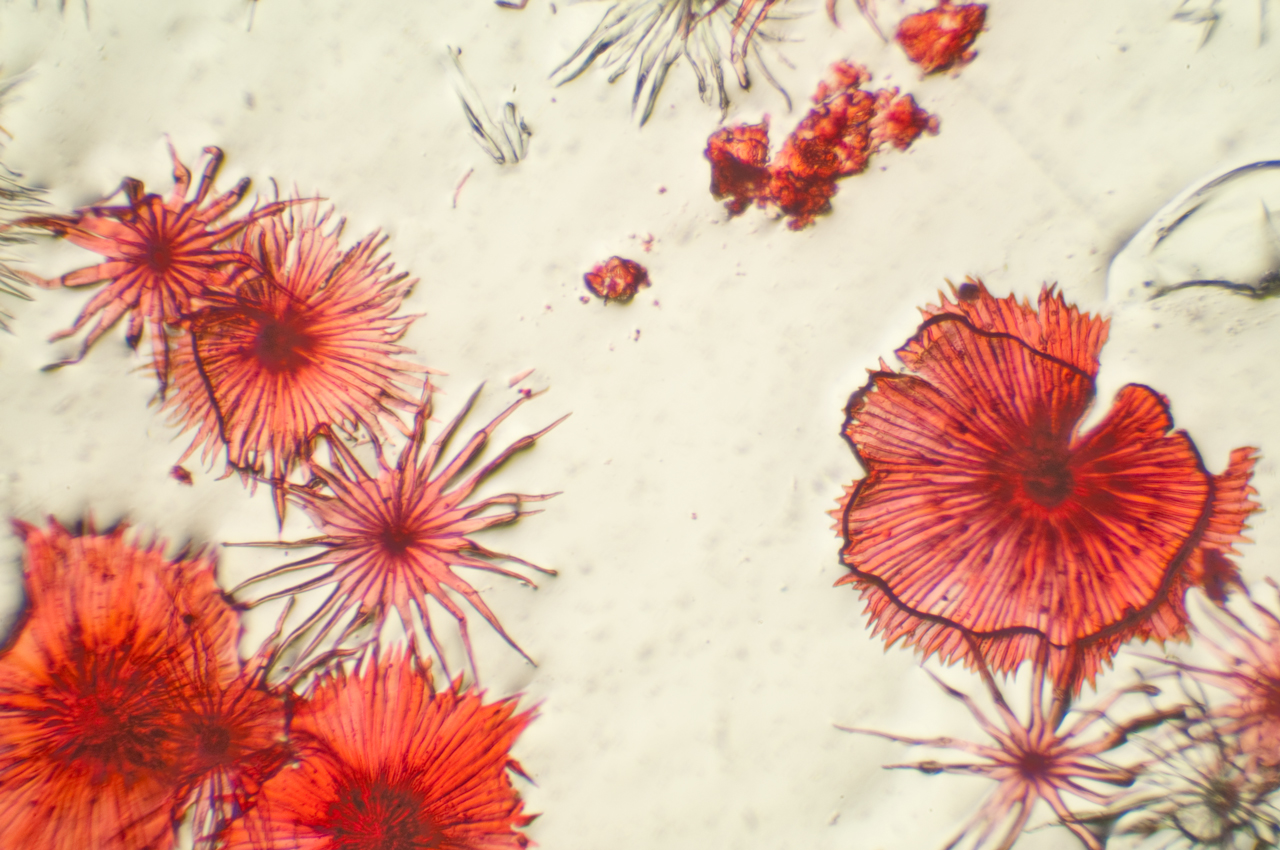
Butterfly Wing Scales
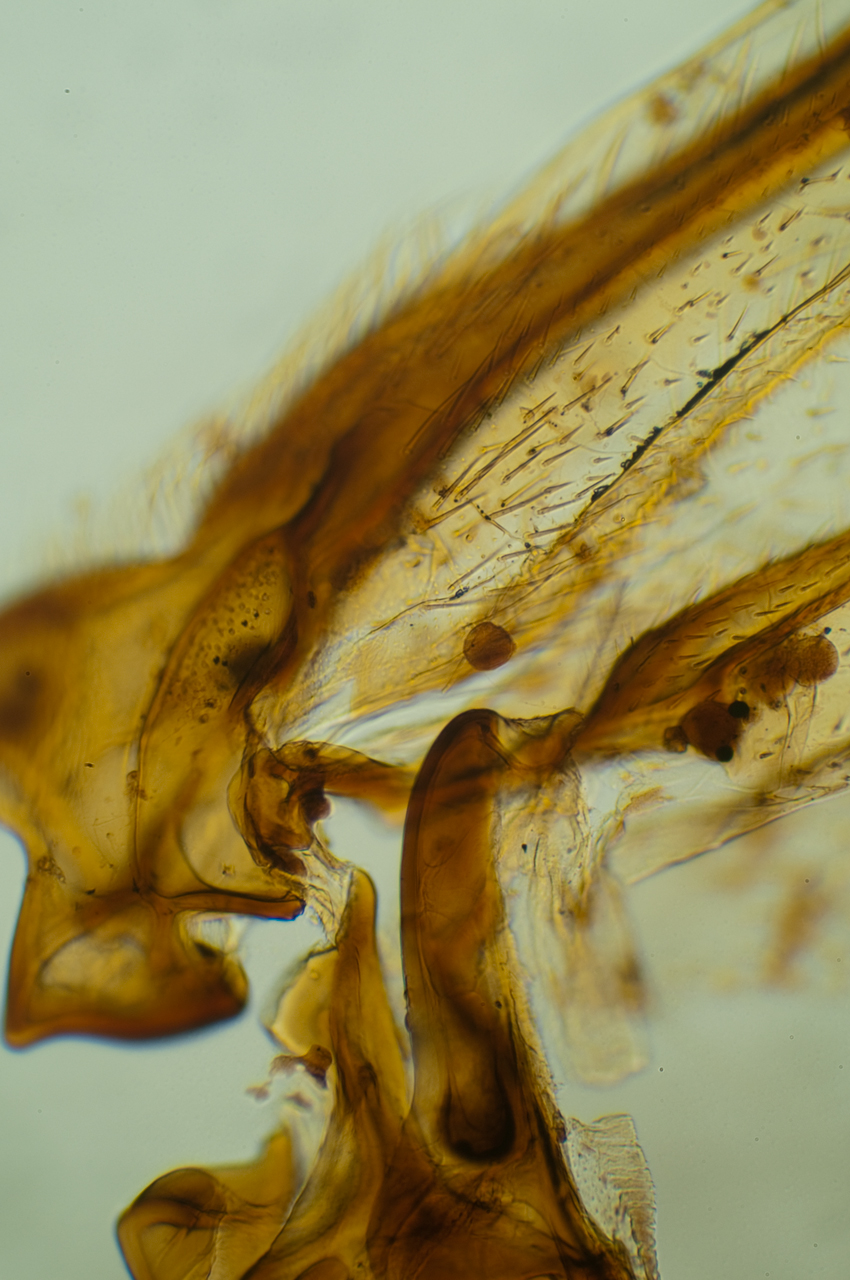
Fly Wing
Pond Water
The Microscope Starter Kit from Microscope World tells how to make a culture solution to grow bacteria so that you can have plenty of pond creatures, but just to see what I would find I placed some pond water directly on a slide and added a cover slip. Found some things on the very first try. These were taken using the Labophot microscope with a Nikon E Plan 10/0.25 160/- objective, and a 2X camera adapter in the trinocular head. Focus by means of live view on the Nikon D300s camera.
PS. Instead of paying the high on-line shipping for the Microscope Starter Kit if you phone them you can get USPS priority mail for 1/3 the price. I recommend this kit for microscope beginners because the DVD is very instructive (even the production quality leaves something to be desired) and the included prepared slides match those discussed in the DVD chapter on prepared slides. The DVD chapters are:
How to use a Microscope - very basic but at 6 minutes in is about various types of slides: Well Slide, Wet Mount, Permanent Slide (Balsam & Xylene) and the use of a spacer between the slide and cover slip. Specimen preparation: soak in: fixative, 30% alcohol-70% water, 50%-50% alcohol water, 70% alcohol - 30% water, 100% alcohol and finally a clearing agent like Xylol.
Investigating Cells - Plant and animal + use of Iodine (Wiki) as stain to bring out details.
Examining Prepared Slides - matches the slides that are included.
Investigating Pond Water - recipe for nutrient solution.
Techniques Used in Studying Ciliates - has a lot of information (Wiki: Ciliates)
Pond Water Culture
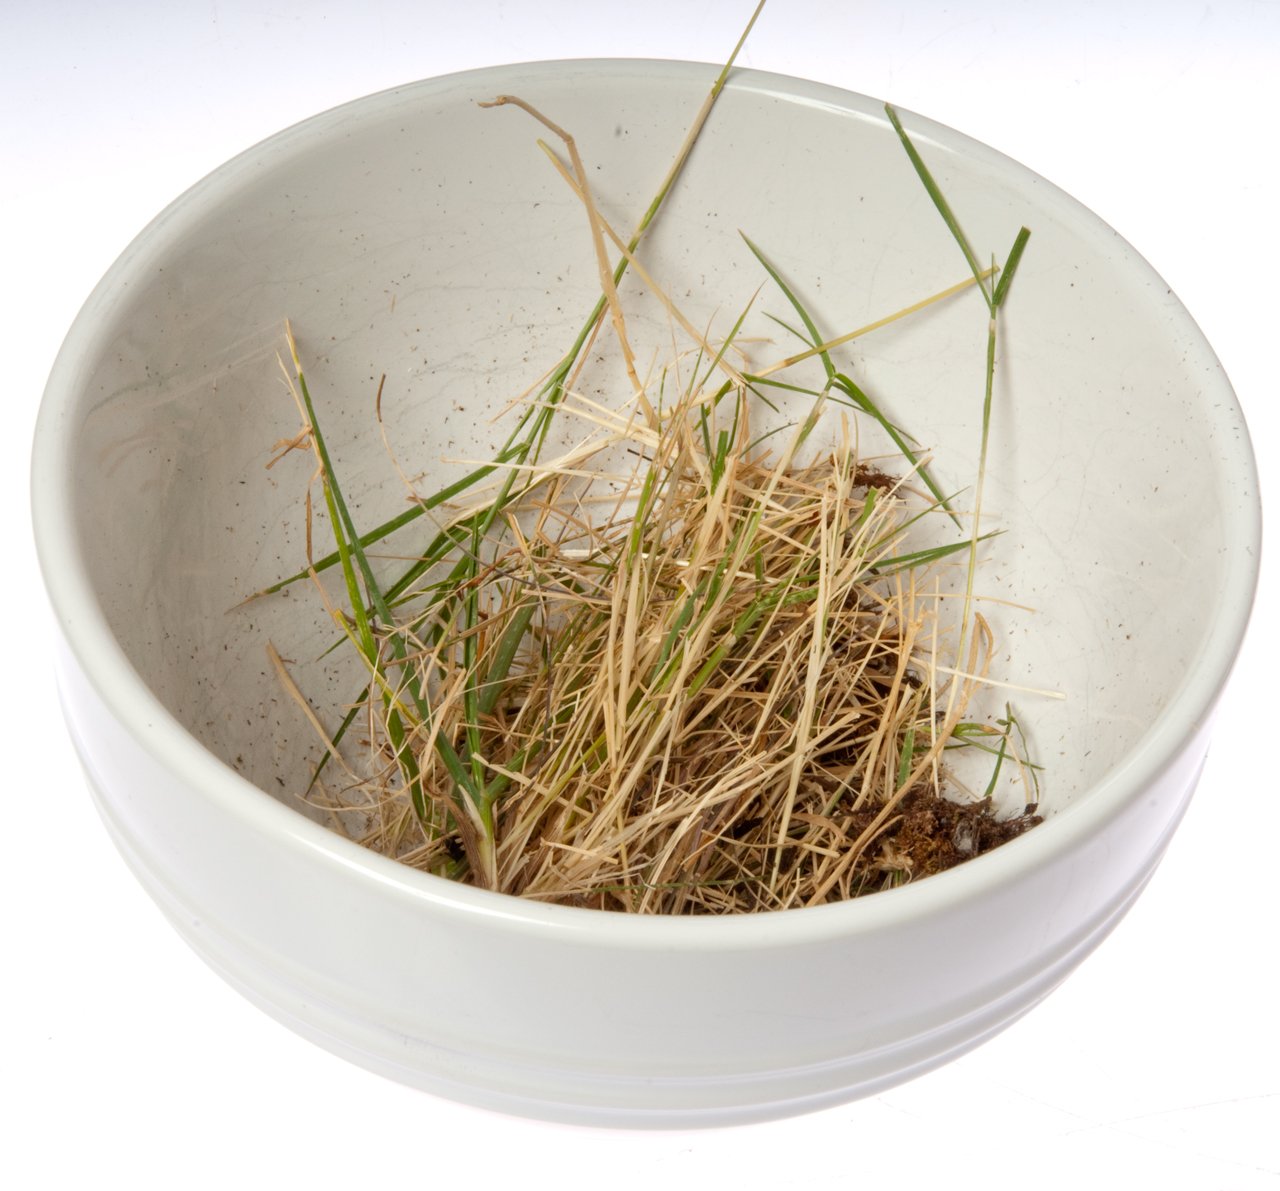
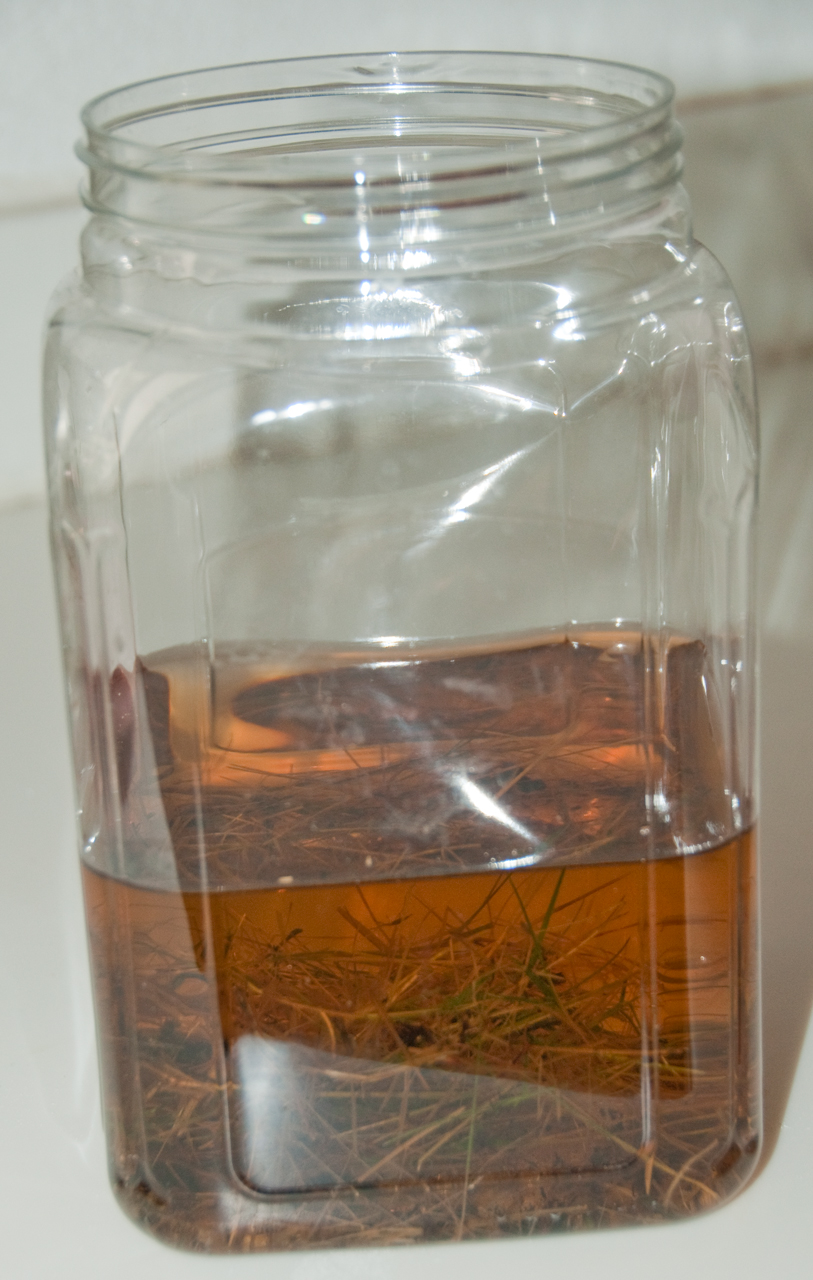
Bring to a rolling boil 1 liter of water (I'm using my tap water even though the DVD says to use store bought "spring water"). This will kill any organisms that are in the water and in this case drive out any chlorine and dissolved oxygen. Add a handfull of straw. I pulled up some dry grass and some moss that was there from cleaning the house gutters. The DVD said it should be brown and I just noticed that I've got some green grass in there, we'll see if this works.
Boil the dry grass for 10 minutes to break down the plant matter to make food for bacteria (Wiki). It smells like wet grass. Let brew sit for a two to three days uncovered in a cool shady place. Then add about 30 mL of pond water into the culture solution and let that sit for three to ten days. You can pull a sample of a few drops, put that on a plain slide and add a cover glass and have a look to see how dense the living creatures are. If culture turns milky it means there's too much bacteria and needs to have water added to lower their concentration.
Dry grass & a little moss
After sitting for a day
After adding water to make
up for boiling loss
After adding about 1/8 cup of pond water
and waiting a couple of days there's a whole
bunch of very tiny things moving, but on the first
try none of the larger ones.
You can NOT see these very small creatures in
bright field lighting, but they easily show up
when the Phase slider is pushed in.
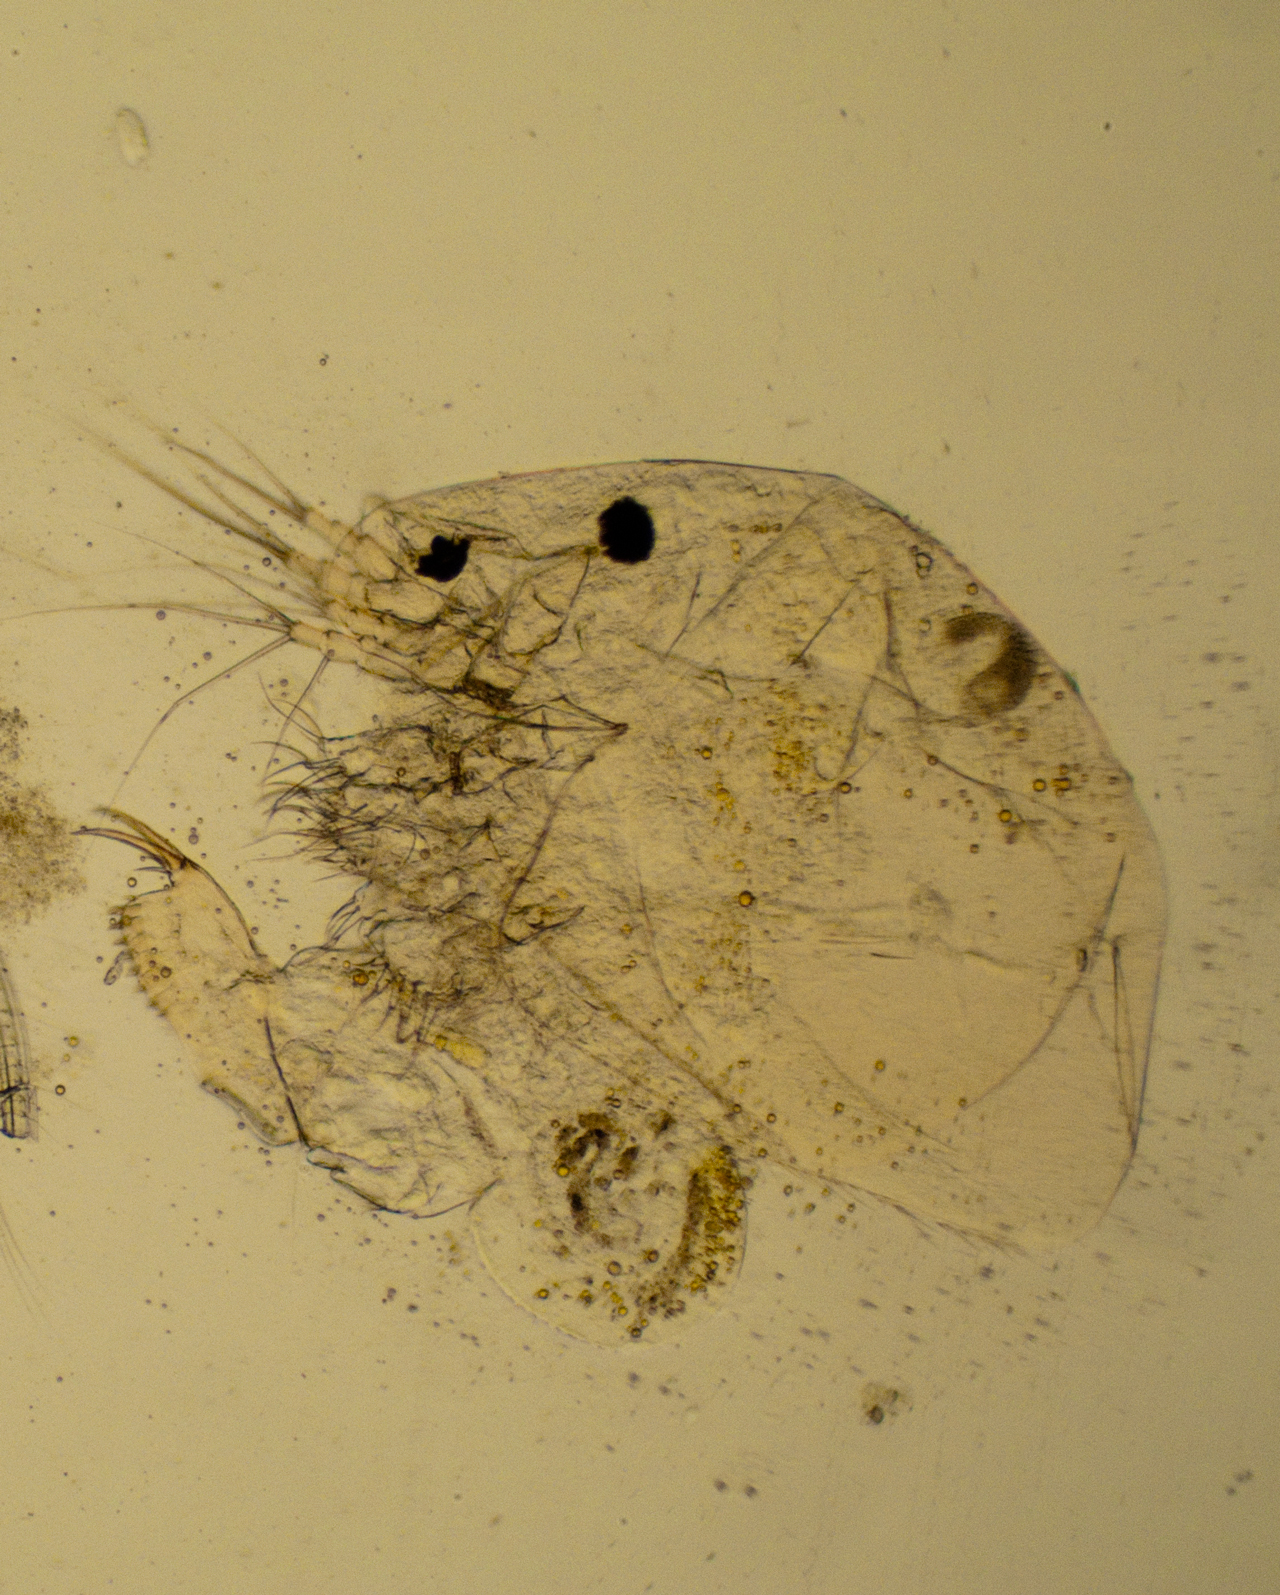
I've been told these are Bacteria, spirochete (Wiki) form and one protozoan (Wiki)
28 July 2014 - 1 day after adding pond water to the culture: a lot of bacteria, but only a small number of Protists (Wiki). (Ph 3 pushed in)
29 July 2014 - 2 days after adding pond water to the culture: even more bacteria and now maybe half a dozen Protists in FOV of 10x objective (Ph 3 pushed in)
4 Aug 2014 - Still no big guys http://youtu.be/qVylp5rAsTA will try to get a water sample from a friend who has a Koy pond.
7 Aug 2014 - Still no \big guys. Got sample of water from friend's koi fish (Wiki) pond, but there were no bacteria or other small living things in it, but added anyway.
Also added a spoon of dirt from outside. But there is plenty of life in the culture.
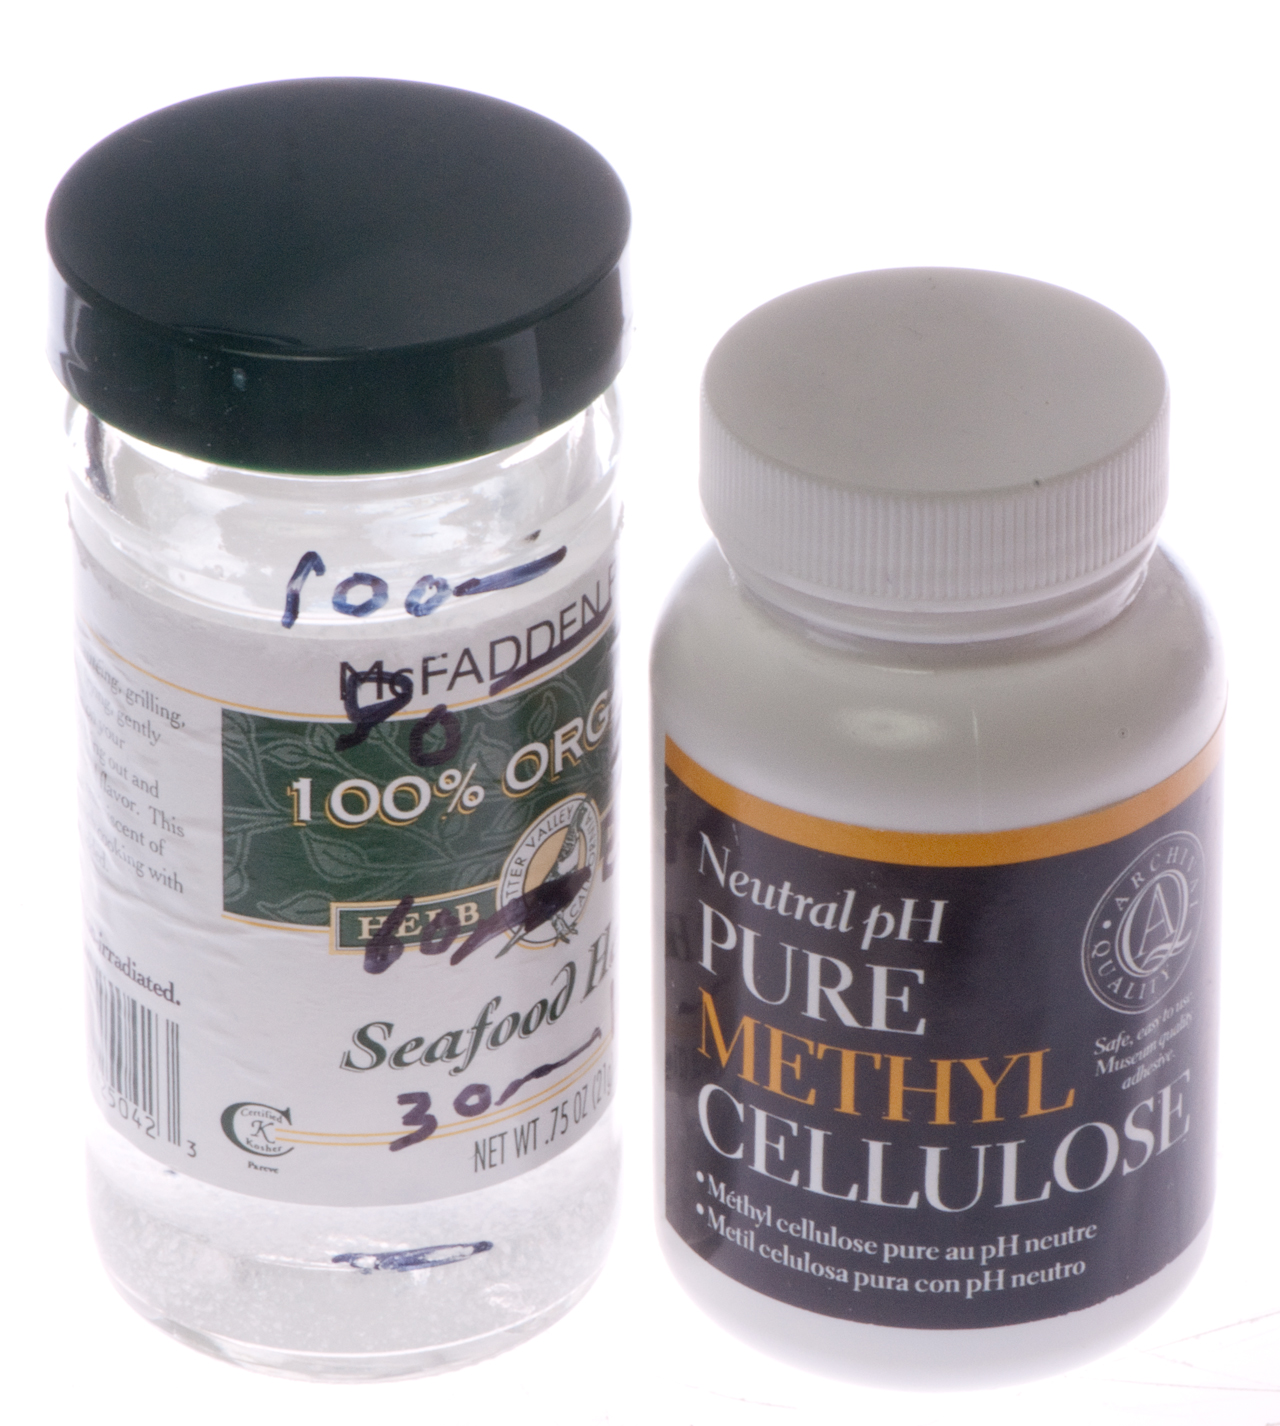
18 Aug 2014 - ordered some Methyl cellulose (Wiki). By adding some to the water it increases the viscosity thus slowing down the movement.
19 Aug 2014 - a lot of medium sized creatures. see video below.
The formula on the label for glue is 1/2 cup of water and 1 tablespoon of the Methyl cellulose powder.
I'm using 100 cc of water (very close to 1/2 cup) because that's what fits into a glass spice jar marked net wt. 0.75 oz and something approaching 1 cc of the Methyl cellulose powder. That's about 10 times less powder since I'm not trying to make glue, but rather just increase the viscosity of the water under the cover glass.
Shortly after being mixed the cellulose settled to the bottom and there was about 20 or 30 cc of it, so the recipe on the label is about correct if you want a saturated solution.
After standing overnight the liquid is homogenous. After mixing with water this may be called: Protoslo® Quieting Solution
This is still too dilute, so I added another 1 cc (making a total of 2cc in 100 cc of water) to the bottle. This seems to slow them down.
See YouTube video. First part at 20x, the 4x, then 20x.
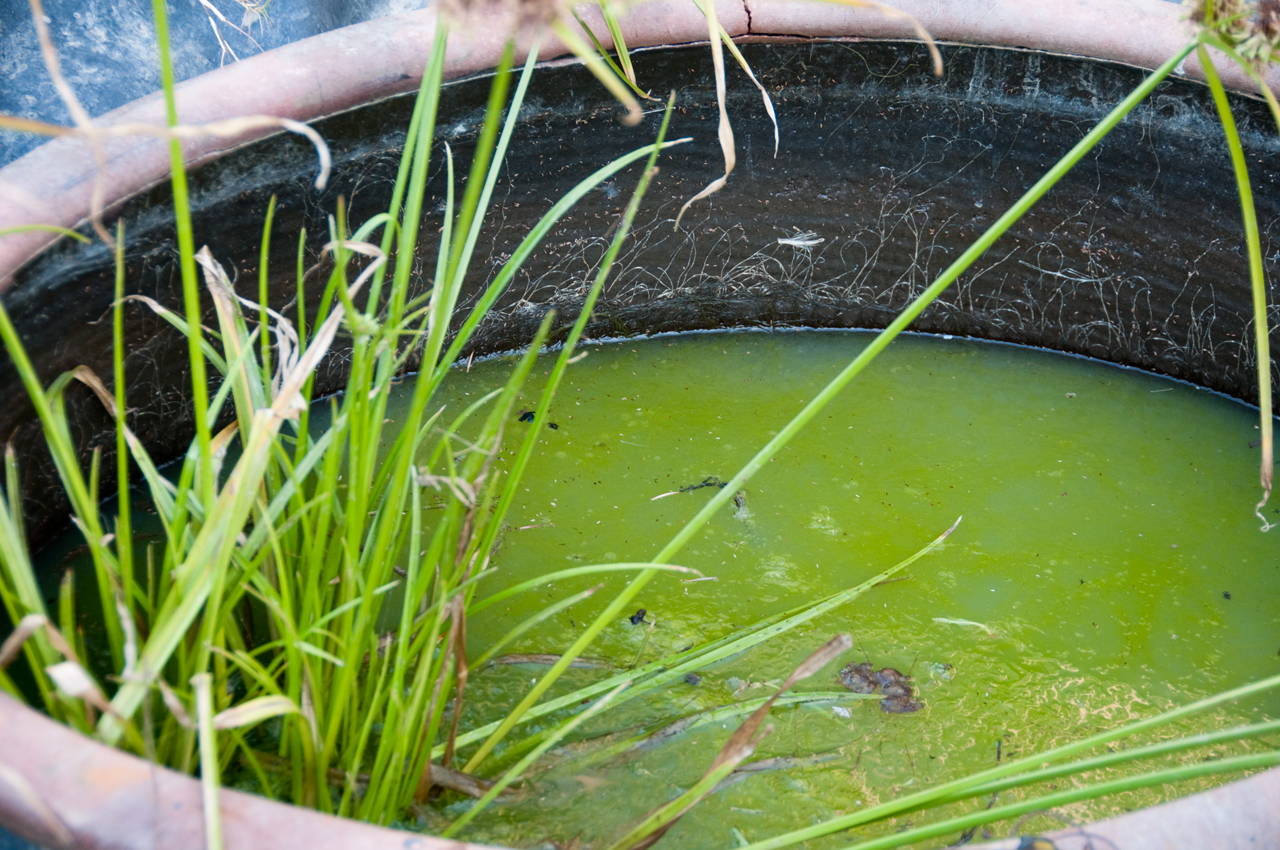
Rather than culture pond water I just took a couple of samples, one from the pot and one from the ground water into petri dishes. A quick look at 4x shows that the pot sample has the big guys and where to pull the drop. You can actually see the big guys with your eyes.
Pot sitting in a pond formed with water proof pond making material.
Recently added an RV water filter
to the hose bib that's used to fill the pot & Pond.
It should remove chlorine and ammonia.
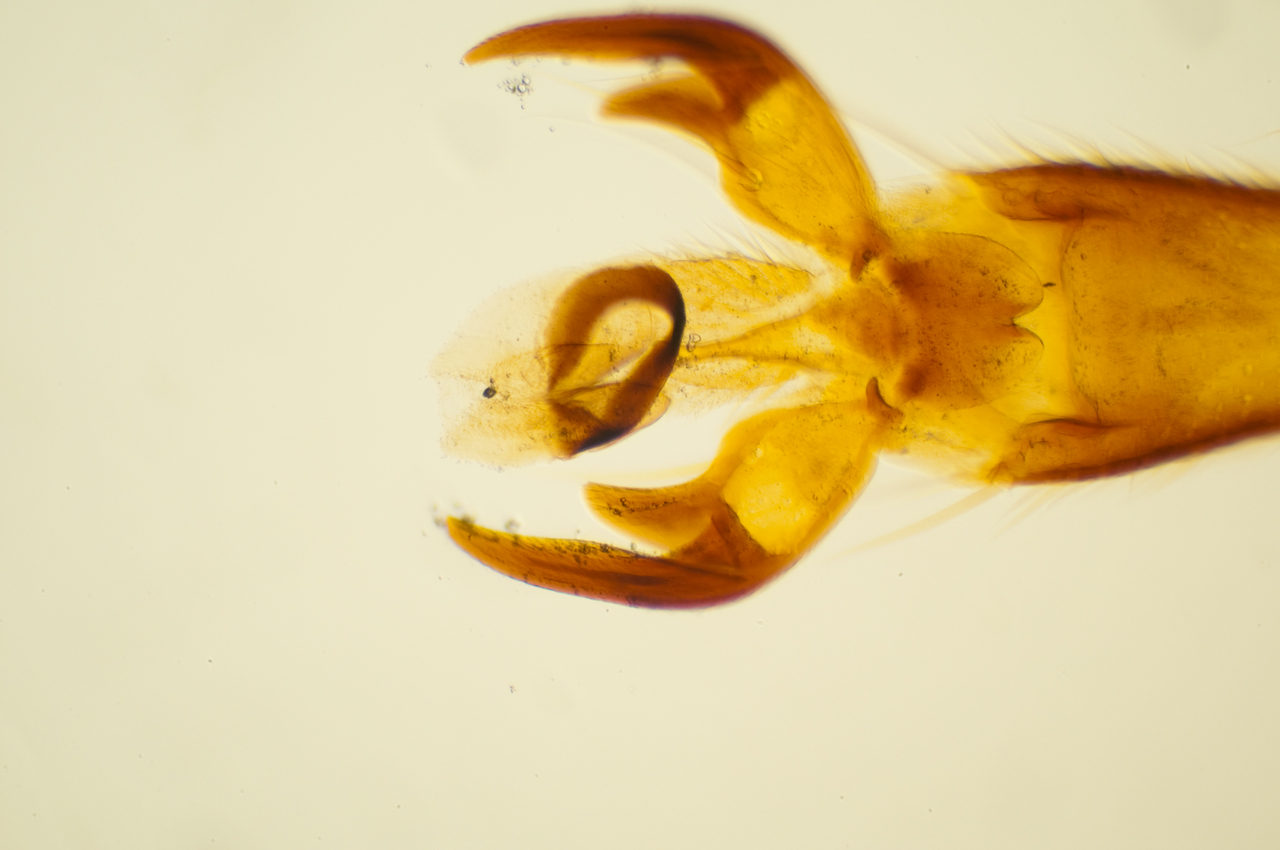
Pond Water Images
Video showing a moving claw on the left
Still of another one
This is a little larger that what you see in the 10X eyepiece
using a 10X objective. It's 10x objective * 2x camera adapter or 20X at the image sensor in the camera.
19 Aug 14 YouTube Video
Hummingbird Feeder Sugar Water
After mixing a batch of sugar water (formula: ____ water & ____ sugar) for the hummingbird feeder and putting the balance of the mixture in the refrigerator until the need to refill the feeder, some fuzzy ball started appearing after ______ weeks. They are about 1/4" in diameter and have a dark core.
What are they? Aspergillus mold - very bad for hummingbirds, so need to clean feeder much more often.
How did they get there? This part of the mix was never in the feeder, only in the house, so from the air?
In bottom of Mason Jar
Y-R Stand
Many of the "phot" series of stands have a similar look, there are functional differences. It's not clear to me what stand names (like Y-R) go with what features.
The focus stage can get close enough to the objective so that JIS (36mm) or DIN (45mm) parafocal length objectives will come to focus, but since it has RMS threads you can not use CFI60 objectives and since it will not get up to 31mm you can not use RMS parafocal distance objectives.
If you know please tell me.
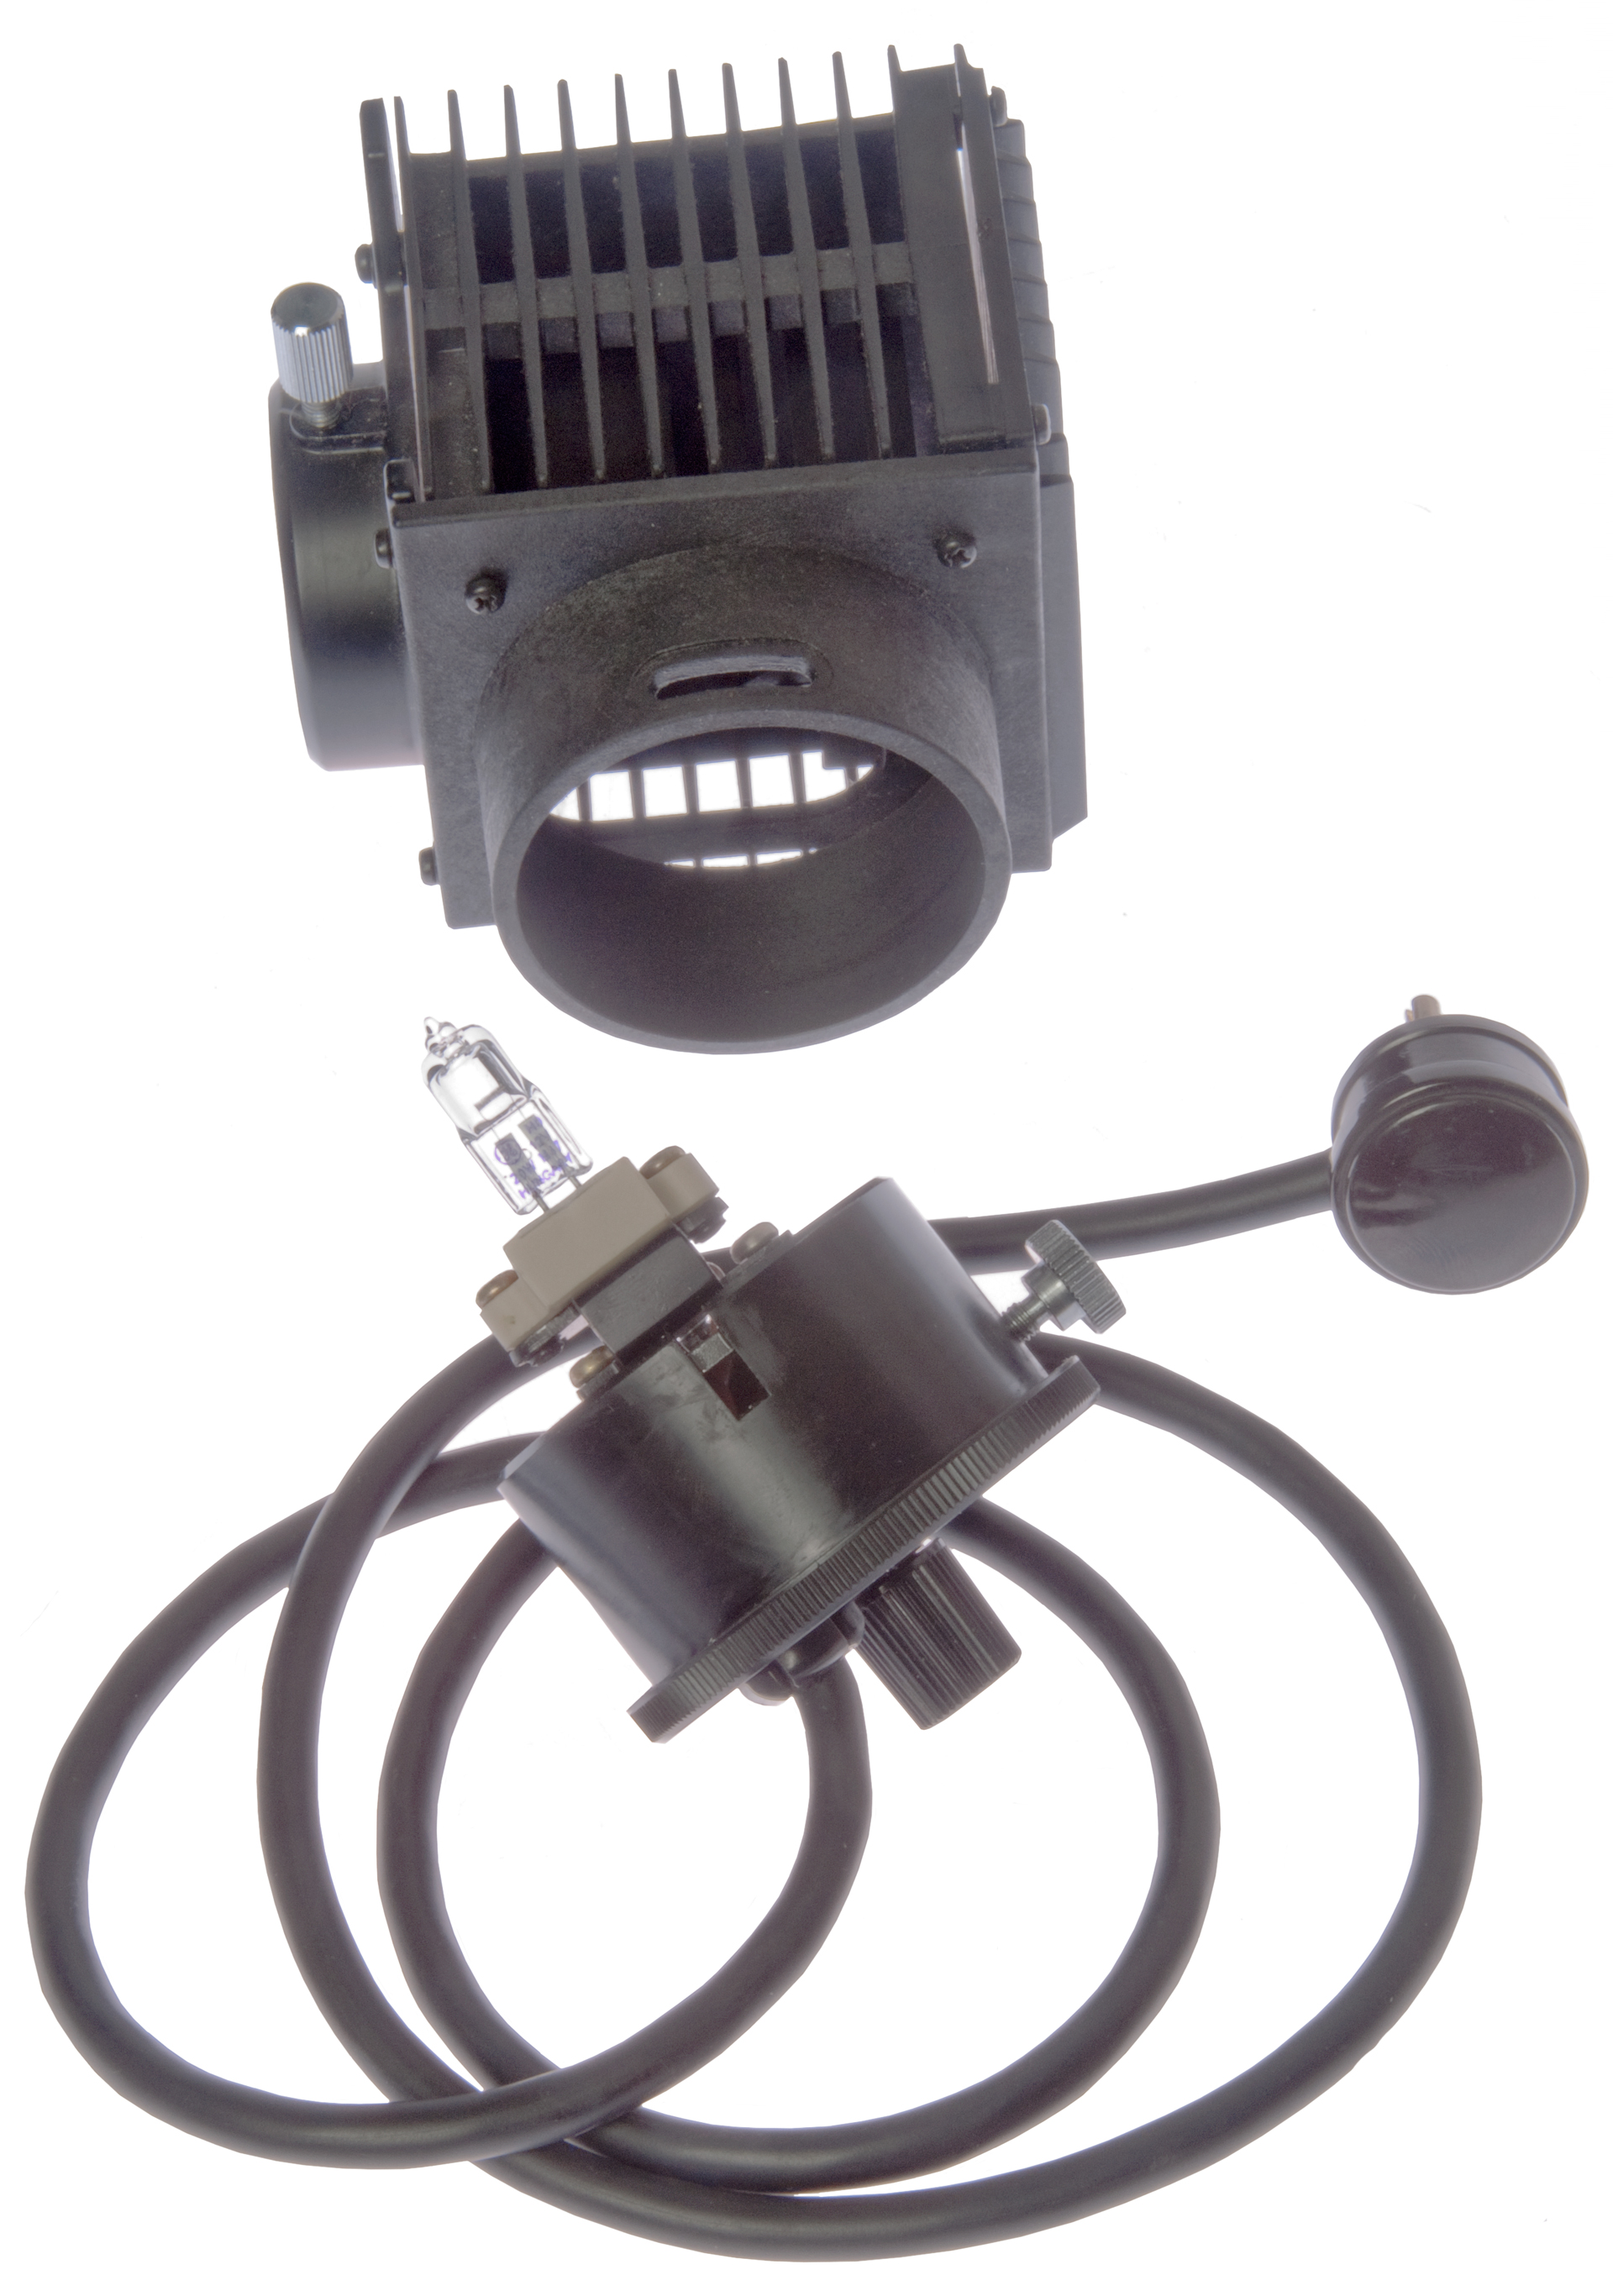
Lamp House
The black material seems to be an electrical insulator and it supports the two metal buss bars that provide power to the lamp.
The front black heatsink is tilted back and I expect that's done on purpose so that it will no reflect IR light into the light path.
The bi-pin lamp is a 6 Volt 20 Watt Philips 7388.
Philips Code 7388
ANSI Code ESB
LIF Code M30
Cap-Base G4
Bulb Material Quartz-UV Open
Operating Position any
Main Application Projection
Life to 50% failures 100 hr
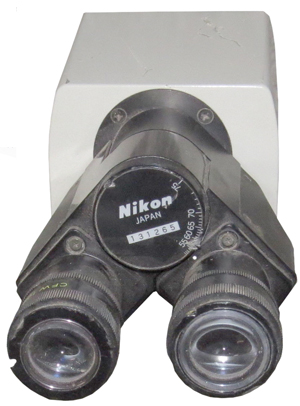
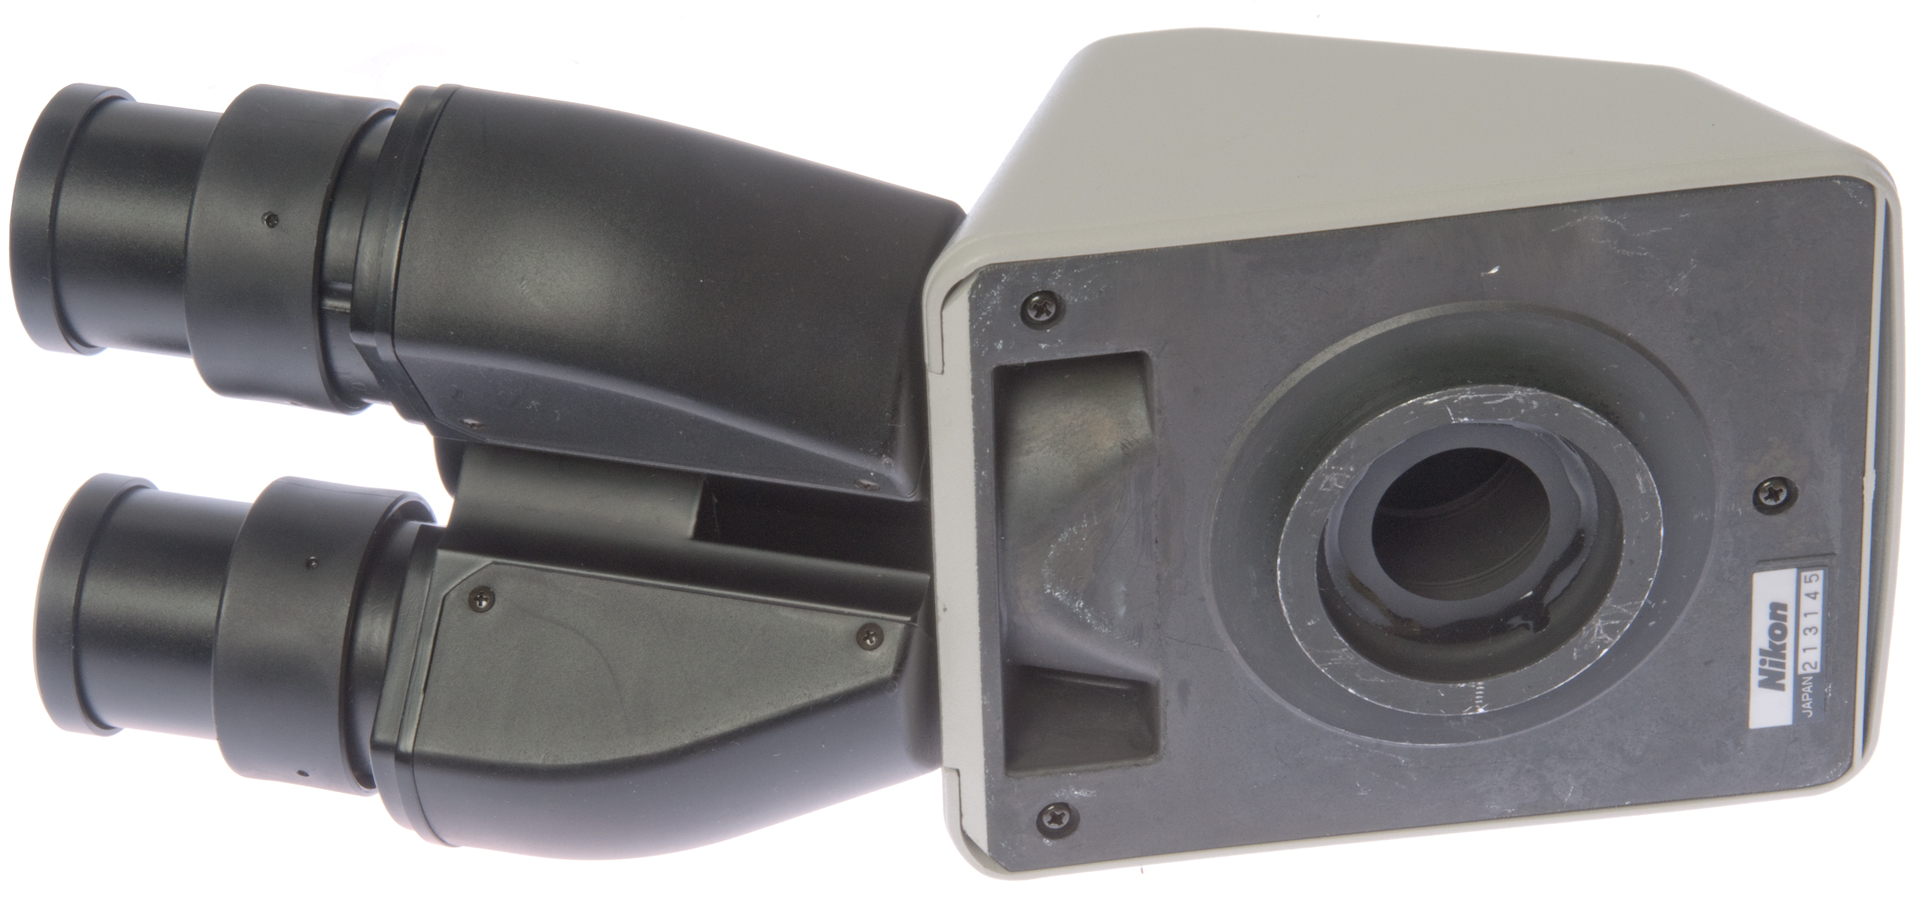
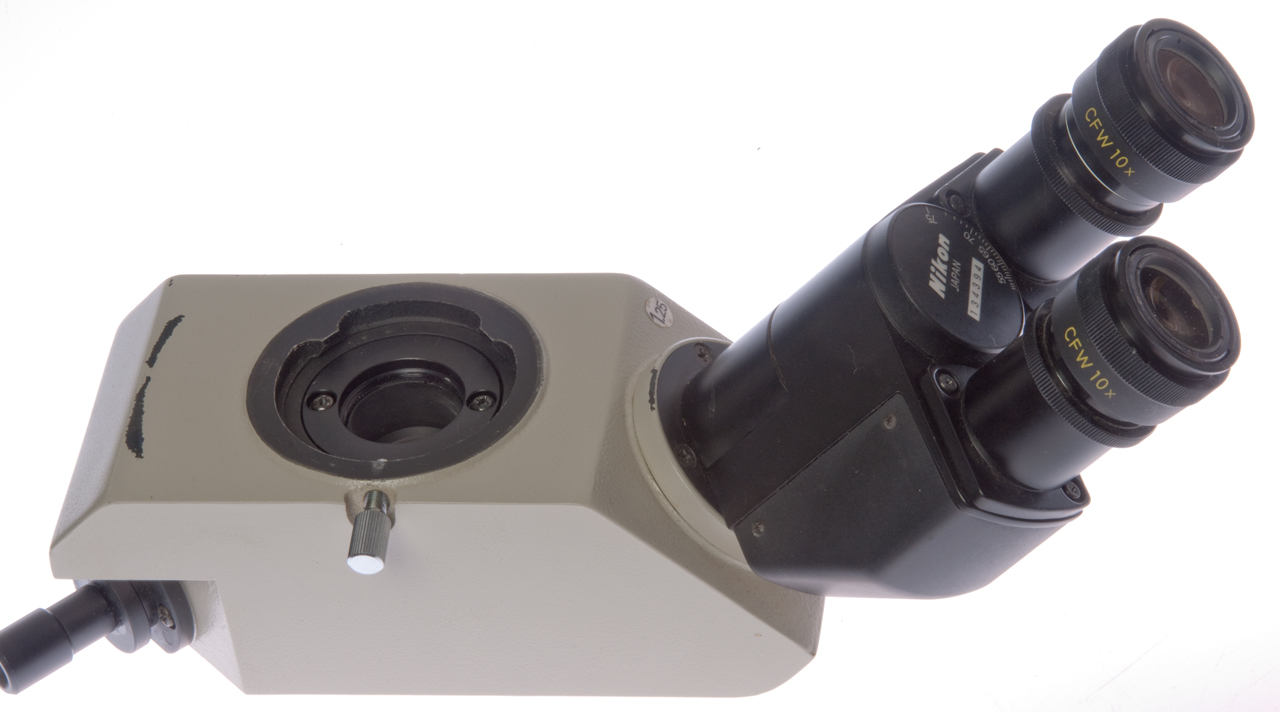
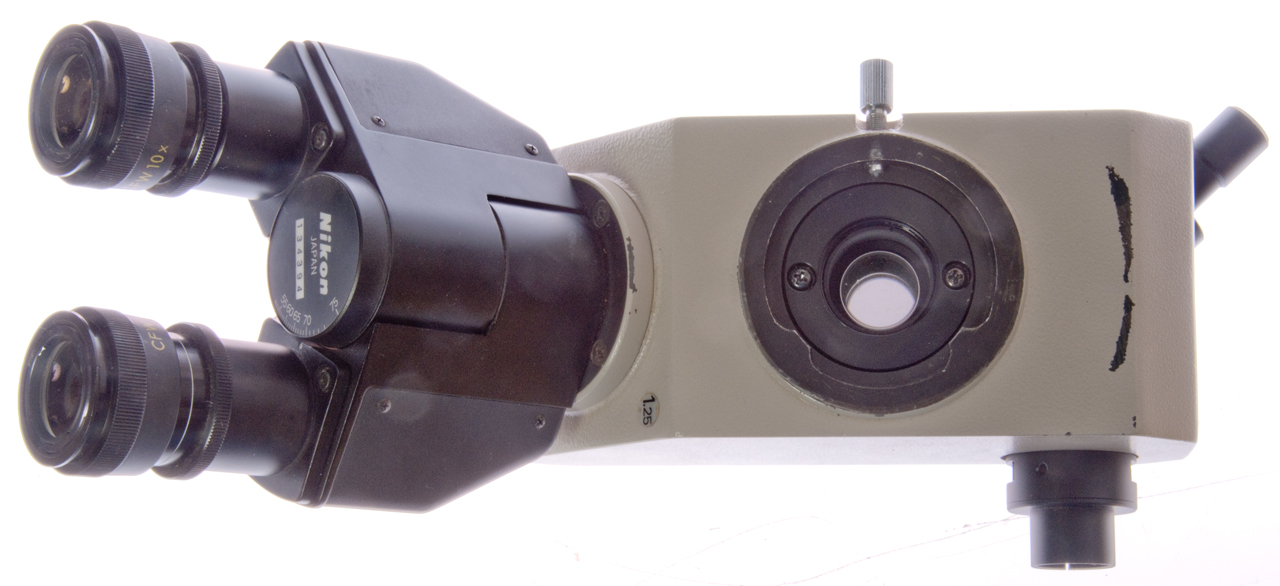
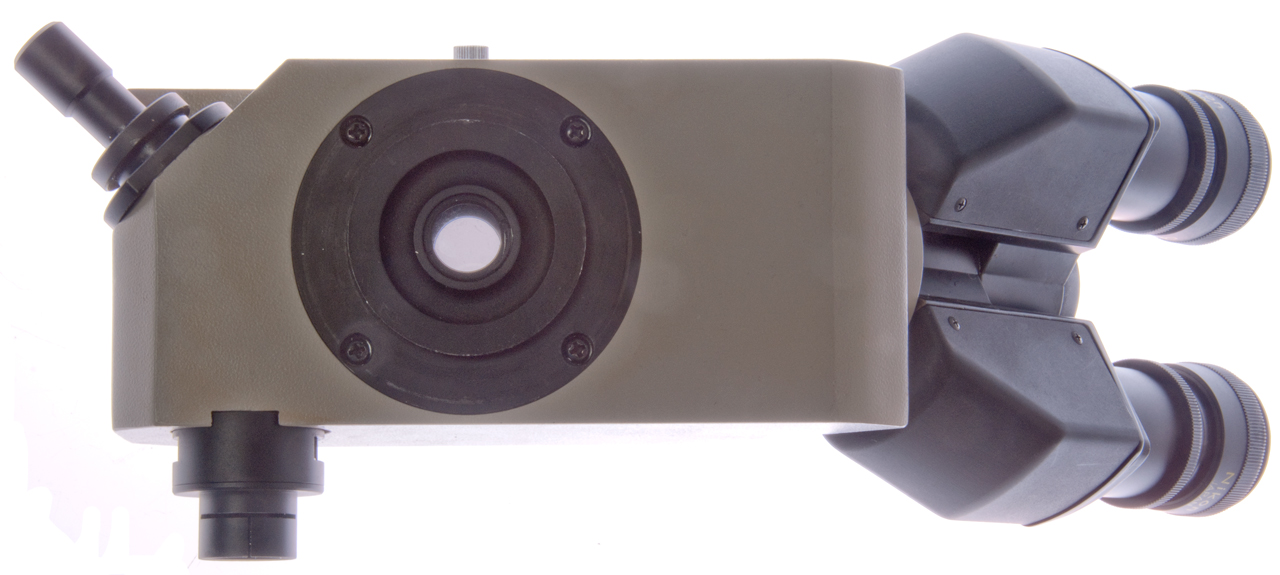
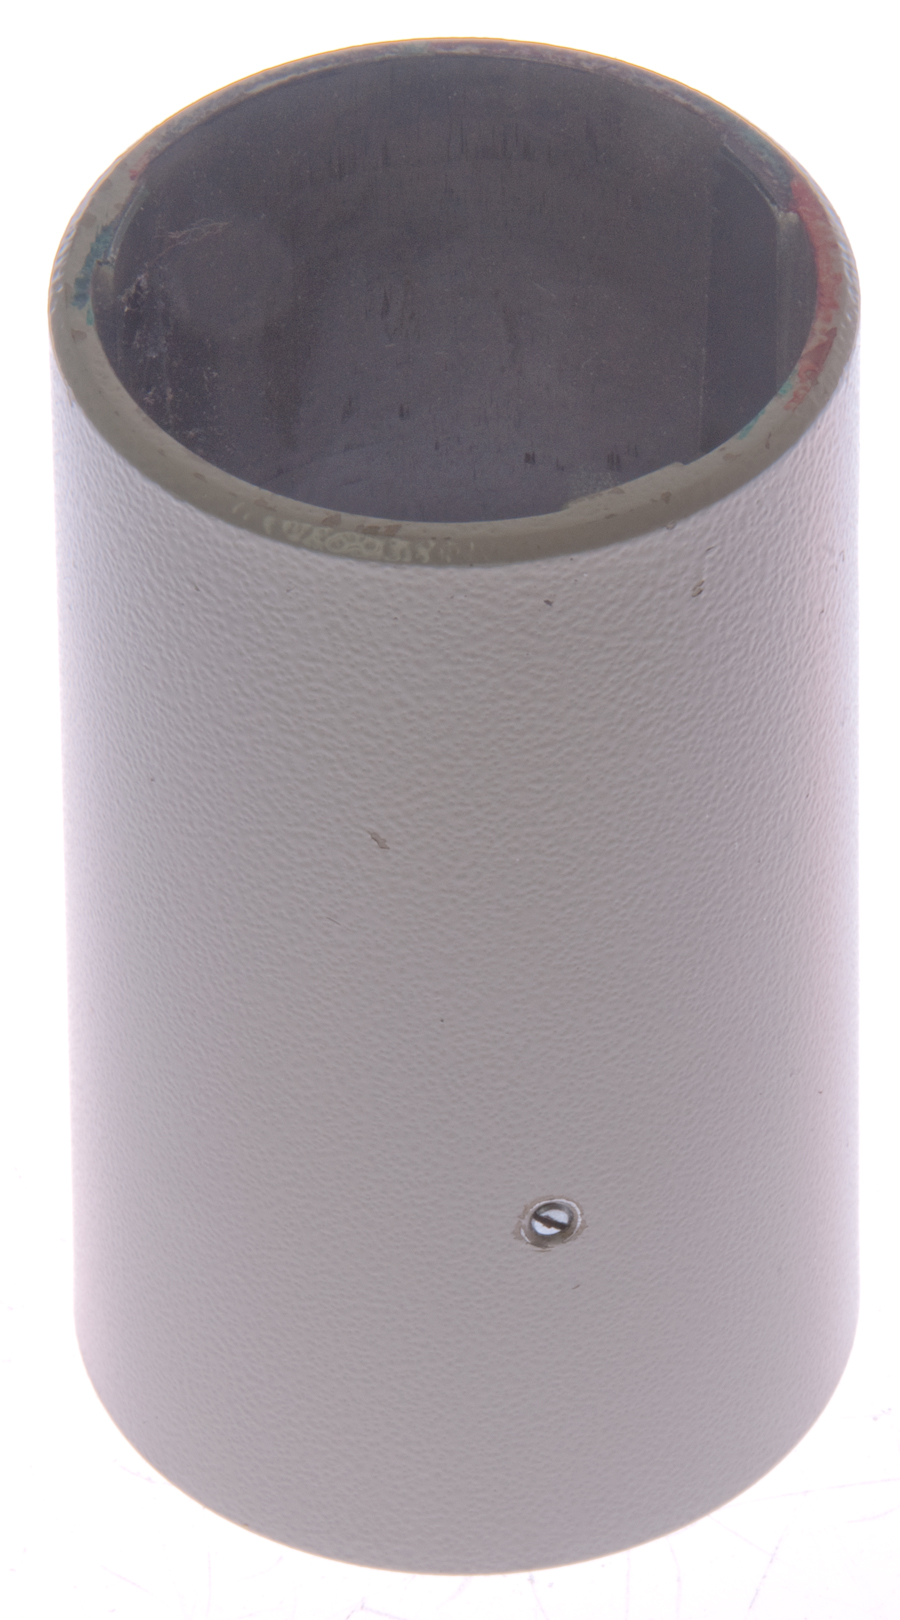
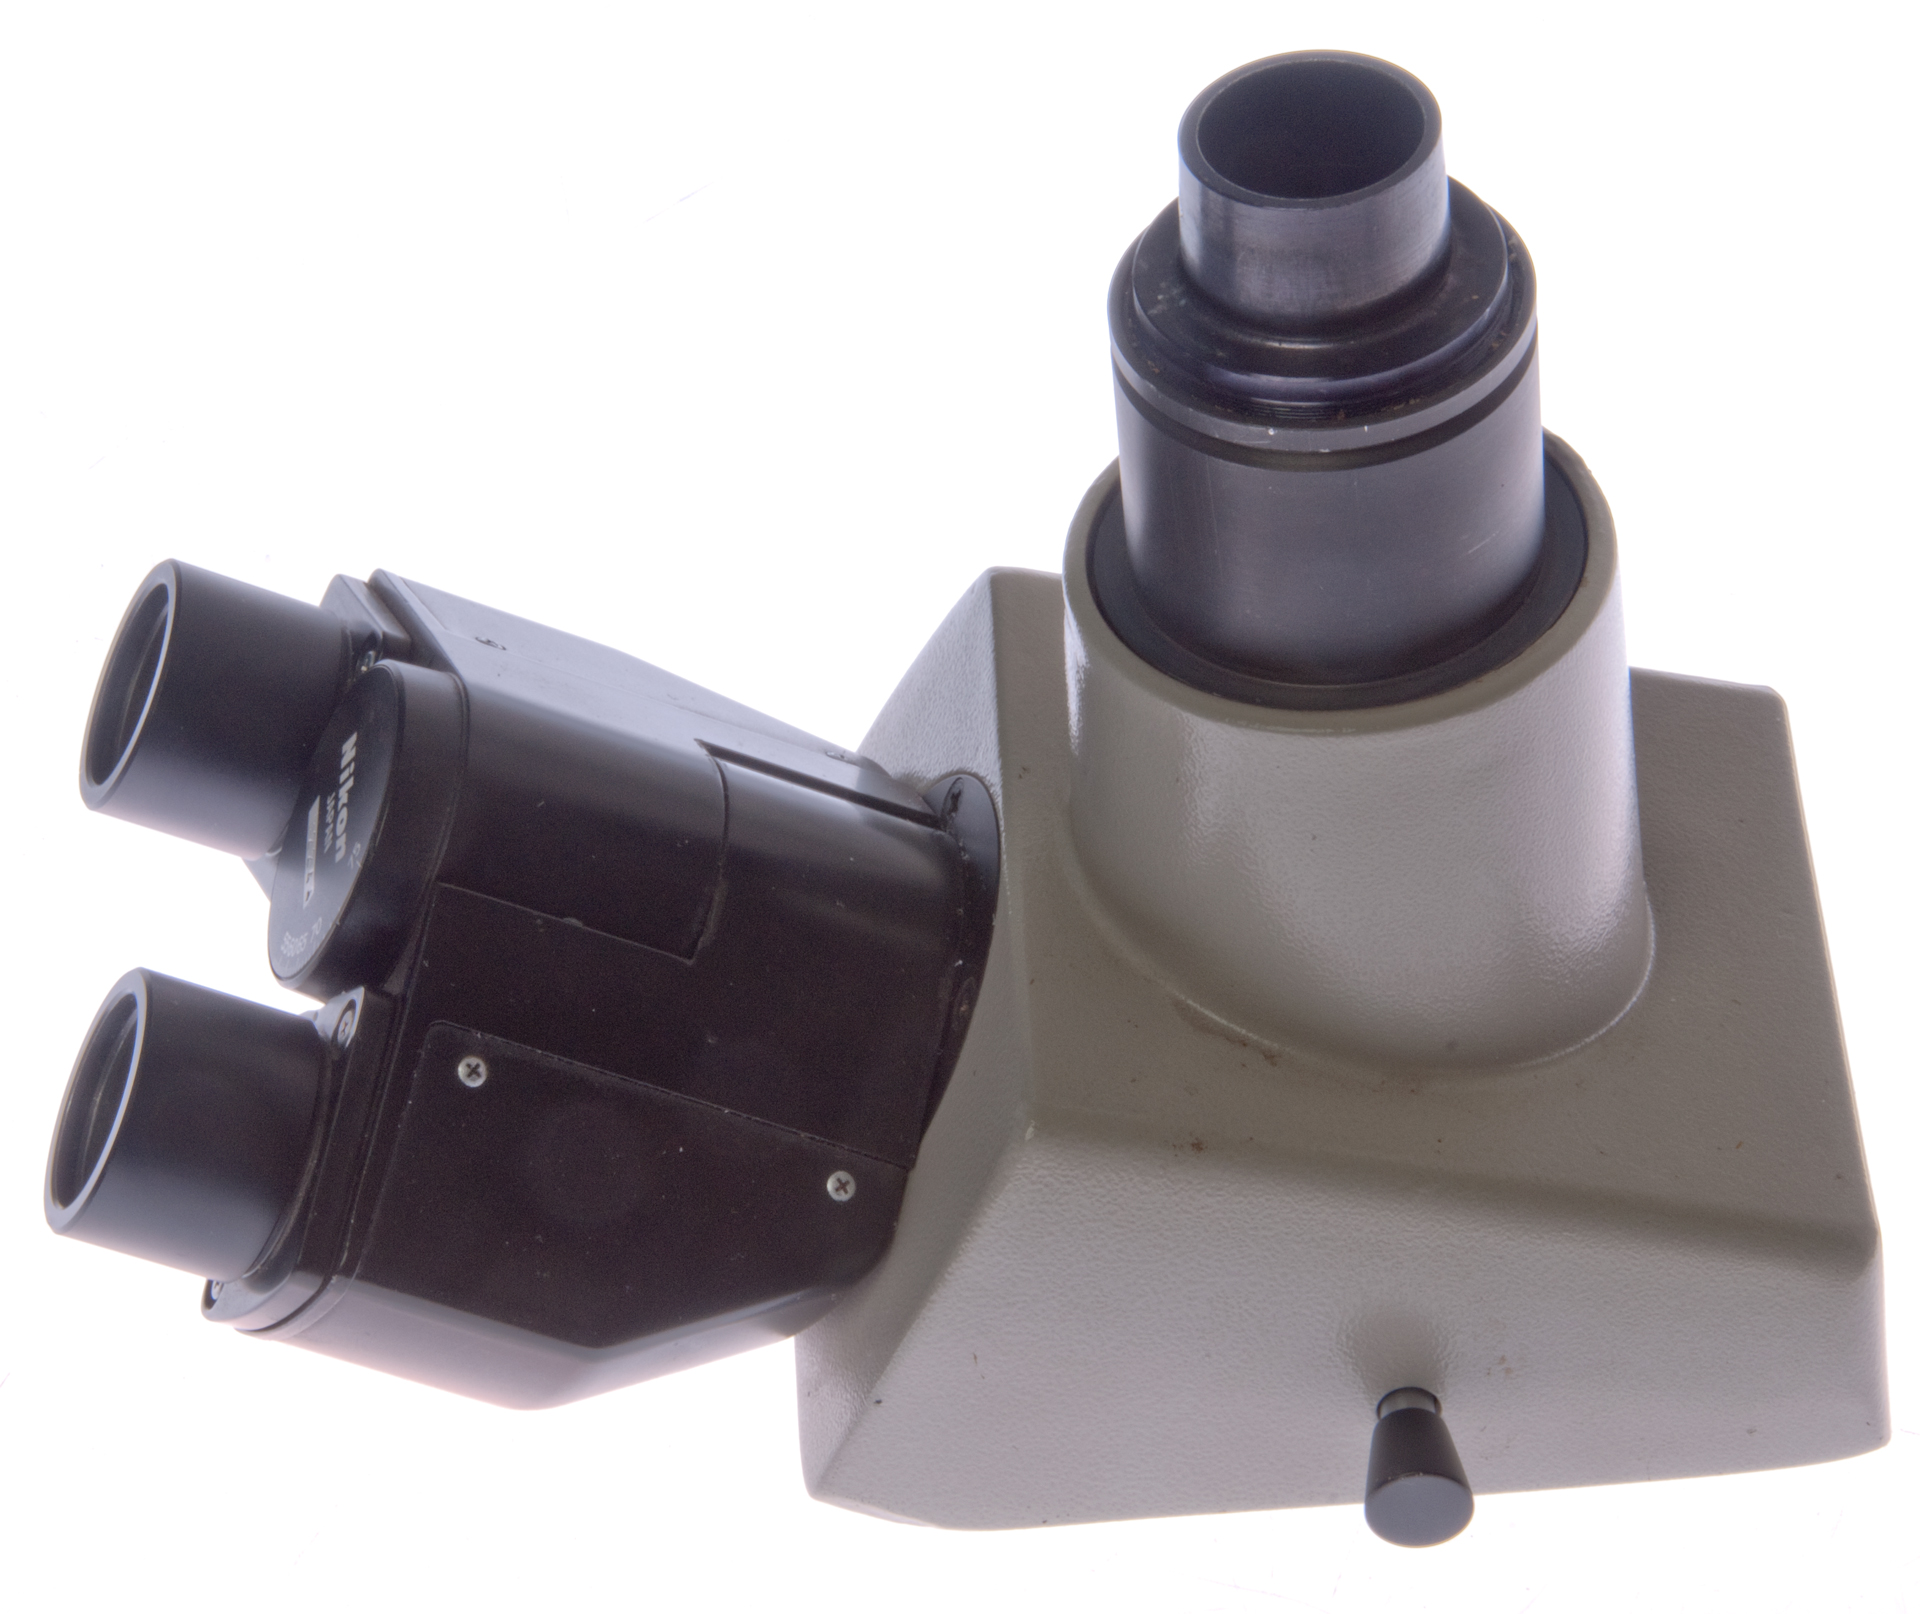
Eyepiece Tube (aka: Head)
The heads for most if not all the "phot" microscopes use a 48mm diameter mounting beveled flange that's captured by a thumb screw. When used on the Labophot microscope the eyepieces should by of the CF (Chrome Free) type. For all but the Ultra Wide head these will be the 23mm barrel diameter type.
Note: The Labophot and all the other equal age "phot" microscopes use a 160mm type head. Some of the newer designs of "phot" microscopes use an infinity head and maybe with one exception all the current Eclipse microscopes use an infinity head.
A binocular head has two eyepieces but does not provide stereo viewing because there is only one objective lens.
A Stereo microscope also has a binocular head and has a pair binocular objectives or a Common Main Objective (CMO).
It's not uncommon on eBay to see a "stereo" microscope that's really a compound microscope with a binocular head.
To tell which head you have:
- Remove head from microscope and install eyepieces.
- If a trinocular head push in the selection control to 100% to eyepieces.
- Hold head so bottom is pointing to something that's in the light and far away.
- If it's an infinity head you will see an image like in a telescope. If a fixed tube length head everything will be blurry.
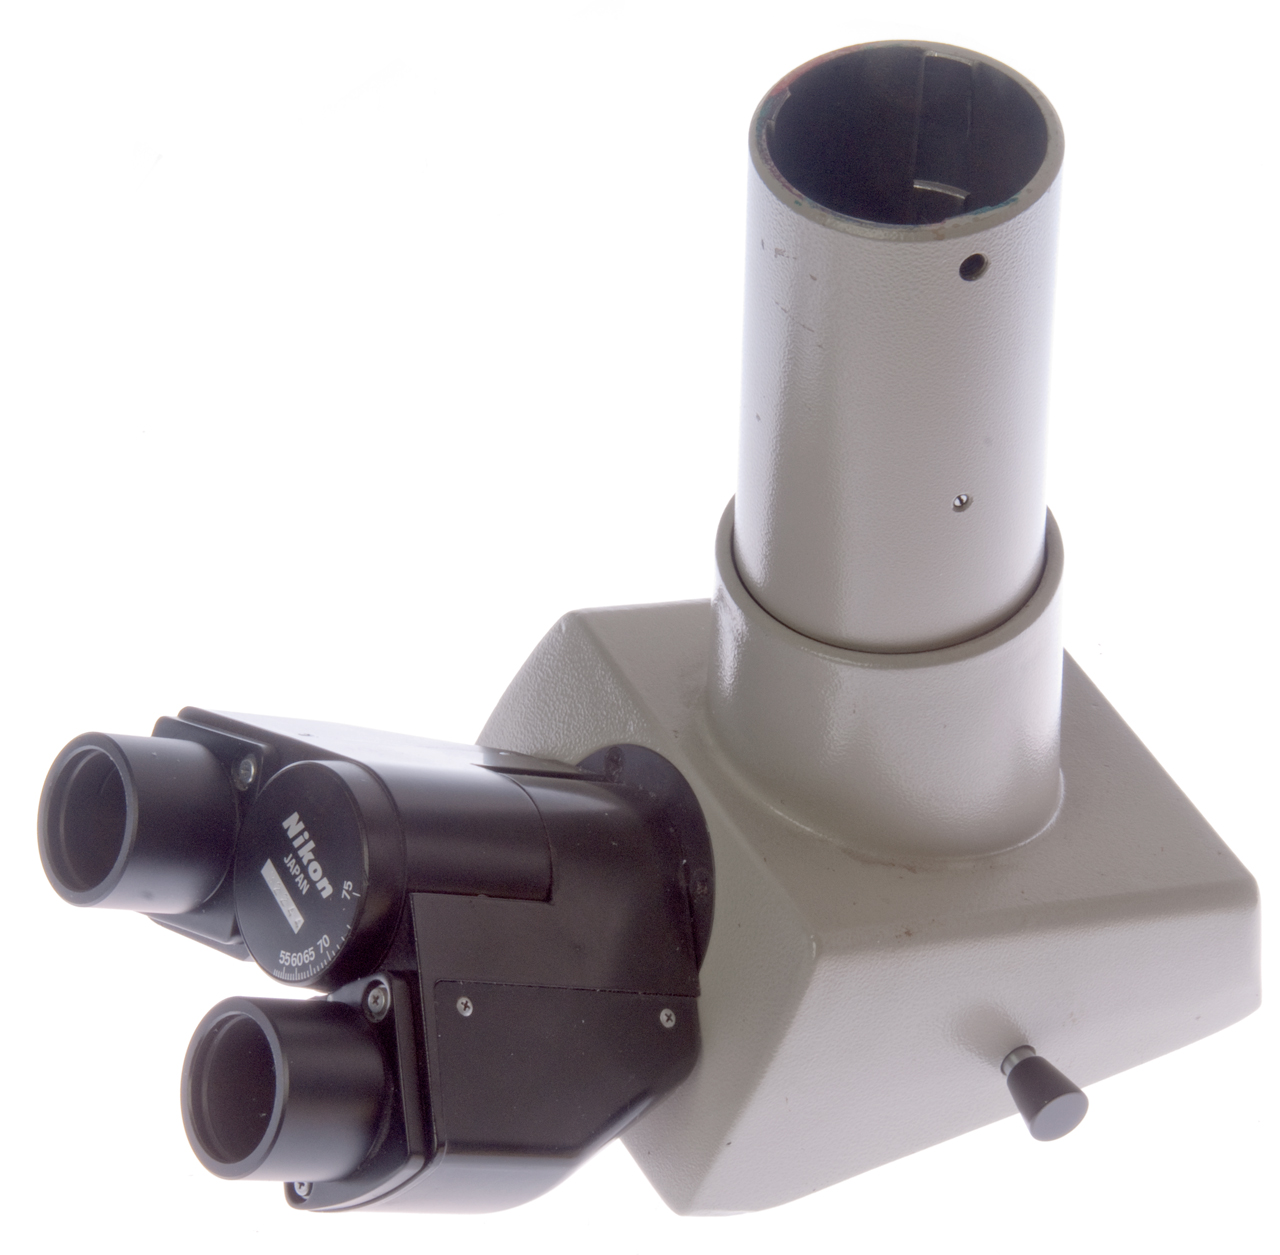
Monocular
This head (eyepiece tube) came from the introductory Alfaphot microscope so was designed to have minimal cost. At first it looked like it's too small to fit the Labophot, but the dovetail is the same as on the other heads.
Mono Fig 1
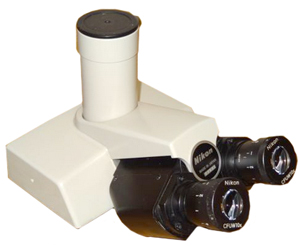
Mono Fig 2 Teaching, monocular, Type T Trinocular heads
Mounted on the Labophot (it looks very small)
Optically it works as well as any of the binocular heads except
it's for just one eye.
Binocular
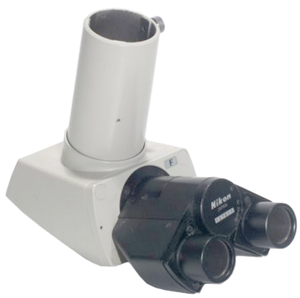
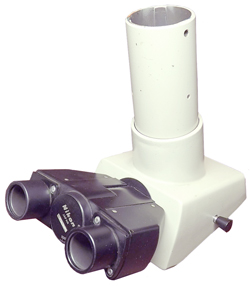
This is the normal eyepiece tube (head) shipped with a base microscope.
Note: The introductory/teaching microscopes use a linear slider for setting interplanetary distance, not the more expensive Siedentoph type.
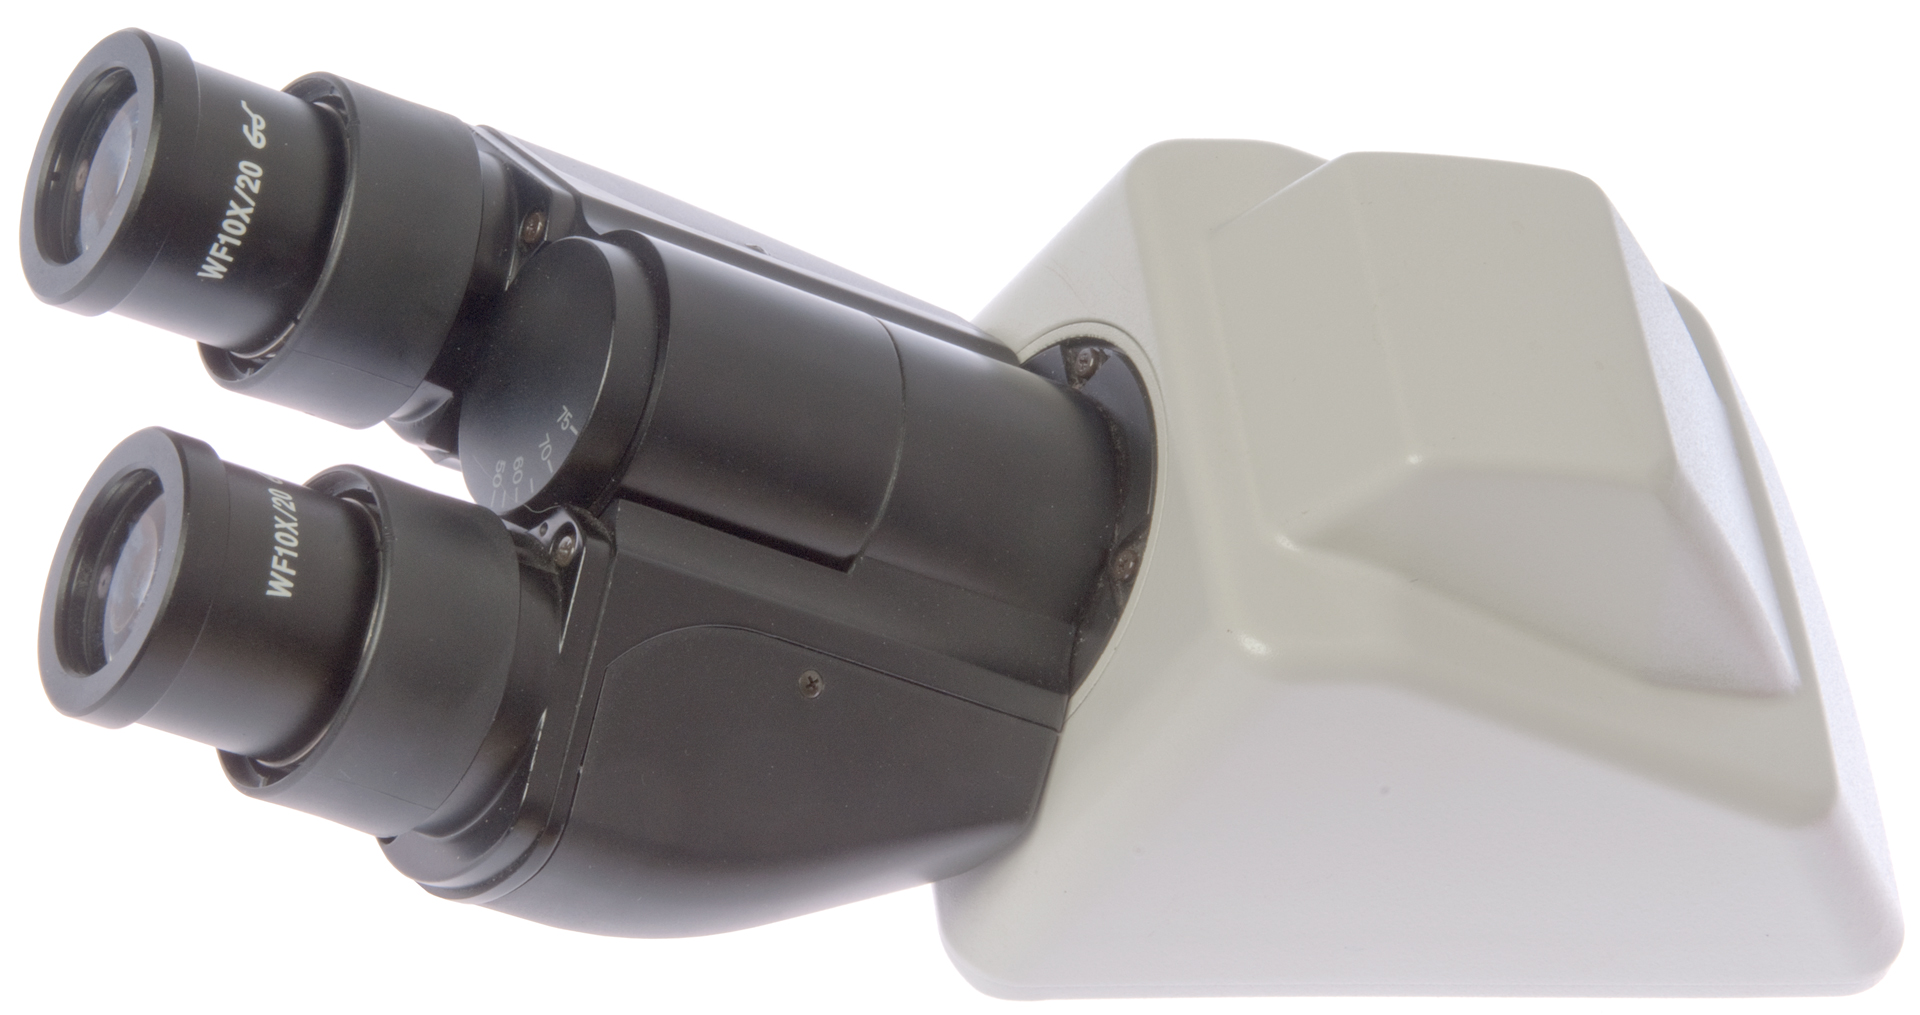
Eclipse Binocular
With Nikon CFI 10x/20 eyepiece (30mm tube)
This is an infinity type head that will not work on a Labophot under normal conditions. The two main reasons for this are:
1) The dovetail is 52mm O.D. whereas the Labophot (and Nikon S series microscopes) use a 49mm O.D. dovetail. I tried the head on the Labophot, but as expected the dovetail is too big to fit. A simple adapter can fix this.
2) The head contains a Tube Lens for the infinity optics. This means this head will not make an image with objectives that are designed for tube lengths of 160mm, 210mm &etc.
It turns out that this particular head requires 30mm eyepieces. The CFI eyepieces seem to have either a Field Number of 20 or 22, both of which require a 30mm eyepiece diameter. This appears to be the stock head for the Eclipse E200 and I'm sure other models.
To test for the infinity optics I took it outside and pointing the base at the distant mountains moved each eyepiece individually out a little to bring it into focus.
A pair of CFI 10x/20 eyepieces are on order (9 Sep 2014) to check out the focal distance difference.
Maybe the Eclipse heads have a different eyepiece seating distance than conventional fixed tube lens heads or this particular head is off a little or my eyes are off a little?
Just as a test, after adjusting the eyepieces so that they are focused at infinity (see August Köhler patent) I just set the head on the Labophot and used a
Nikon CF Plan 10x/0.30 ∞ / 0 EPI objective which has RMS threads so fits the Labophot. The microscope was already setup and focused on some pond water and it was also focused with the ∞ objective. Note that the distance between the objective and the head can be changed without changing the focus or other optical parameters.
When I tried looking at the nearby mountains just after installing the Nikon CFI 10x/20 eyepieces they were not in focus, but after unscrewing the focusing action on each eyepiece good focus was obtained. The overall length of the eyepiece varies from 47.8 mm to 57.0 mm, i.e. an adjustment range of about 10mm, +/and/- 5mm which is more than enough to get infinity focus.
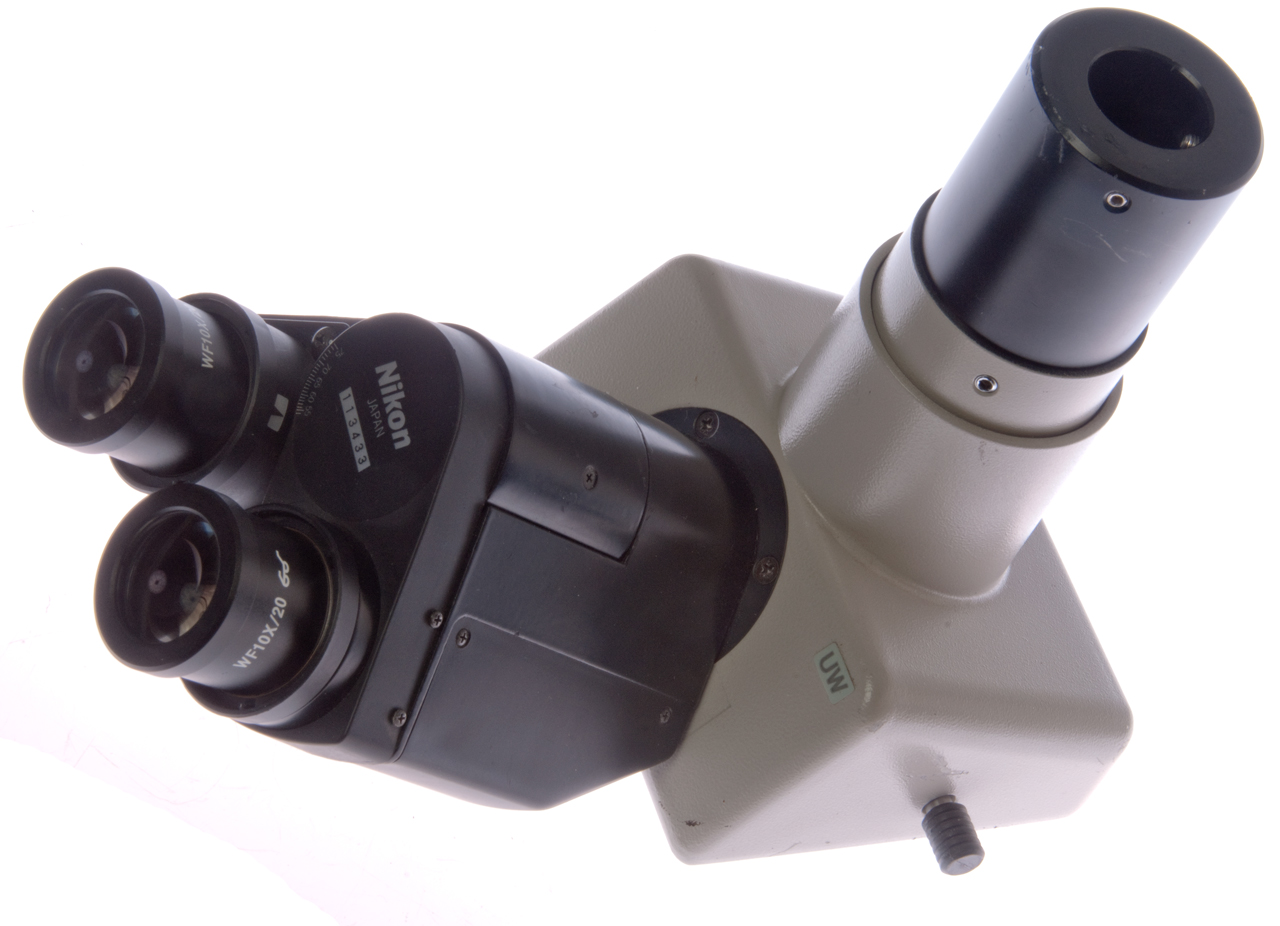
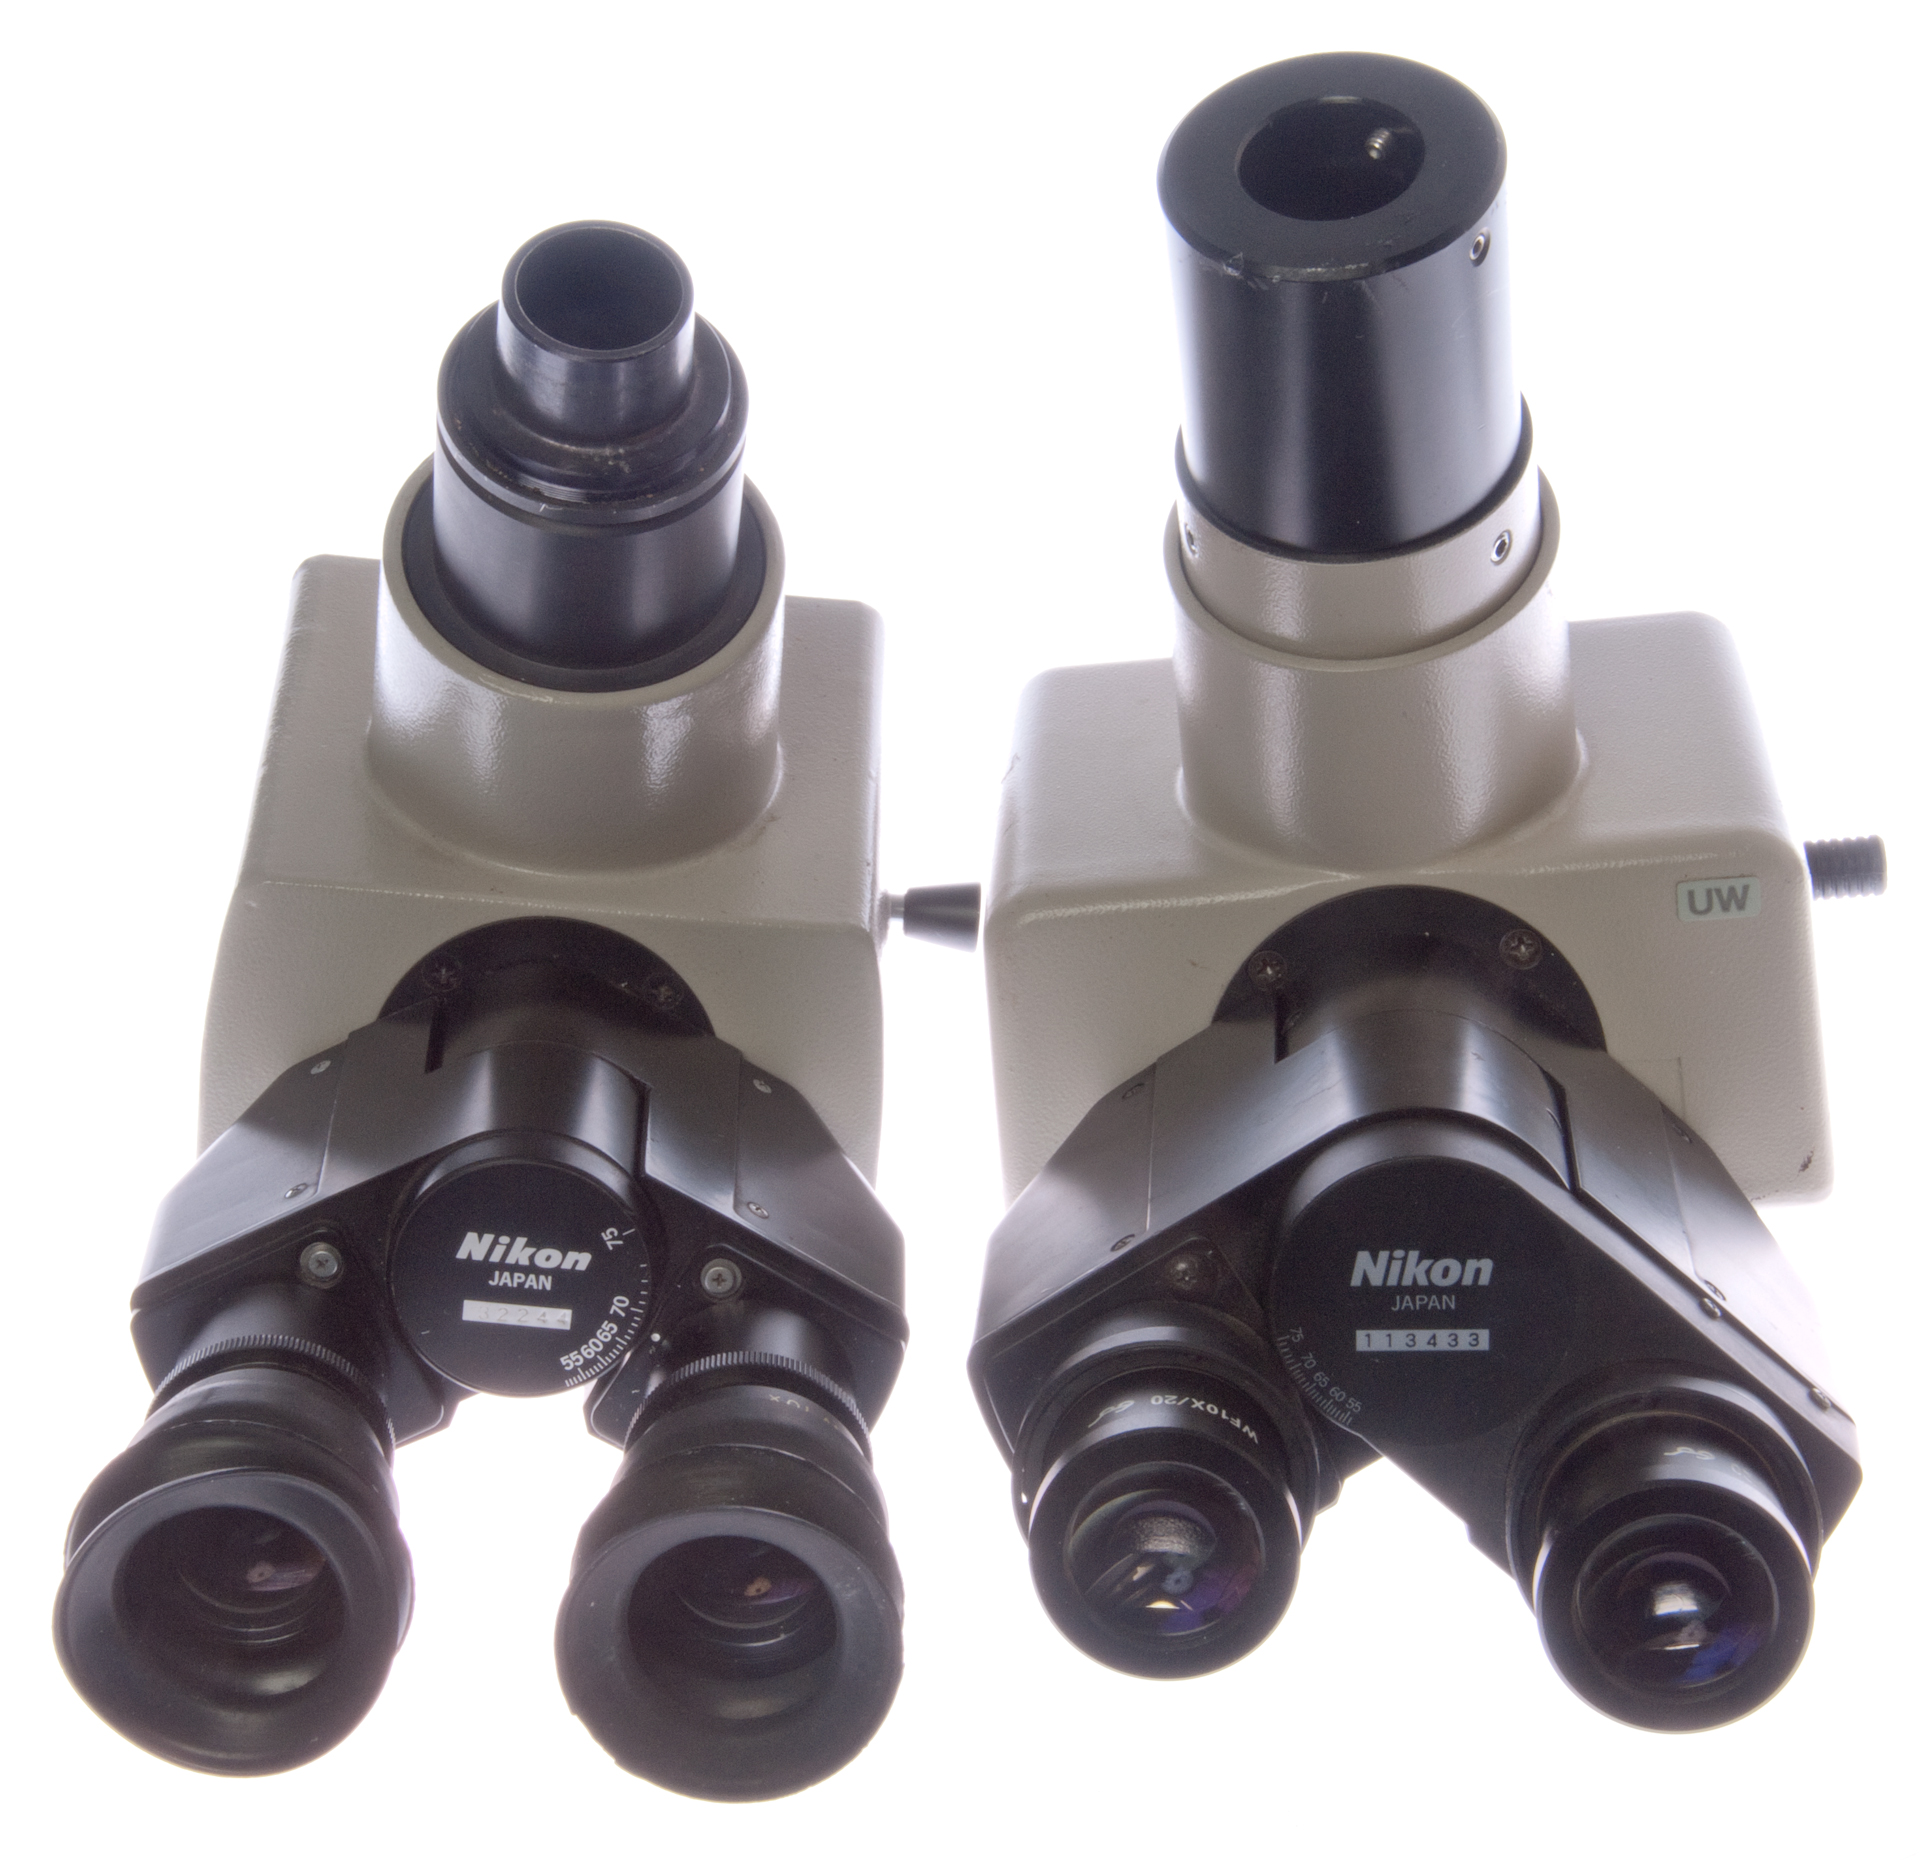
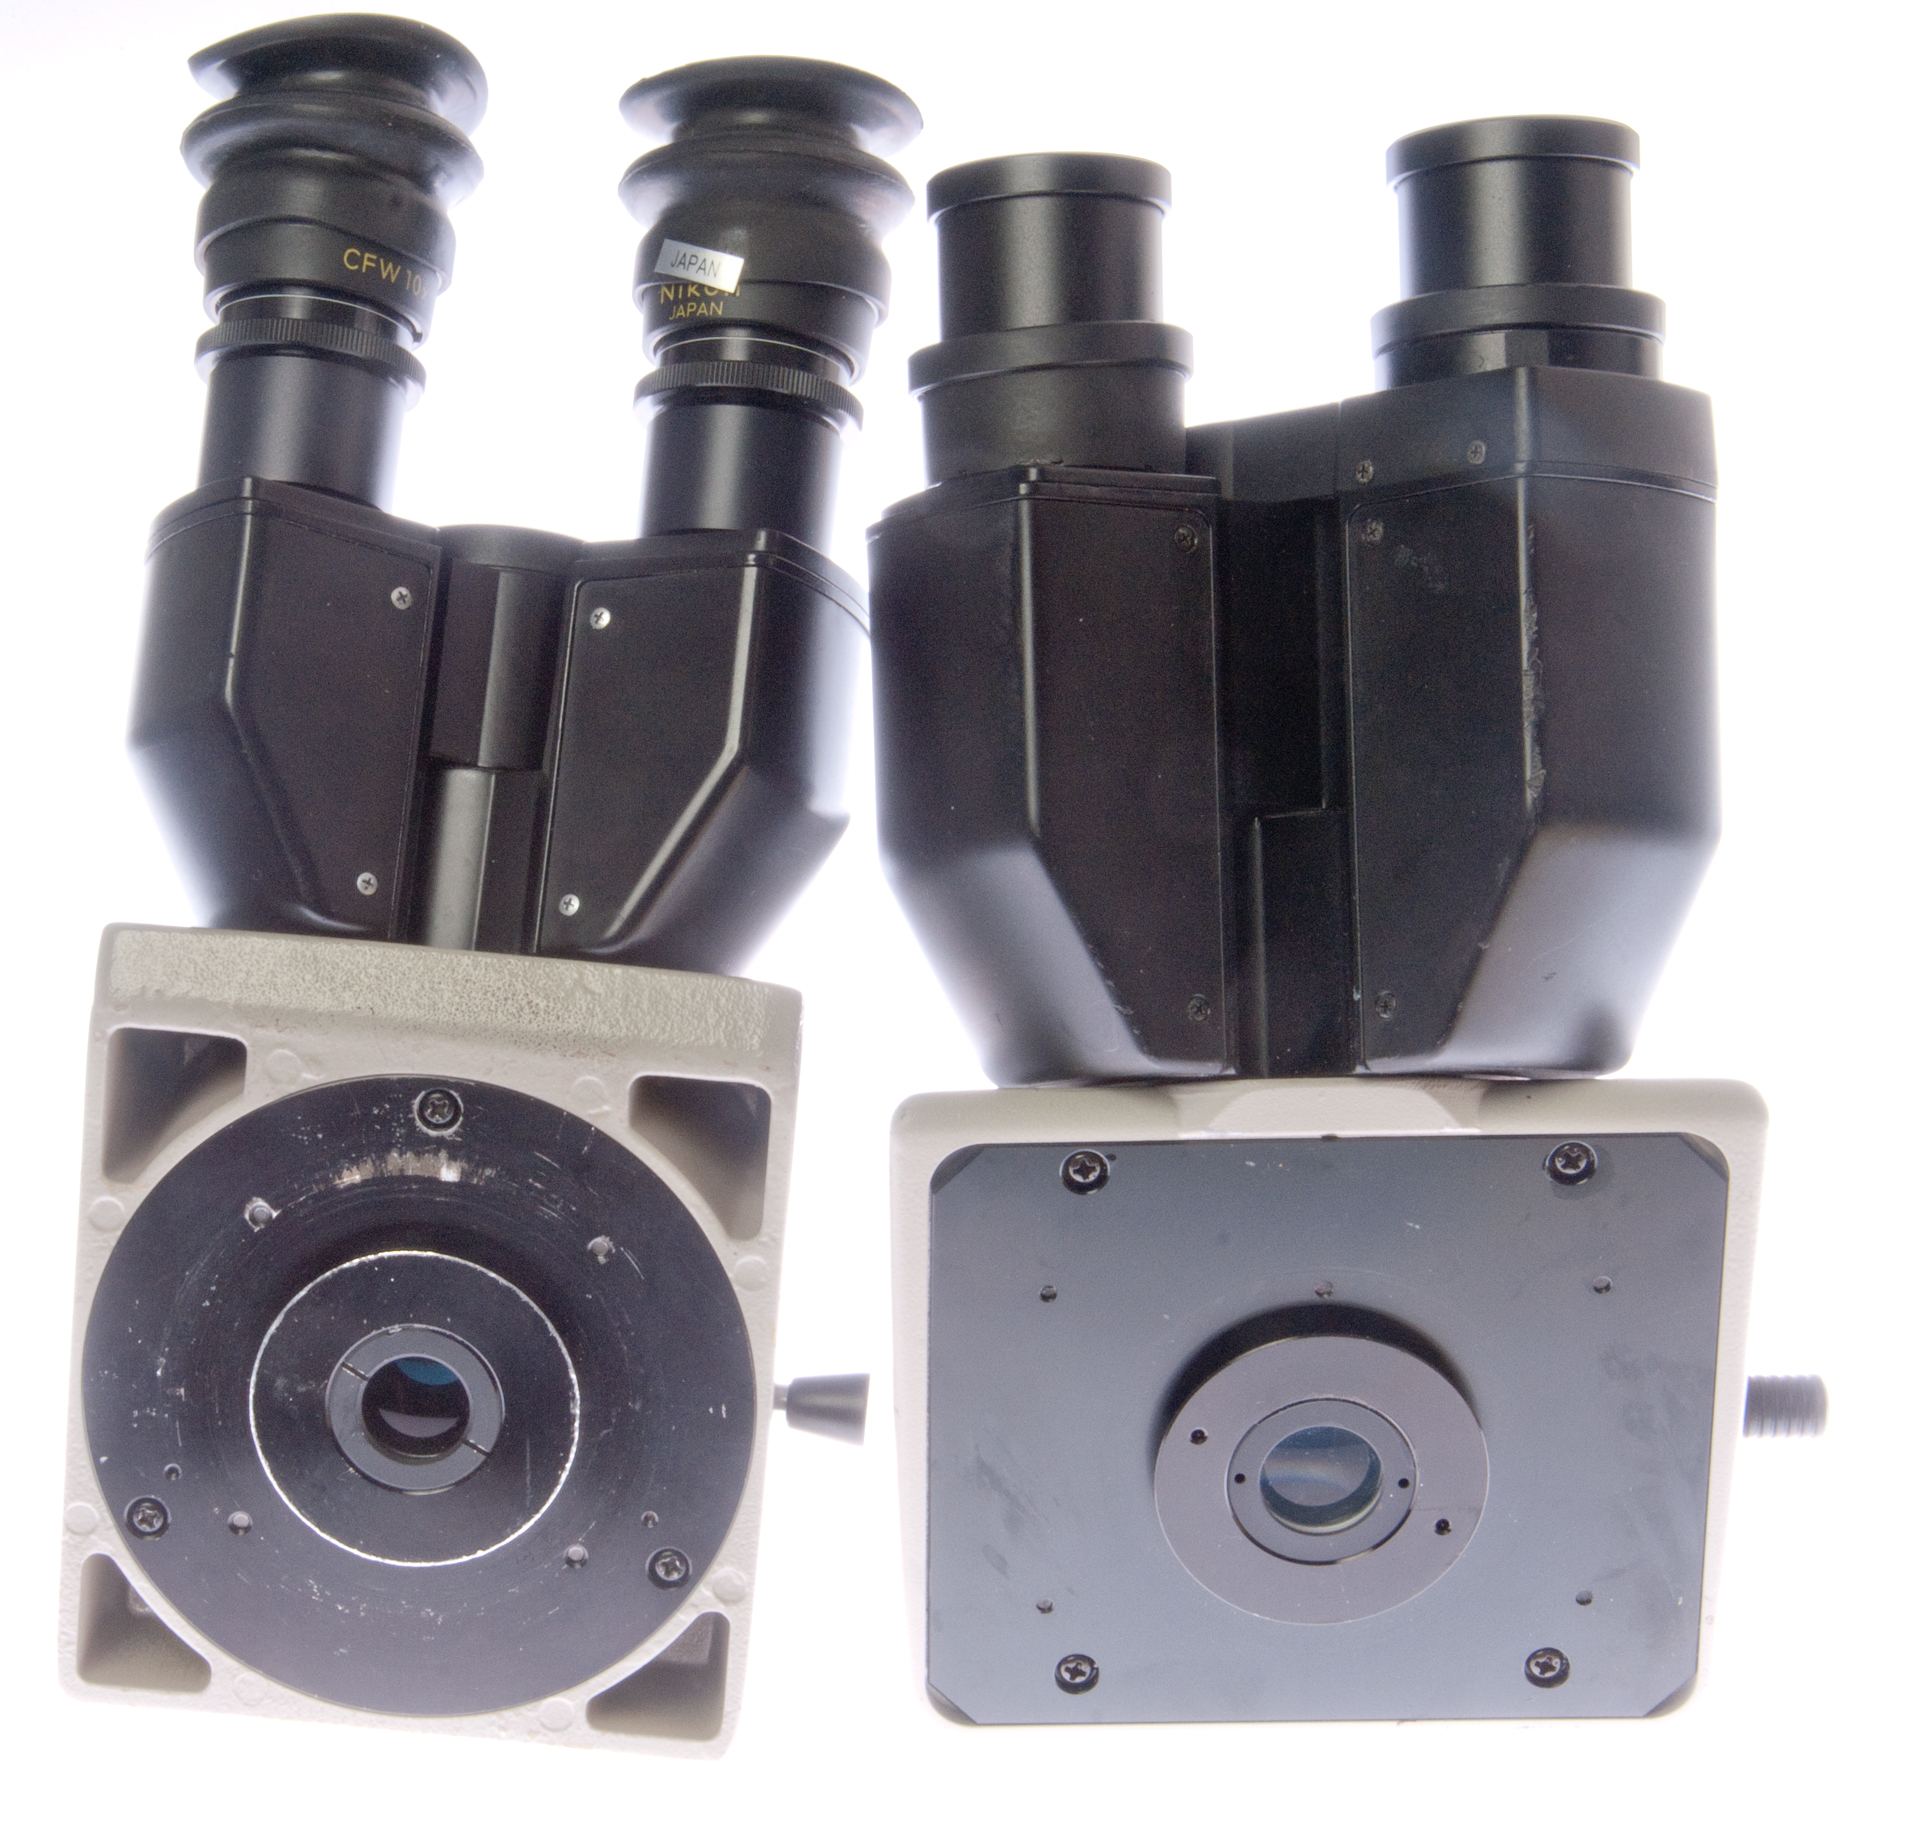
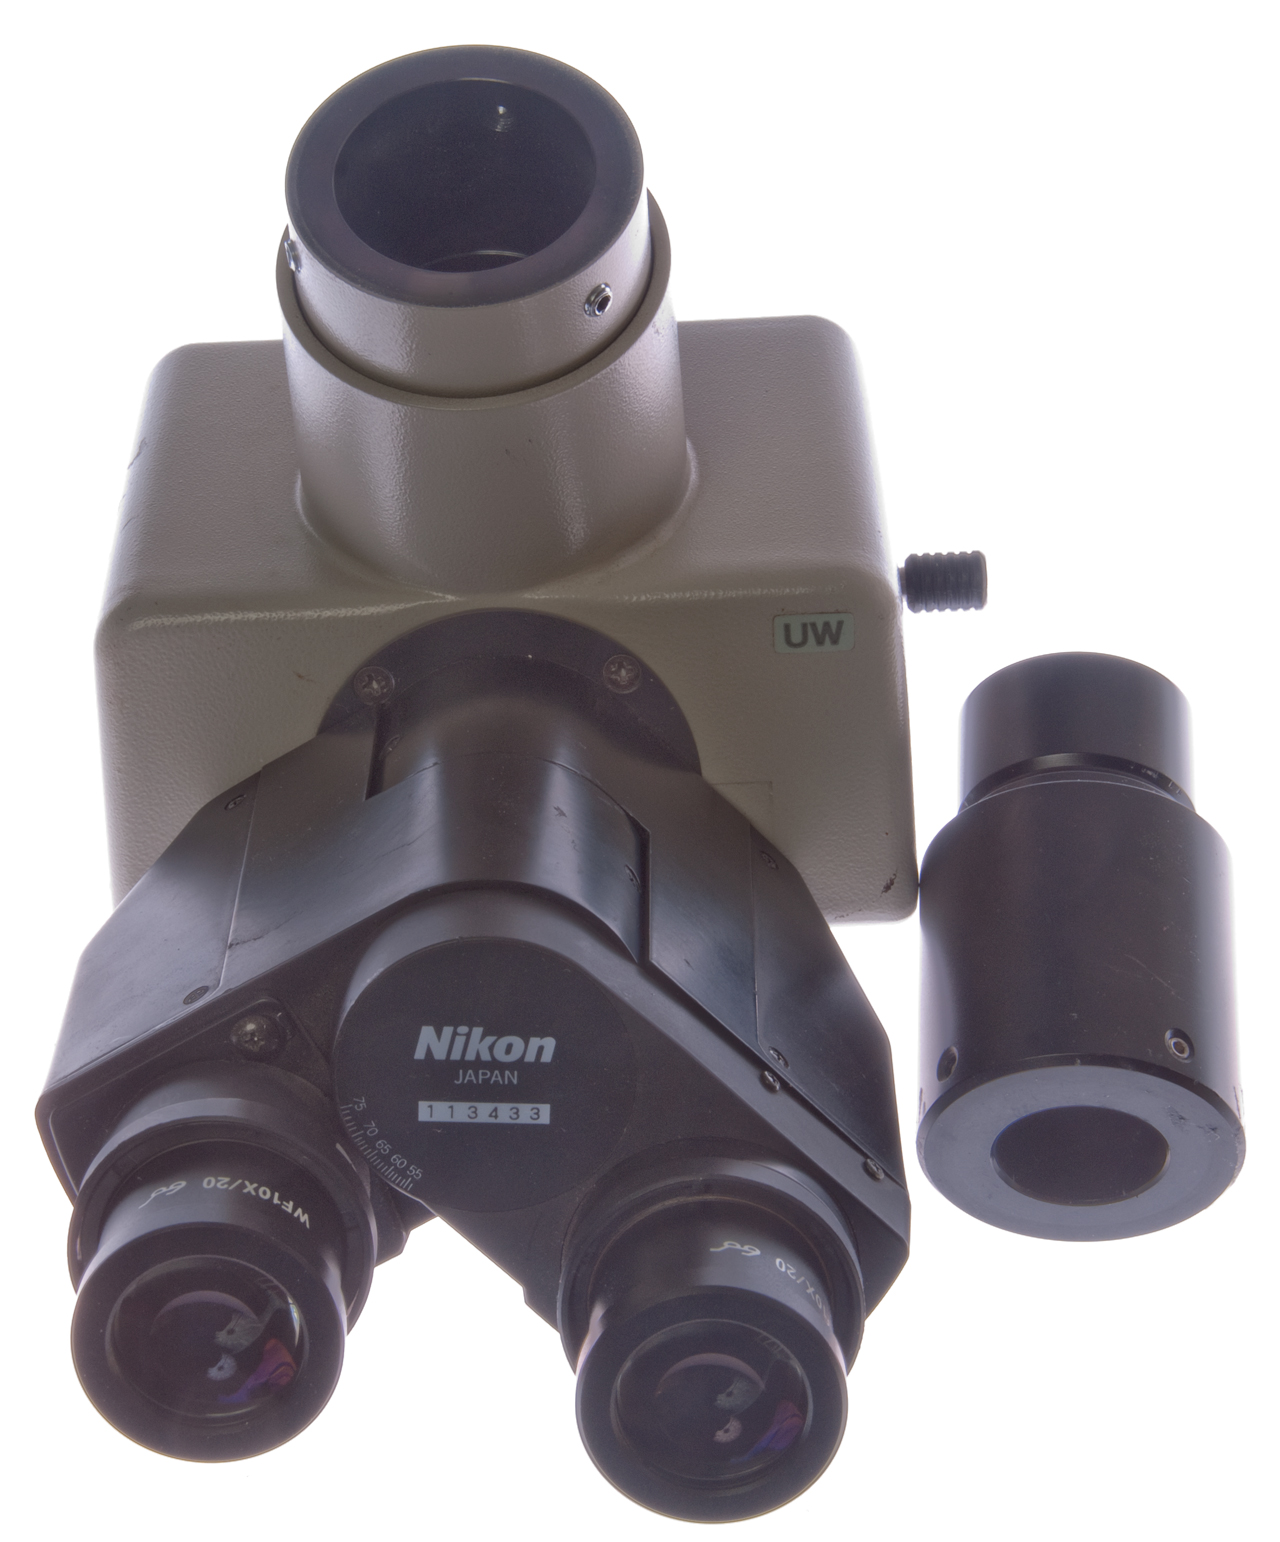
Ultra Wide (UW) Trinocular
Allows seeing twice the diameter (4x area) compared to normal binocular head.
Requires CFUW (or CFI type) 10x eyepieces which are 30mm diameter, not the common 23.2mm dia.This allows the Field Number (the size of the field stop diaphragm) to be 26.5 mm as opposed to the less than 20mm for regular 23mm eyepieces.
There may also be an ultra wide binocular head (i.e. without the camera port)?
This head has a slightly larger entrance optical diameter (18mm) compared to the stock trinocular head (16mm).
The camera port is the ISO 38mm compared to the 23.2mm port on the stock trinocular head.
Where is the image plane for this head
Answer: when the black 38mm to 23mm adapter is installed the image plane is 10mm down from the top,
just like any other 23mm microscope tube. That means it's also above the top of the tube
Like the other trinocular heads when the control is pressed in all the light goes to the eyepieces.
When the control is pulled out the light is split between the eyepieces and the camera port.
When the Amscope fixed focus 30mm eyepieces are used the camera and eyepieces are not parafocal.
But when the Nikon CFI 10x/20 30mm focusing eyepieces are used the camera and eyepieces ALMOST focus at the same stage height.
It would take a 30mm eyepiece extension to make it parafocal.
This also may mean that when these eyepieces are used with the Labophot type T trinocular head using the following procedure the eyepieces and camera will be parafocal:
1. focus camera using live view and a few presses of the magnifying glass,
2. focus left eyepiece (my left eye is the stronger one)
3. focus right eyepiece.
It turns out that even when the CFI eyepieces are screwed all the way out the camera focus is sill off a little,
What's needed is a 30mm eyepiece extension tube that would hold them so that the tip of the eyepiece was about 5mm out from the tube.
Fig UW 0
Fig UW 1 w/o eyepeices
Fig UW 2
Fig UW 3 w/Amscope eyepieces
Fig UW 4 compare standard trinocular head and UW head
23.2mm camera port vs. 25.3mm at top of black cylinder.
The reason for the slightly larger hole is to allow the use of
a couple of pinch screws to anchor the 23mm device.
Fig UW 5 compare standard trinocular head and UW head
16mm entrance vs. 18mm entrance on UW head.
Fig UW 6 w/Black 38mm to 23 mm adapter removed.
The adapter contains no optics.
This may be a 38mm ISO camera port.
T-mount adapter from eBay seller micro_crystal
The black adapter is 53.2mm from the head flange to the
top of the adapter. The objective focal plane is down 10mm,
so the focal plane is 43.2mm above the head, but that's a few mm
too short to allow focusing directly on my camera's imaging chip.
But would work for the new mirrorless cameras.
Fig UW 7 UW head installed on Labophot w/ 23mm eyepiece in
camera tube (it's close to focus).
ISO Camera Port
This is a 1-1/2" (38mm) port rather than the older 20.2mm eyepiece port. There are a number of commercial camera adapters that include optics that are very expensive. There are also adapters to the common C-Mount and T-Mount.
T-Mount Adapter & C-Mount Adapter
The T-mount adapter adds 3mm flange to flange. 33mm ID
The C-mount adapter adds 12mm flange to flange. 21mm ID
These adapters add enough length so that you can not get parafocal operation between the eyepieces and camera.
This would be desirable since there's no optics in these.
You can easily refocus the camera when using these, but then the eyepieces are out of focus.
Dual View (Teaching)
This head can be used with another head added on top of it or with the plastic cover on top as a stand alone head. Normally the added head would be a regular binocular head but could be one of the trinocular heads. It has a joystick that moves a white arrow type pointer so the student's attention can be directed to a specific point. This pointed needs source of light. It uses standard 23mm eyepieces, and for the Labphot these should be CF types. When a second head is installed directly on this head the teacher and student are in a face-to-face position. There are also "bridges" that allow the teacher and student(s) to be sitting side-by-side and the number of students can be up to 5 (?). The inter-pupil distance can be adjusted and there's a scale marked from 51 to 75mm.
This head may need collimation (Wiki).
This is a Siedentopf binocular head i.e. the inter-pupil distance is adjusted by moving the eyepieces about a central axis in an arc rather than by moving along a slide directly in a straight line (that's called a Jentsch and the adjustment changes the tube length and so requires refocusing.
The pointer illuminator uses the THN transformer. It's not clear what the actual lamp looks like to fit the input port on this head.
Microscope Solutions has an LED replacement lamp. But I don't have the lamp holder or power supply.
Teaching Head Fig 1
Teaching Head Fig 4
Teaching Head Fig 7
Teaching Head Fig 3
Teaching Head Fig 6
Teaching Head Fig 2
Teaching Head Fig 5
Trinocular type-F
Selection of view or camera is by rotating head. There is no push/pull control.
When the head is turned it switches to the camera port. There is no glass in the camera port path.
This may imply that the camera port and the visual port are not parafocal.
Trinocular type-T
Selection of view or camera is by means of a push to view/pull for camera lever on the right side.
After loosening the three small (-) screws the support tube can be removed revealing a standard 23mm eyepiece tube.
So, this is not a 38mm ISO camera port.
When the lever pulled out to select the camera port there is glass in the camera optical path. But the camera should be in focus when the visual image is in focus.
So far this has not worked for me, but it may depend on what camera adapter is used.
eBay photo
Overall
bottom
top control pushed in (eyepiece viewing only)
top control pulled out (camera & viewing)
Three (-) screws to remove outer support tube
Now Nikon to microscope eyepiece adapter can be used
With Nikon D60 camera so show the idea
Stack with:
Nikon D60 camera
Nikon to 23mm microscope adapter
Type-T trinocular head (support tube removed)
Teaching head
Vertical Illuminator
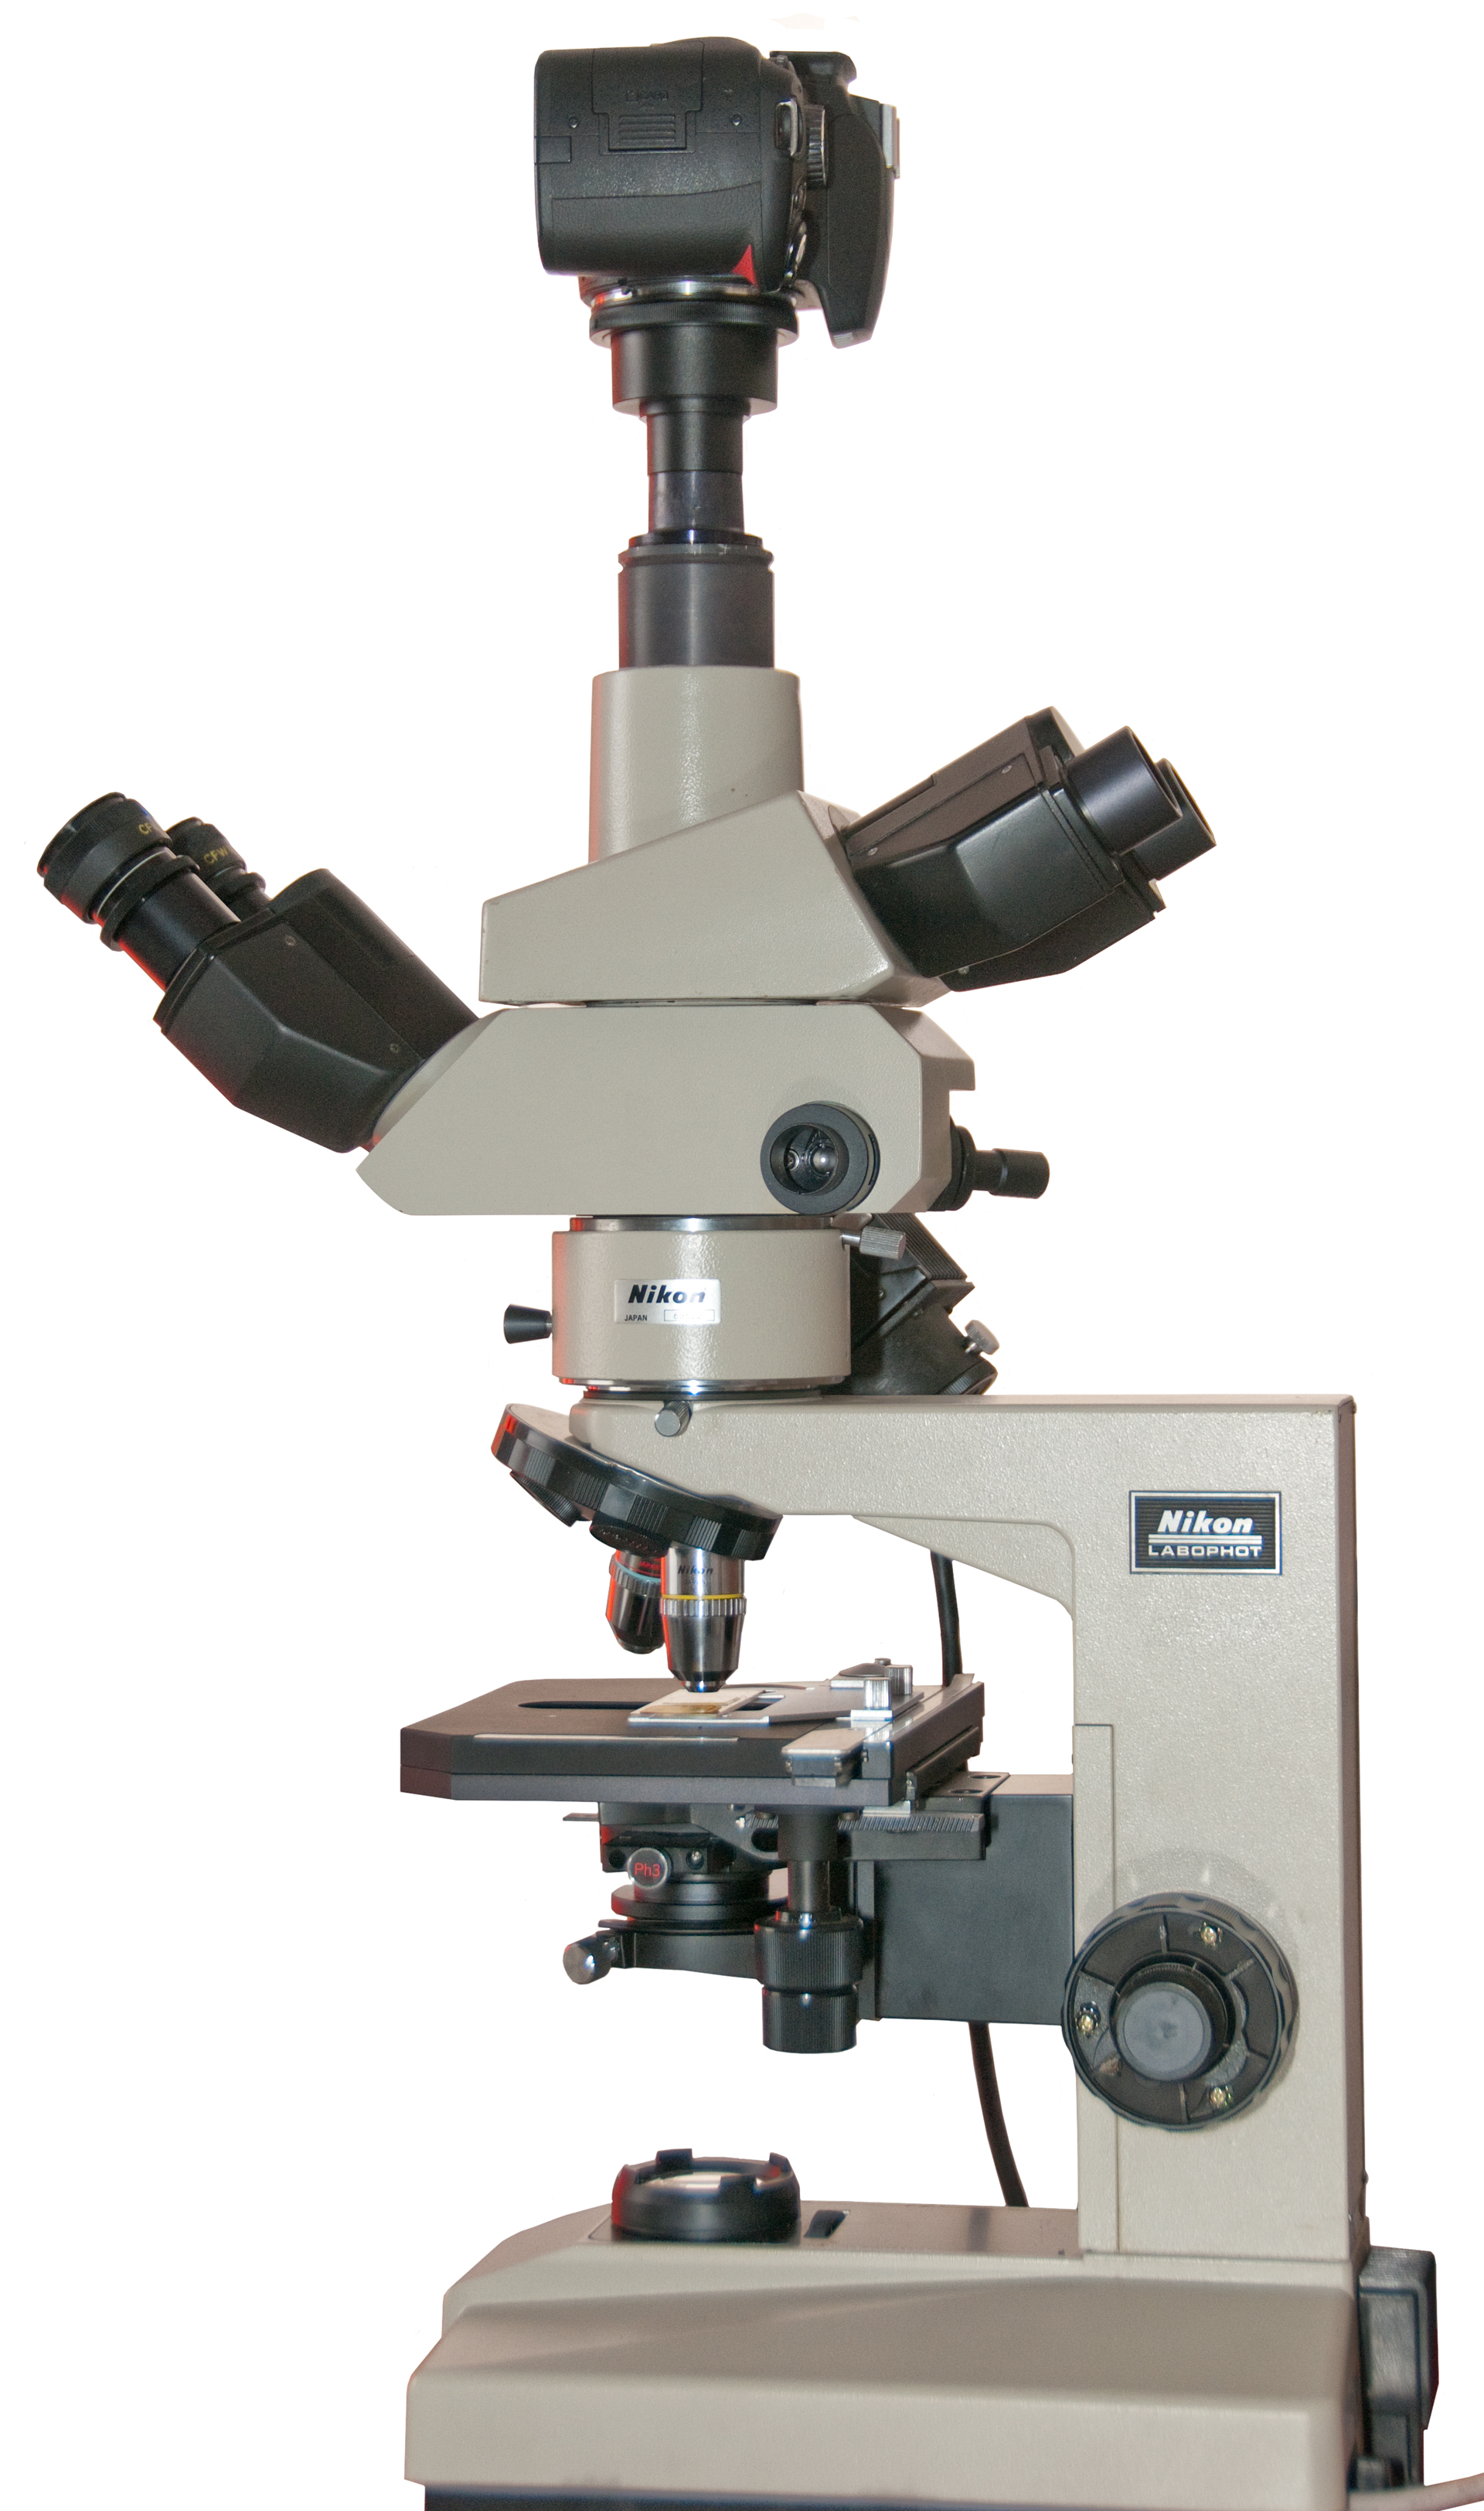
Labophot microscope
Trinocular head and UFX-IIA film camera adapter
When installing a new 0.5x camera adapter which had the O-ring installed (the prior camera adapters had a groove for an O-ring but it wasn't installed) I needed to apply a little
pressure and push down to seat the adapter, but in that process discovered that the trinocular camera tube could be unscrewed from the head.
Camera tube removed, control pushed in.
Camera tube removed, control pulled out.
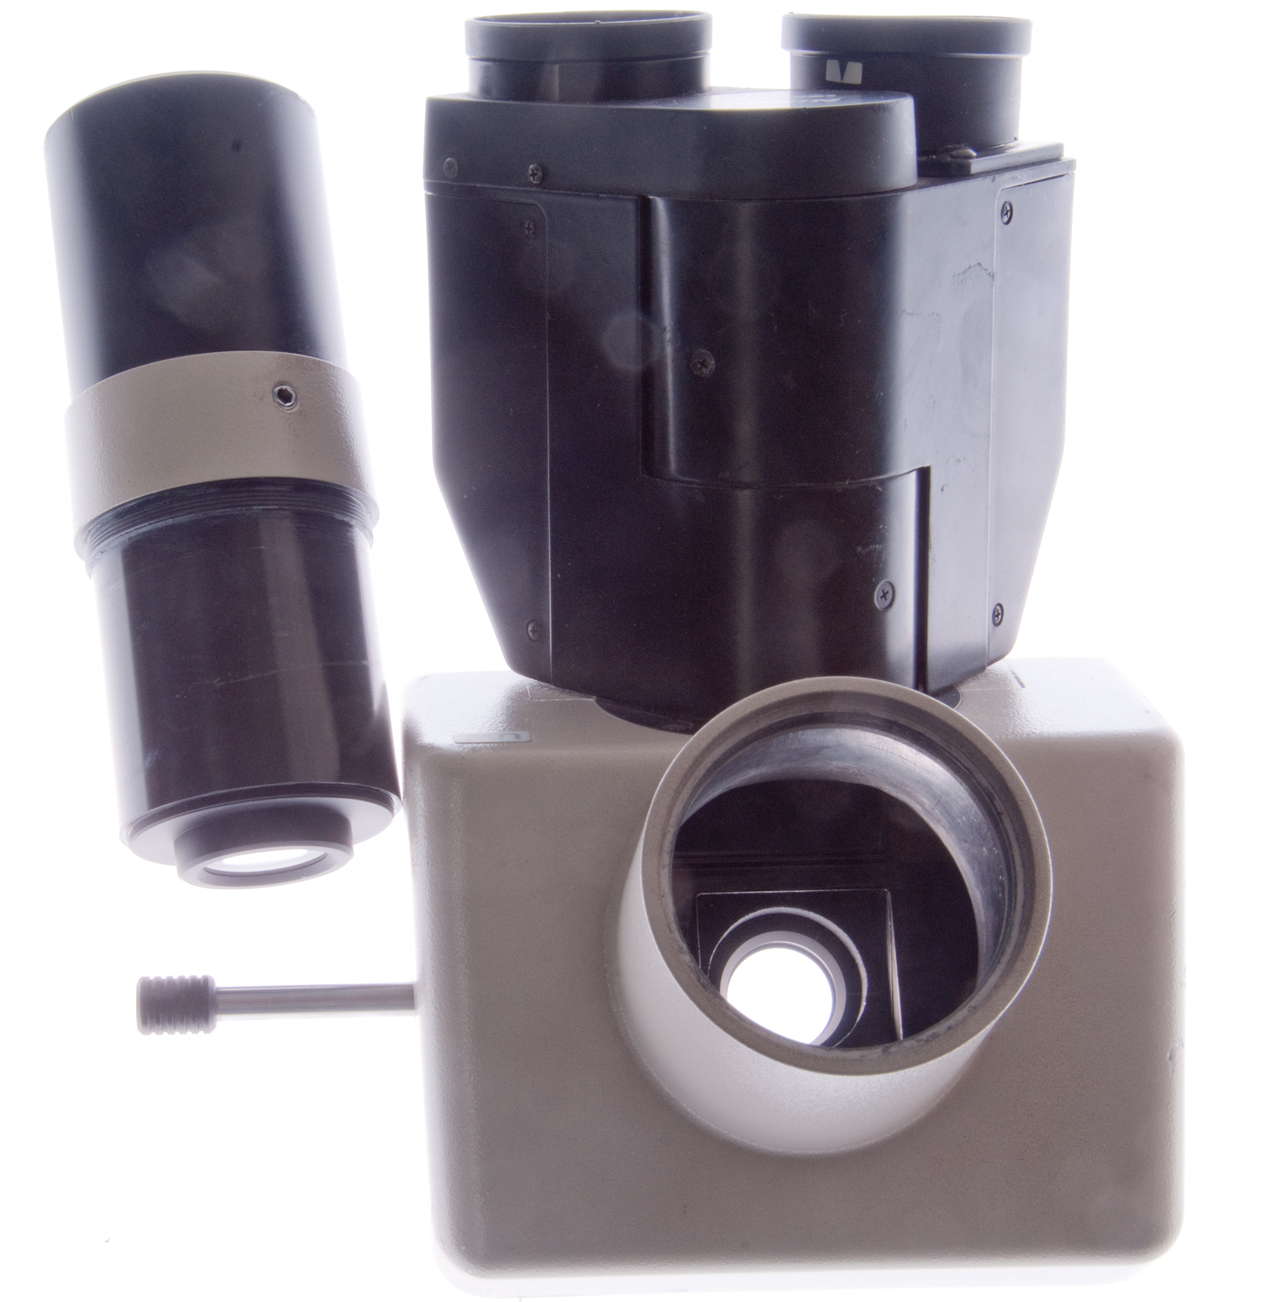
Camera tube.
Lens unscrewed from camera tube.
There are two lenses in the trinocular head camera light path.
One on the bottom of the head, see above, and one on the bottom of the camera tube.
I wonder if it's possible to convert this from a "T" head to the "T2" head used on the Epiphot 200 which is an infinity head?
Let me know.
Combined binocular head and vertical illuminator
This might be used for metallurgical work or wafer inspection like an Optiphot-66 or -88.
Eyepieces (Wiki)
The Labophot optical system requires that both the eyepieces and objectives are Chrome Free (CF) types.
They have provision for a 21x1.5mm reticle to be inserted. One of these is the "M" used to outline various camera film frames.
One of the CF 10x eyepieces has a measurement reticle fitted.
To access it you unscrew the knurled ring at the lower tip.
The eyepiece acts just like a magnifying glass (Wiki). It's subject is the real image from the objective that's 10mm below the top of the tube.
From the bookMirrors, Prisms and Lenses by Southhallis the equation for the magnification of an eyepiece:
Mag = 250mm * [(1/FL) + (1/250mm)] See Lens EquationsFL = 250mm / (M-1)
So here are some common focal lengths for eyepieces:
Power
FL mm
5
62.5
10
27.777
15
17.857
Nikon web page about eyepieces
Viewing 20.3 mm Tube (23.16mm dia EP)
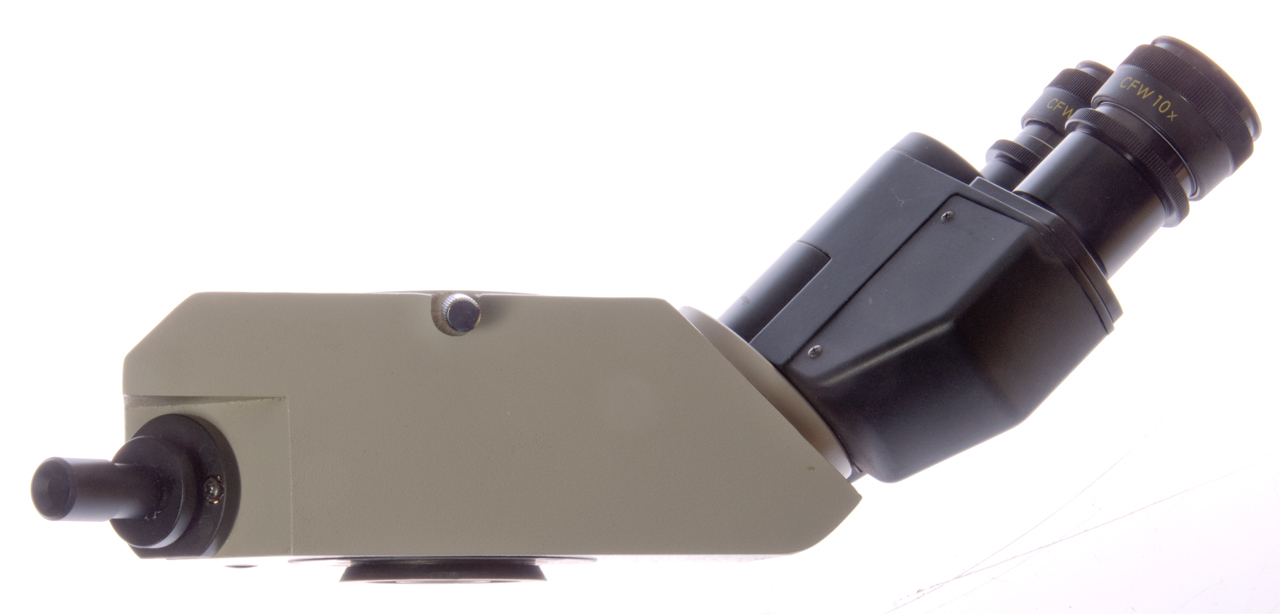
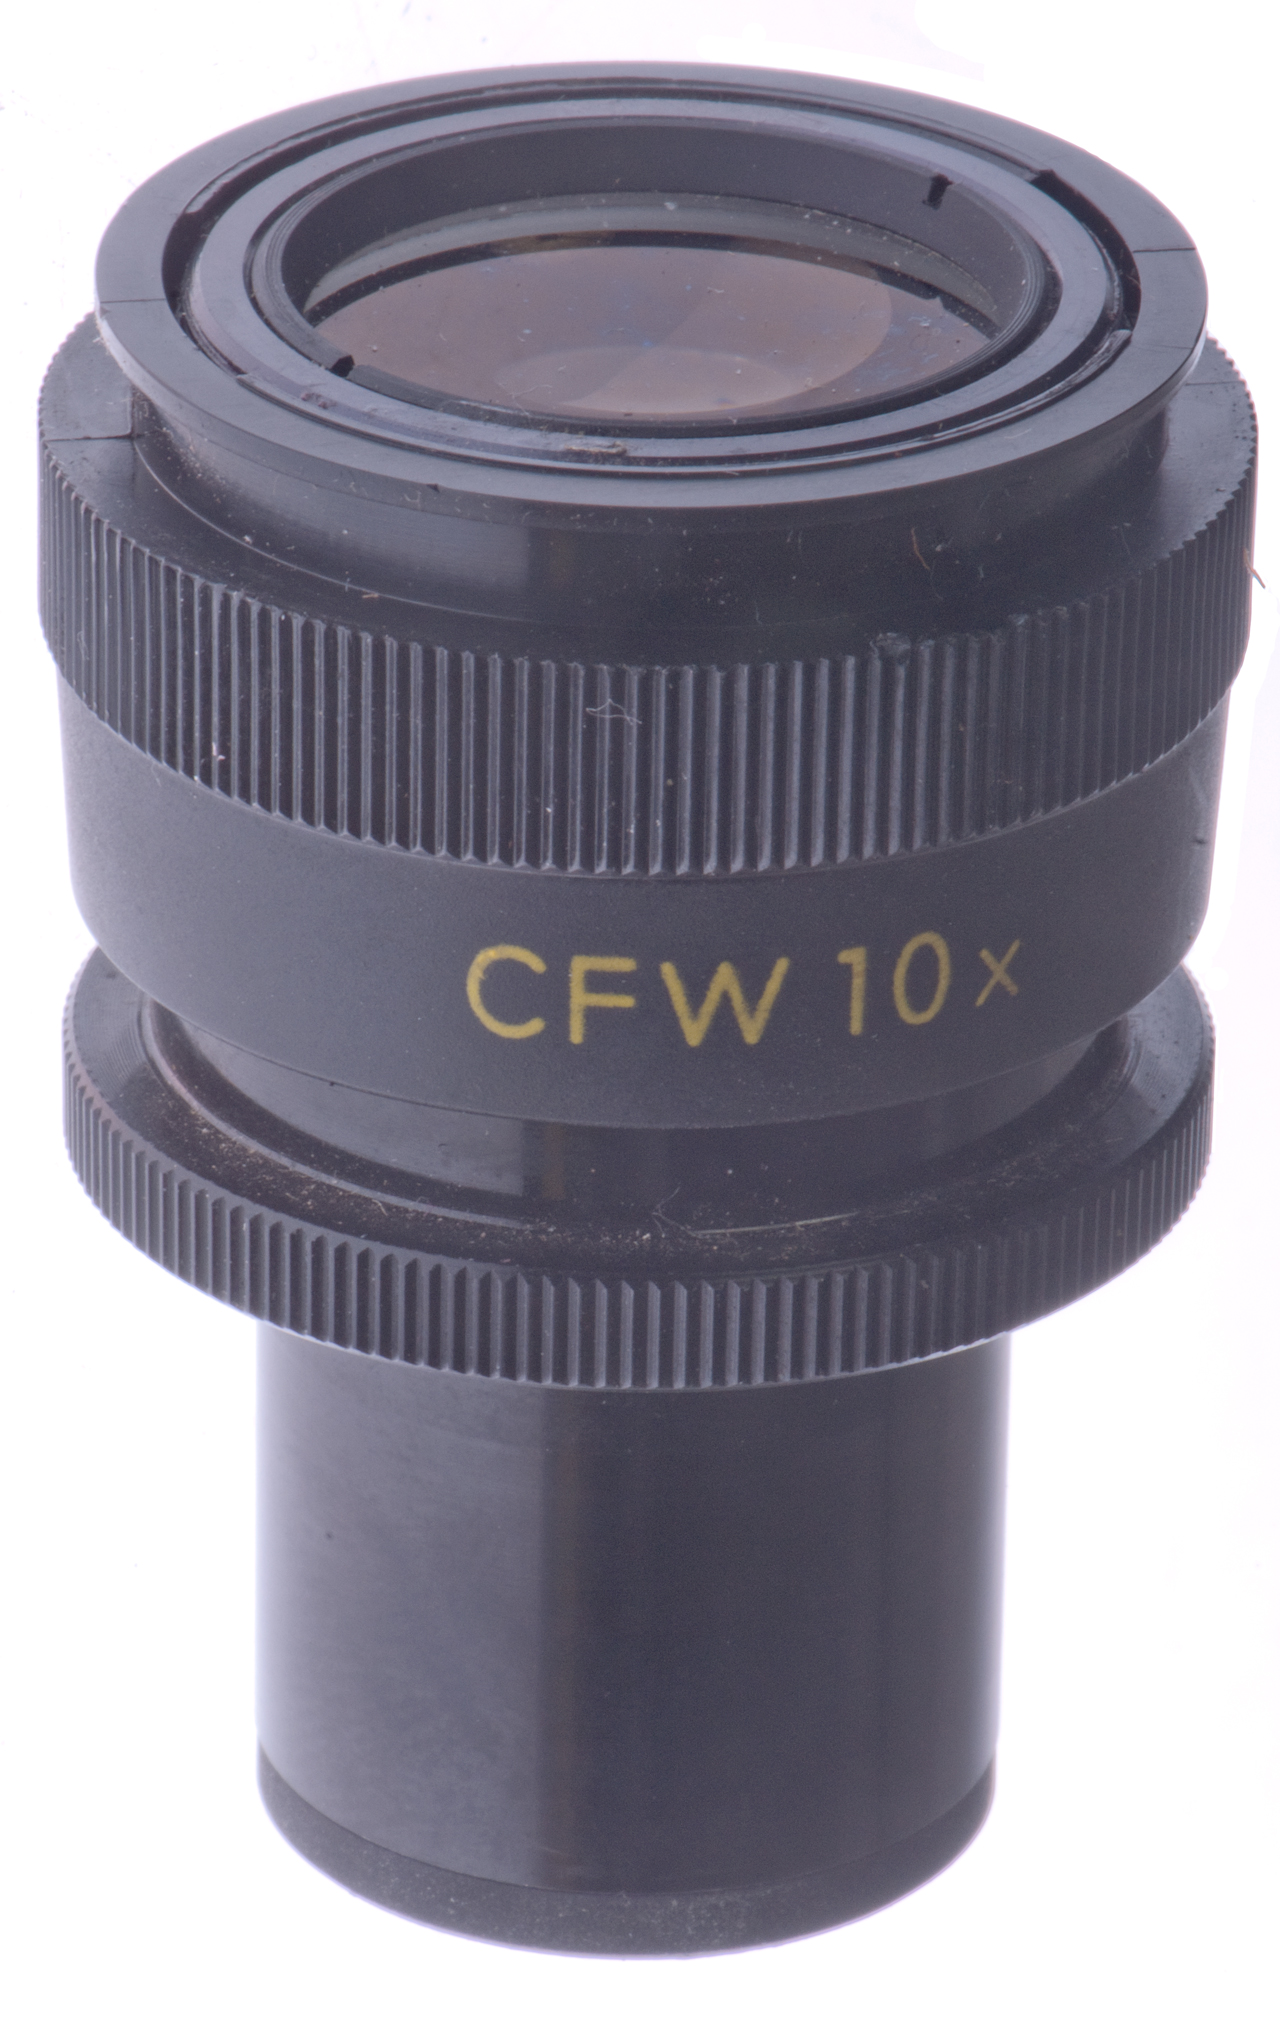
CFW 10x (this is the normal (23.2mm tube) eyepiece and what came installed on this system)
CFW 8x Field number 18mm
CFW 10x
Field Number 18
23.16mm tube mating diameter.
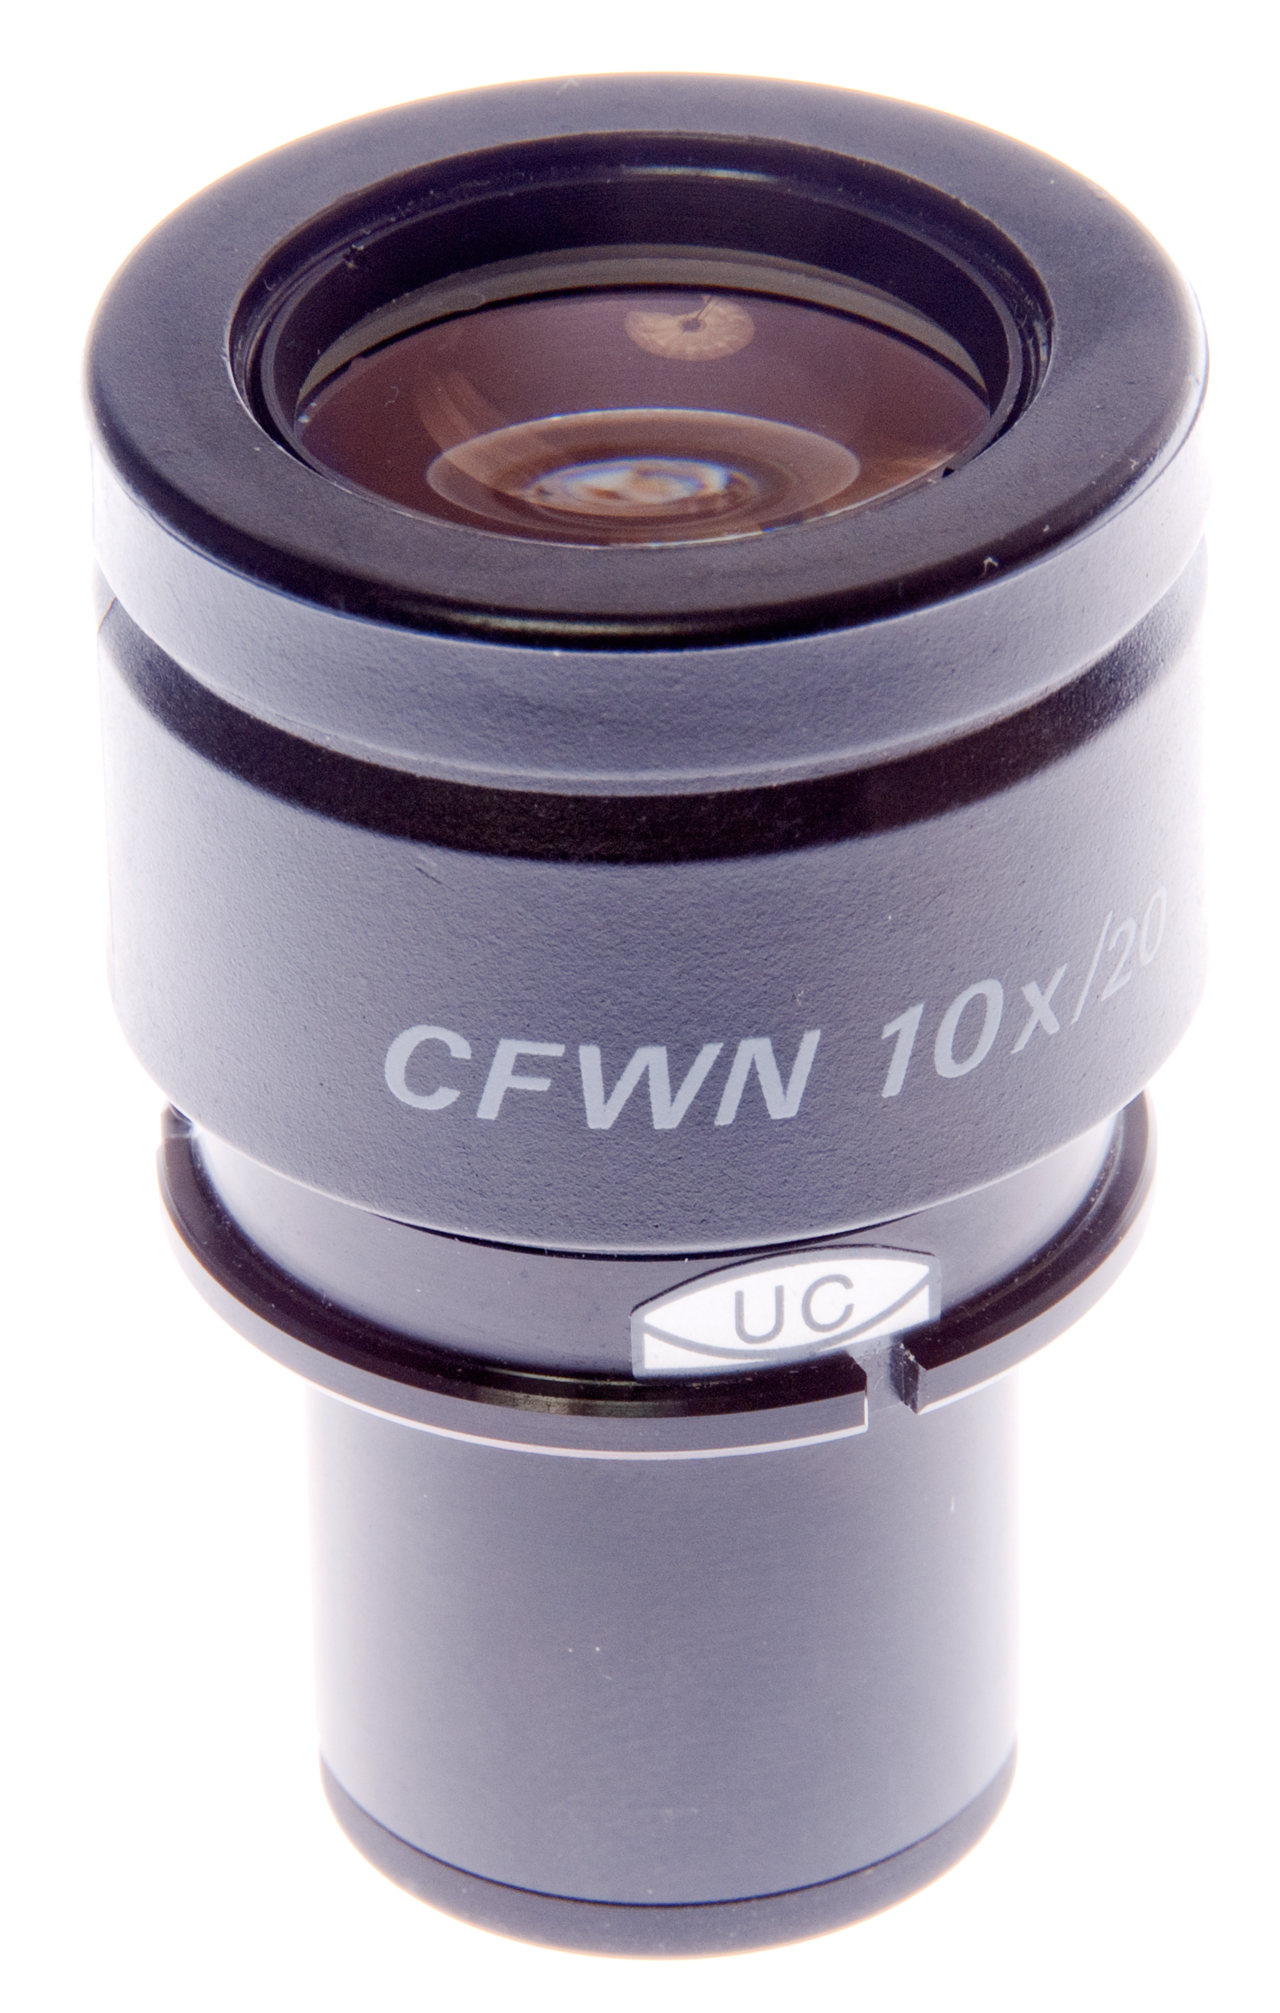
CFWN 10x/20
Field Number 20 (that's the /20 above)
Note these will give a slightly larger field of view compared to the
stock CFW 10x eyepieces which have a FN of 18mm.
10 times 18 = 180mm field at a virtual 25cm from the eye
-vs-
10 times 20 - 200 mm field at a virtual 25cm from the eye.
Also these accept 21mm dia. reticules and can be individually focused.
Mating dia 23.15mm.
CFW 10x Field number 18mm
CFW 15x Field number 18mm
CFUW 10x Field number 26.5mm
Field Number (UC Berkeley The Microscope Eyepiece or Ocular)
Field number in millimeters times the objective power equals the apparent size of the field of view.
For example: a CF 10x eyepiece (FN 18mm) with a 10X objective appears to have a field that's 180mm in diameter.
The field number is also the inside diameter of the diaphragm at the very tip where the reticle fits and can be measured with vernier calipers.
The Nikon CFWN 10x/20 eyepiece has a filed number of 20mm and so is fits a 30mm tube.
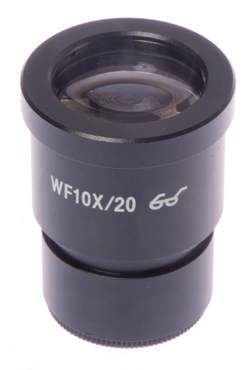
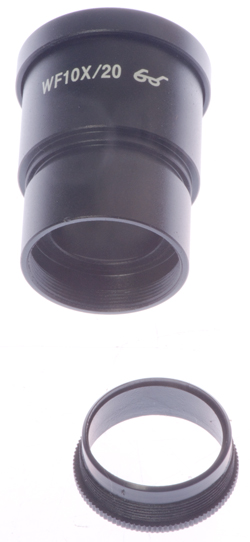
Wide Field Viewing 30mm Tube (Amscope fixed focus)
For use in the UW head that needs 30mm eyepieces.
Amscope makes a EP10x30 with a 30mm tube size that will fit the Ultra Wide head.
Note the price for a pair of these is about $40 compared to ten times that for a pair of Nikon CFUW eyepieces.
CFWN 10x/20 (high eye-point/widefield for people who wear glasses) FN 20mm, 30mm tube.
These do not have diopter adjustment so if your eyes are different some shimming may be needed.
This also means that the reticle focus may require shimming or flipping top to bottom.
Note the Amscope p/n is EP10X30 indicating ten power and thirty millimeter tube size, yet they are marked WF10x/20.
Amscope WF Eyepiece EP10x30 marked WF10x/20
Amscope WF Eyepiece EP10x30 marked WF10x/20
measured FN = 23mm
Reticle OD 24mm
Nikon CFI 10x/20 Eyepiece (Eclipse or any 30mm tube)
These are marked CFI and fit a standard 30mm eyepiece tube, like the Nikon Labophot type T trinocular head as well as any of the Eclipse type heads.
There is also an Eclipse 10x/22 eyepiece.
Nikon CFI 10x/20 Eyepiece
Nikon CFI 10x/20 Eyepiece in Eclipse Infinity Binocular Head
Eye Guards (Eye Cups)
The factory rubber parts have biodegraded (See: Hints & Tips: car rubber parts) because of exposure to the oxygen in the air.
Also see Problems: Rubber Eye Guard above.
Old biodegraded eye cups
New Orion 1/-1/4" telescope eye cups
Note you need to stretch them, but they fit well.
Photography (relay lens)
Some thoughts on selecting projection relay optics when using DSLR’s (and other “lens-less” sensors) for photomicrography by Charles Krebs
The Nikon D300s has 5.5 x 5.5 um pixels ( 4288 x 2848)12.2 Mega pixels
CMOS sensor, 23.6 x 15.8 mm; total pixels: 13.1 million; Nikon DX format
CF PL2.5X (Chrome Free Photography Lens 2.5 power)
CF PL4X
CF PL5X
CF Photo8X
Vertical Illuminator
This is used to provide white Episodic illumination from the top, like would be used for metallurgy.
What's missing is the adjustable 12 Volt power supply for this illuminator.
Also some questions, Can any objective be used or is there some advantage in using objectives marked "EPI?
What is the description of the filters or blank fillers that to in the two slots between the lamp house and microscope interface?
I've found a Nikon switchable 6V/12V power supply on eBay, but it has a Cinch Jones 4 terminal socket, not the bi-pin socket that would match the one on this illuminator.
A question to be determined is are 210mm objectives needed when this vertical illuminator is used or will regular 160mm tube length objectives work?
Note the flange to flange insertion thickness of the illuminator is 50mm.
Epi 1From eBay ad
EPI 2 Top
The filter slots are a little over 6mm and 4mm wide.
The tube has an ID of about 27mm and an OD of about 40mm.
EPI 3 Bottom
EPI 4 2-Prong Electrical Plug
EPI 5 Inside
Slot in housing allows rotating lamp to line up filament.
Knob of lamp holder moves lamp up/down.
Lamp marked:
12 V 20 W
GE M47
EPI 6 Overall View (but I've got the lamp house upside down)
EPI 7 Control In
Ring of light sent to objective.
Darkfield
EPI 8 Control Out
Central spot of light sent to the objective.
Brightfield
EPI 9 Nikon LV-UEPI Illuminator
Low Voltage (Halogen lamp) Universal Epi
EPI 10 Nikon Brightfield/Darkfield (Epi) Objective
EPI 11 Taken using bottom light trinocular head (not Epi head)
Pattern: 5mm Line, 50 Divisions
EPI 12 Taken Using bottom light but with Epi Illuminator installed.
This adds 50mm to the 160mm tube length= 210mm which changes magnification. Still bottom illumination.
The EPI control can be in either position for eyepiece observation
but for camera must be pulled out.
EPI 13 Now switching to Epi Darkfield Illumination.
EPI Lamp On & control pulled out.
EPI 14 Photo of EPI setup for EPI 13 Darkfield photo.
Setup for EPI 12 the same except EPI turned off and Labophot turned on.
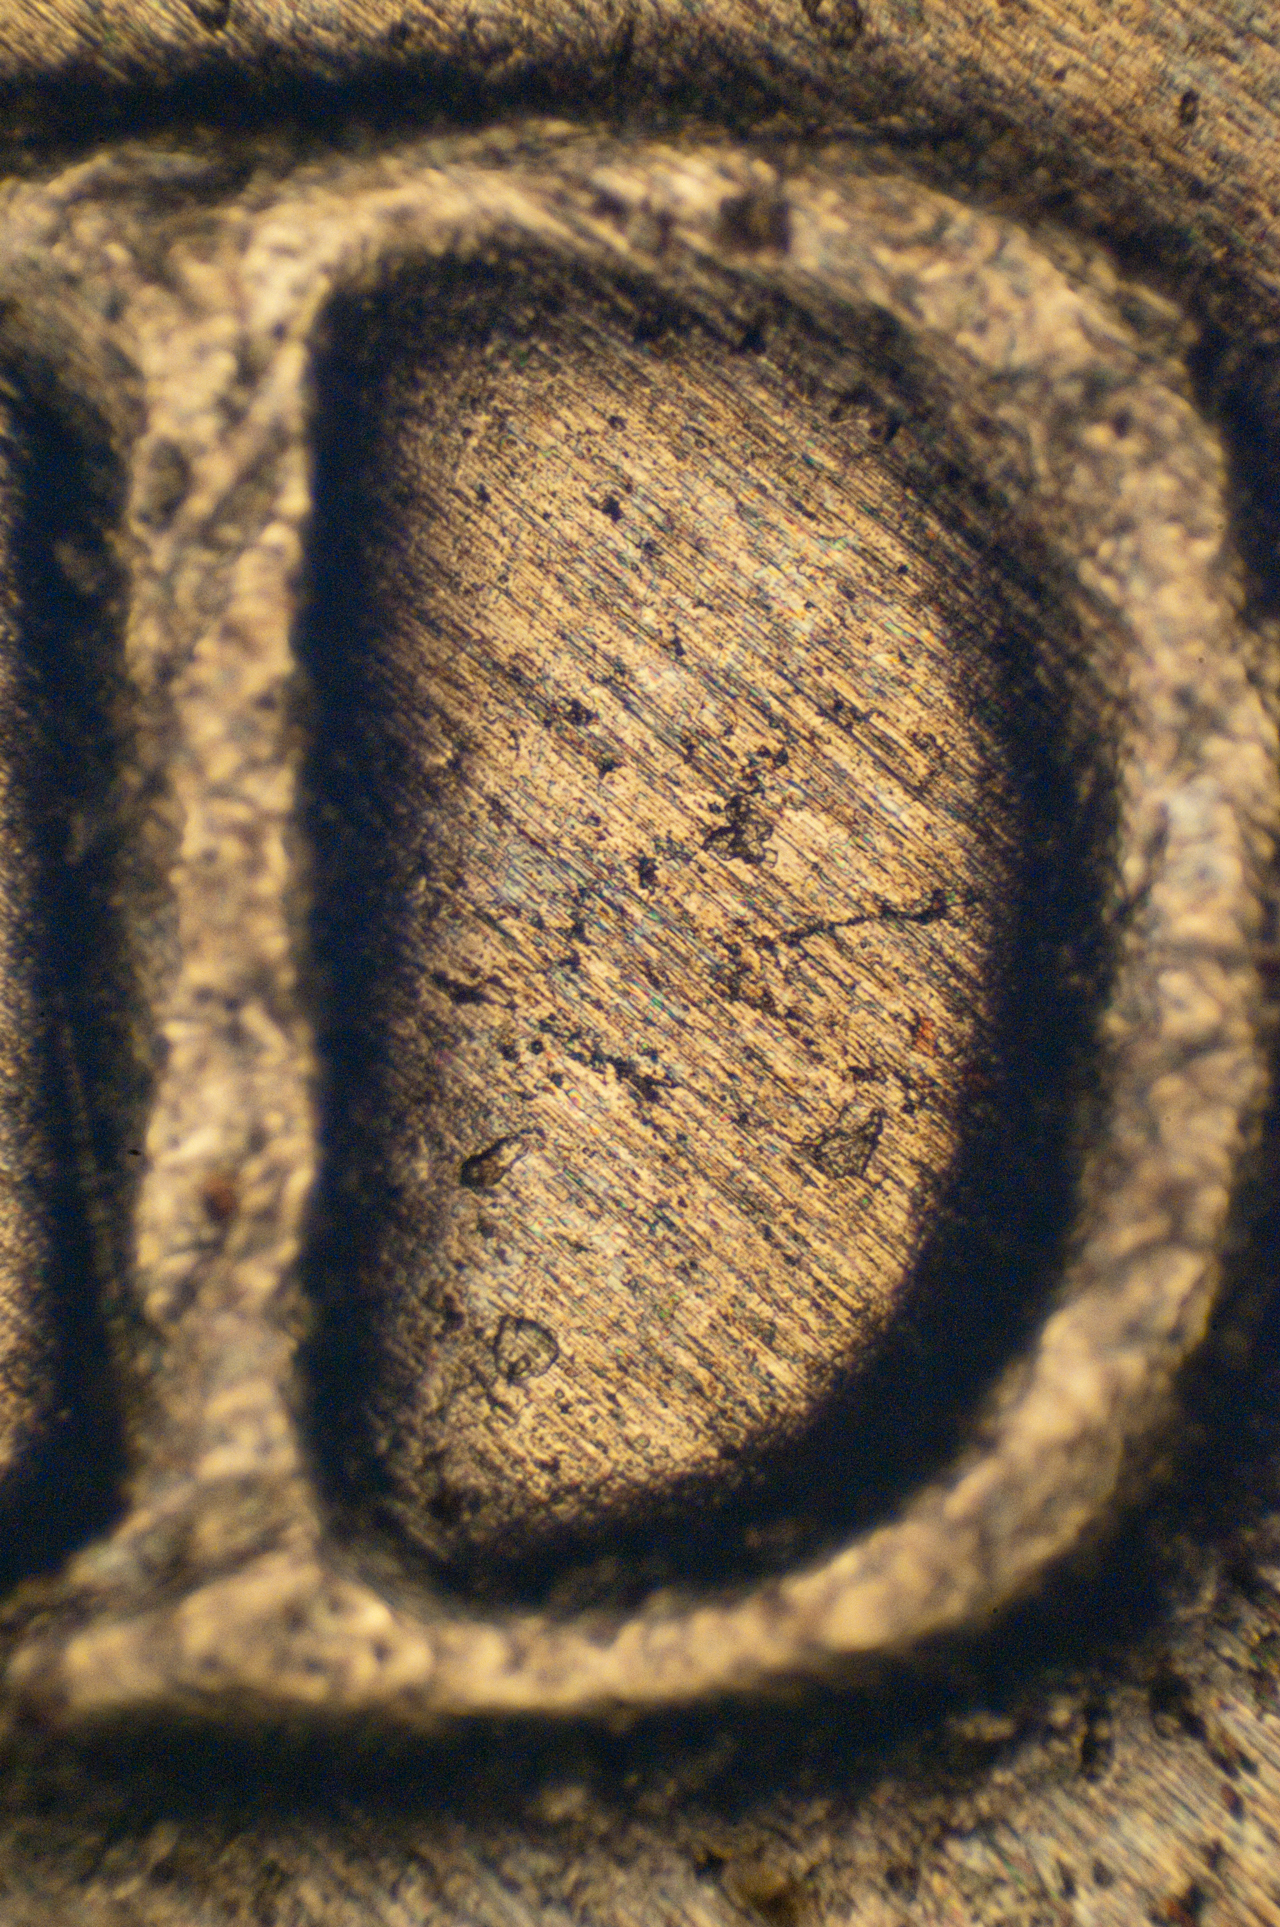
2012 Dime showing the "D" for Denver
This would be an impossible photo if the light was coming
from the bottom. 10x objective (160/- used at 210mm)
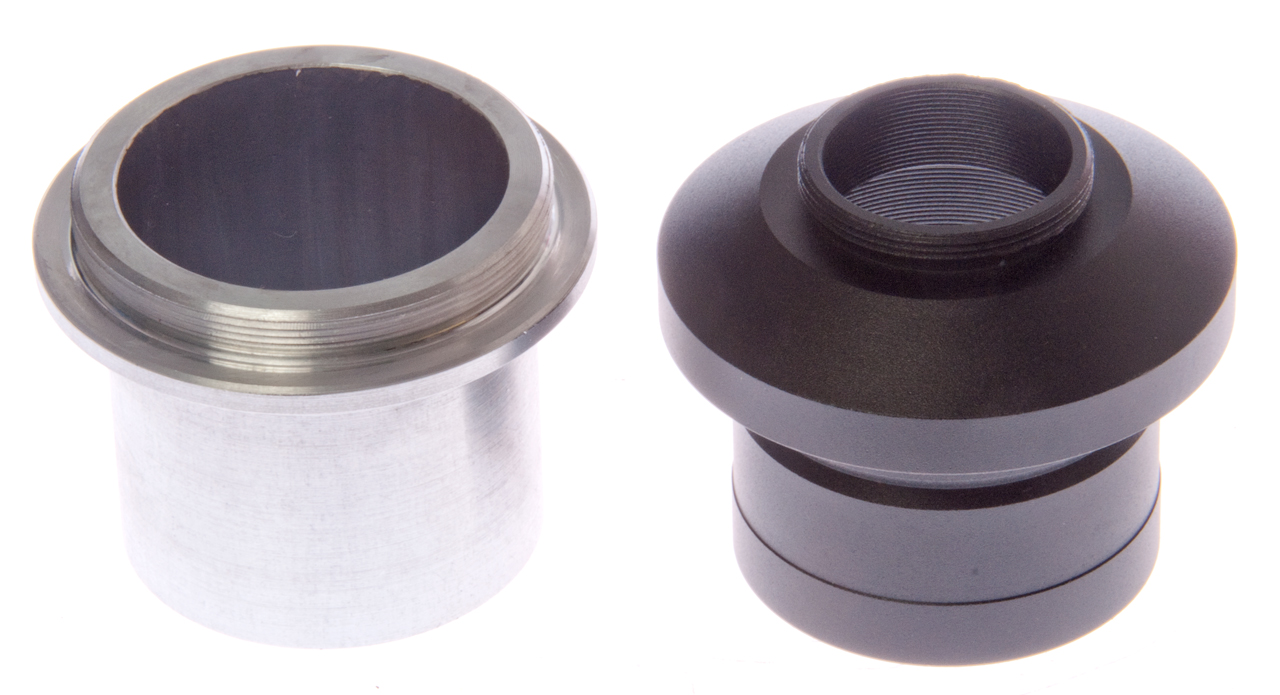
Camera Adapter sold as 0.5x by eBay seller amoyca2011
1230 pixels * 5.5 um/pixel = 6765 um = 6.765mm
6.765 / 4x objective = 1.691 power camera adapter
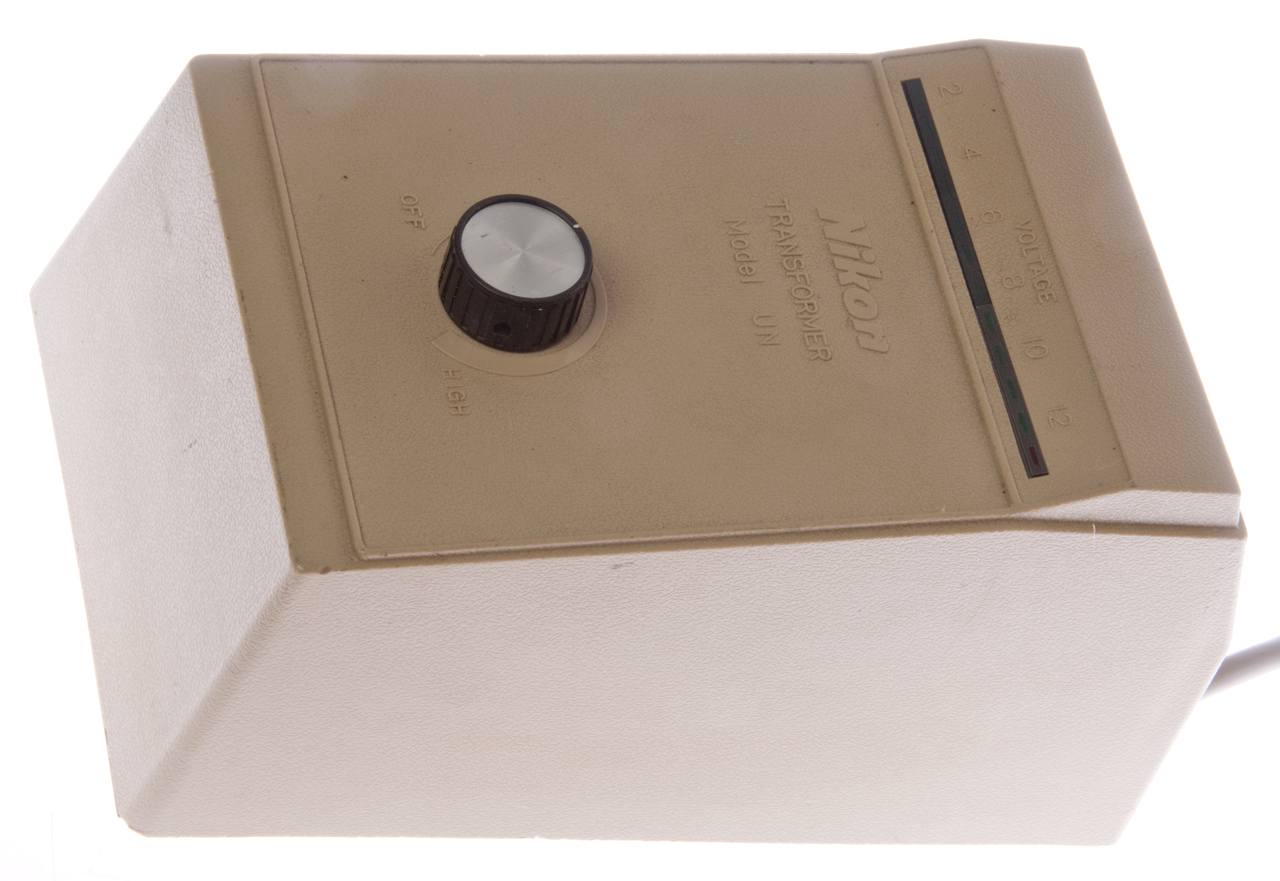
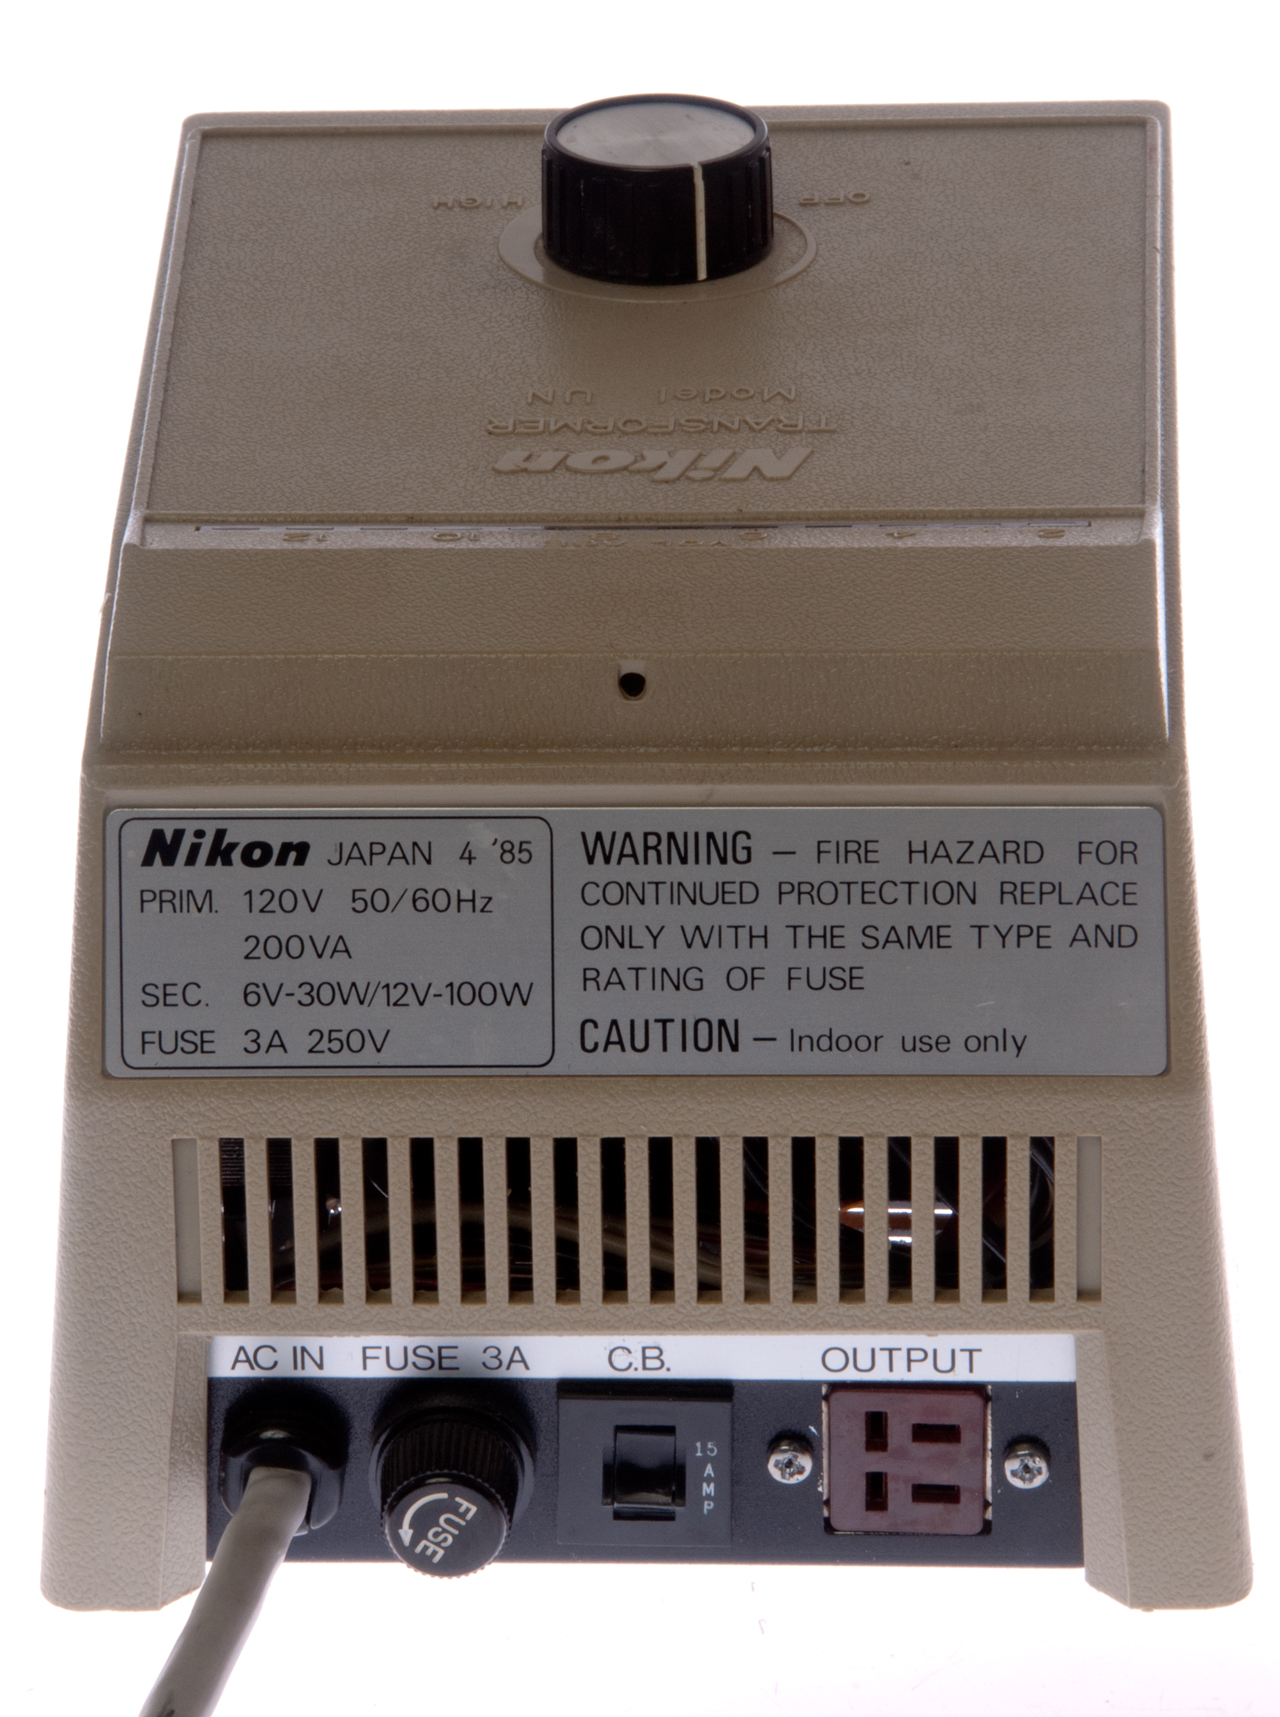
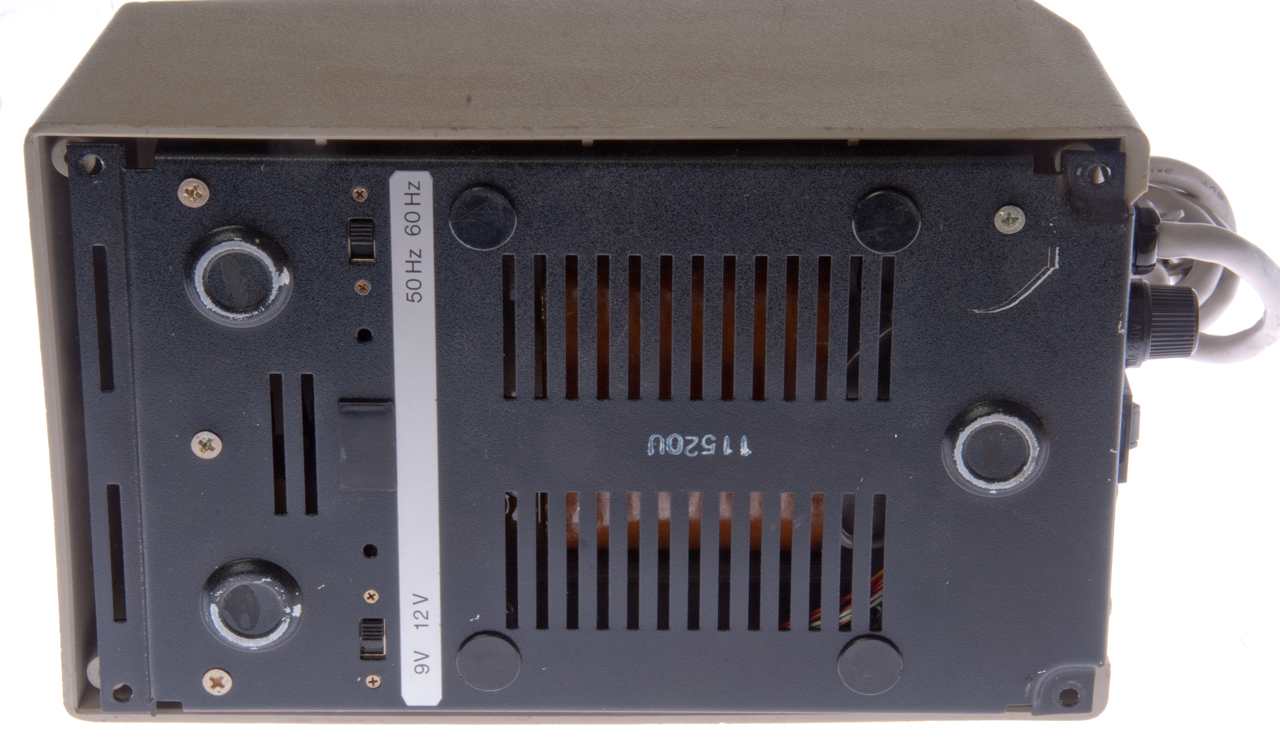
UN Transformer (Power Supply)
To power the above vertical illuminator I needed a power supply that can deliver 12 Volts at 20 Watts. This one was on eBay and is rated for 12 V @ 100 Watts so has five times more power capability than needed, but since it's the correct voltage that's not a problem. It probably can be used to power one of the 100 Watt illuminatiors.
It has switchable input line frequency 50 Hz or 60 Hz and switchable output voltage 9 V or 12 V. On the top is an LED bar-graph type voltage readout.
Although the interior view looks similar to a DC power supply (there are three transformers and a printed circuit board, this is a variable AC power supply.
Halogen lamps (Wiki) will operate on either AC or DC. The reason medical lamps are often Halogen is because they are black body (Wiki) light sources and so have very good color rendition (they also have a continuous output spectrum from infrared to ultraviolet unlike LEDs that have discrete bands of output). Note that changing the voltage using the knob strongly effects the lifetime, color temperature and brightness of the Halogen lamp (Wiki).
The Output connector is square and has 4 terminals for flat blades It is the Cinch Jones P304-CCT Plug, see photo below.
This power supply weighs 8 pounds (12.5 Watts/pound which is consistent with analog electronics)
Nikon UN Transformer 9 to 12 Volts
Cinch Jones P304-CCT Plug
Plug wired to Epi Illuminator (left 2 lugs)
Next photos are in the Epi Illuminator section on how it works.
Fluorescence vertical illumination
There are vertical illuminators designed to support Fluorescence microscopy (Wiki). Nikon has a standardized "cube" that holds two filters and a beam splitter.
The idea is to filter the high power light coming in on the side so just a narrow band of light illuminates the subject.
The new wavelength light goes up the tube and the beam splitter lets it pass and a filter rejects any source light so only the new light is seen.
These come in versions that hold 1, 2 or 4 cubes.
1 cube
The 2 cube version uses the HBO100w power supply.
Nikon HBO-100w/2 Mercury Arc (Wiki) Power Supply
One cable is for the high voltage supply
and the other for the low voltage filament.
HB 10101AF Ultra High Pressure Mercury Lamp Power Supply
4 cube
High pressure mercury lamp box Nikon LH-M100c1
Super high pressure mercury lamp power supply Nikon HB-10103AF
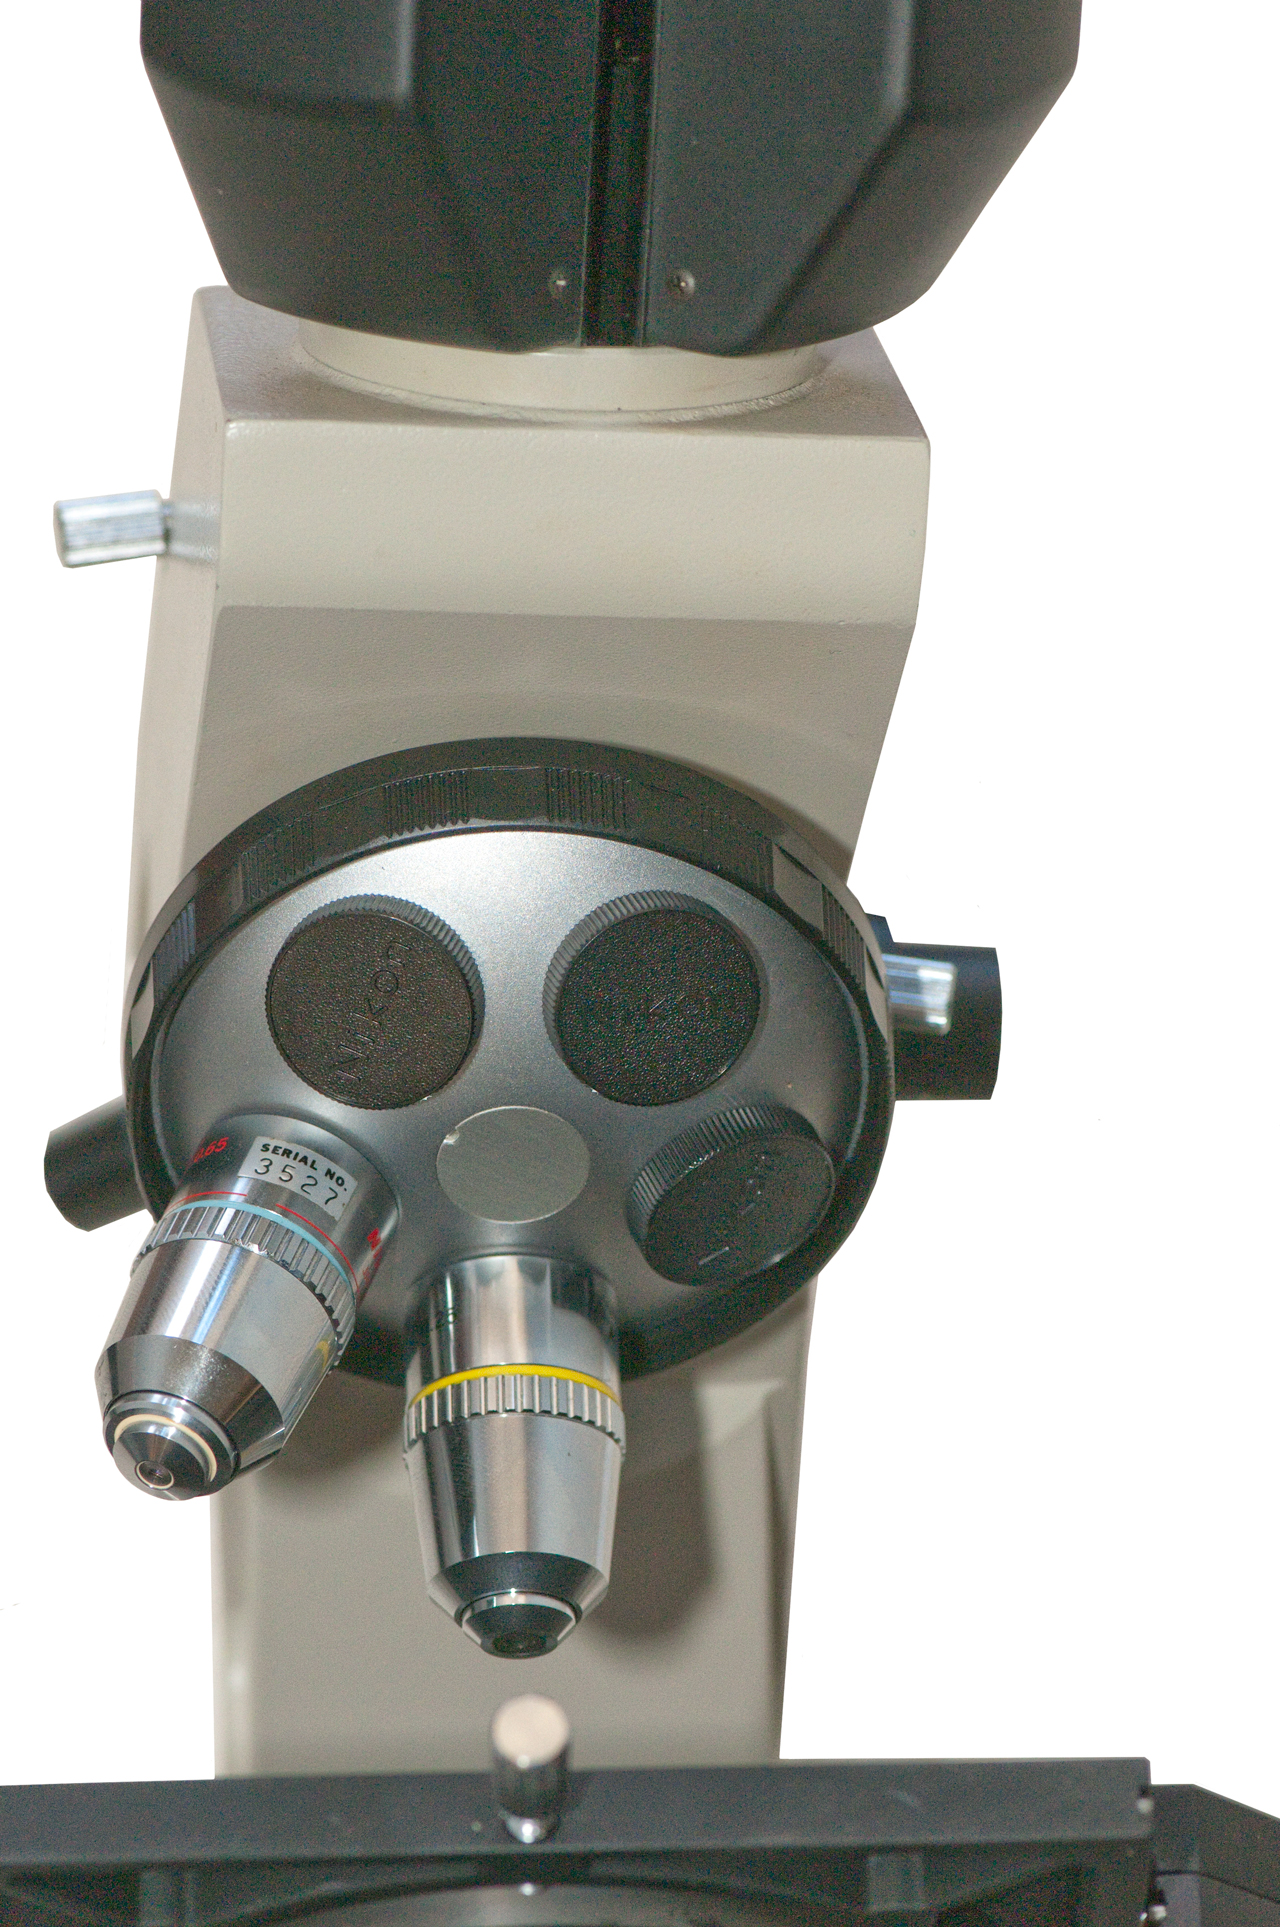
Objective Noise Piece
This scope came fitted with a 5 position noise piece.
Objectives
CF (Chrome Free) Optical System with 45mm parafocal distance and RMS threads, 160mm tube length without the vertical illuminator installed.
With vertical illuminator installed 210mm tube length (i.e. BD & M objectives).
The focal length of an objective is the tube length divided by the power.
So FL = 160mm/Power
Power
FL mm
5
32
10
16
20
8
40
4
100
1.6
N.A. (Wiki)
The Numerical aperture is directly related to both the resolving power (Wiki) and the depth of field (Wiki).
The higher the N.A. the higher the resolving power, but the shallower the depth of field. So for looking at moving things in pond water given a choice of objectives with an N.A. ranging between 0.4 and 0.75 the 0.4 will have greater depth of field. The 0.75 would be better if it was going to be used with an expensive camera that was optically matched for highest resolution, but at the cost of a much shallower depth of field.
Nikon Objective Brochures
Nikon CF Brochure (160mm) Feb 1989
Nikon CF Brochure (210mm) July 1993
Nikon CFI Brochure ∞ May 2007
Nikon Objectives
Name
Tube
mm
Thread
Parafocal
Distance
APO Plan
160
RMS
45
APO Plan CFN
160
RMS
45
BD Plan
210
26
45
BD Plan DIC
210/0
26
45
CF Plan
160
RMS
45
CF Plan EPI
∞ RMS
45
CF Plan SLWD EPI
∞ RMS
45
DL Ph4
160
RMS
45
E (black)
160/0.17
RMS
45
E Plan
160
RMS
45
E Plan
∞ 25
60
E Plan LWD
160
RMS
45
ED Plan
210/0
26
45
FL Plan
?
?
Flour
160
RMS
45
Flour Plan DIC L
∞ 25
60
LU Plan EPI
∞ 25
60
M Plan
210
31
M Plan LWD
210
M Plan ELWD
210
NCG Plan
160
RMS
45
UW Plan
∞/- 25 60
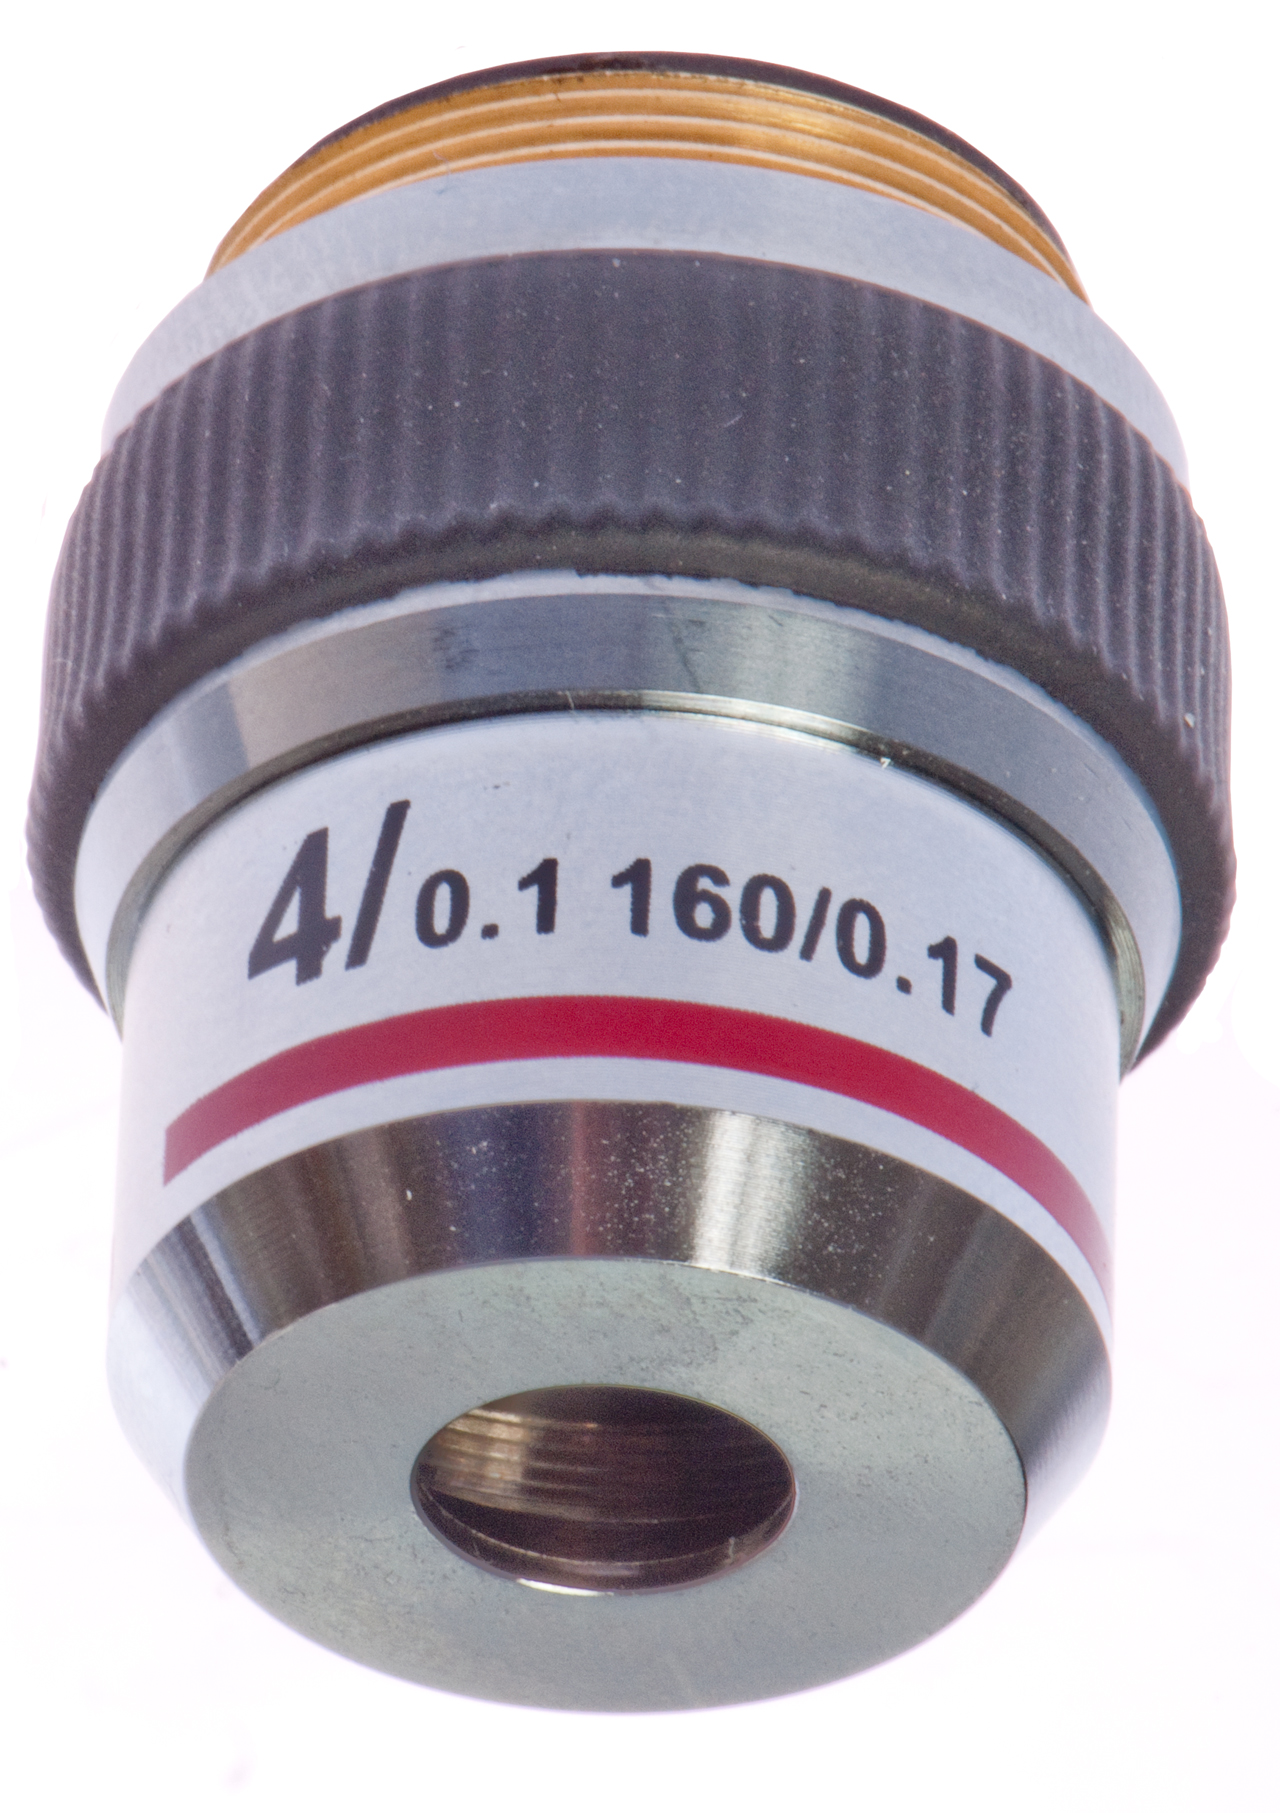
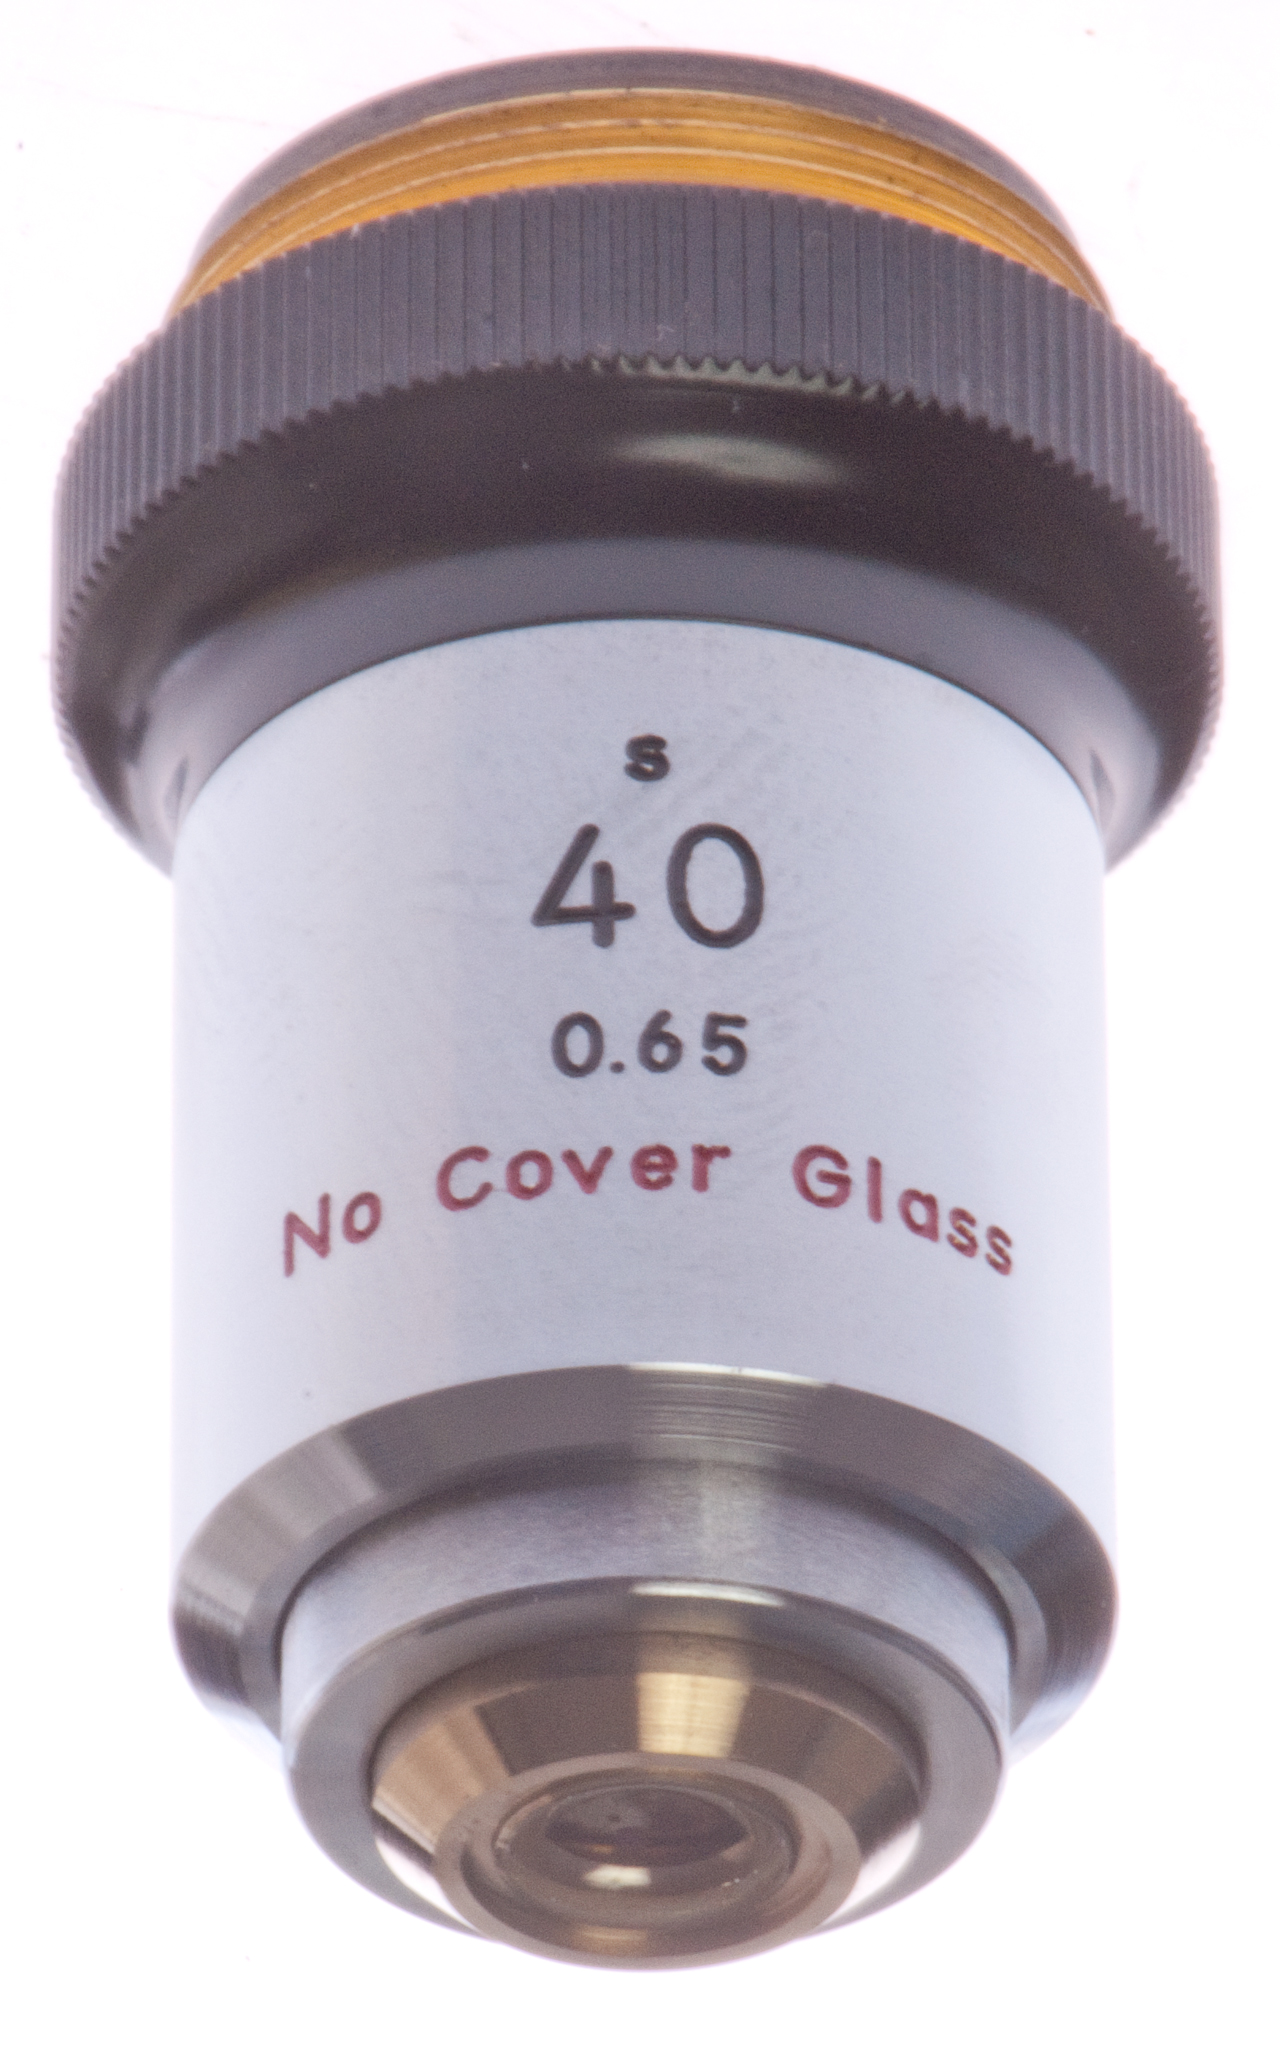
The two objectives that came with the Labophot.
Left: E Plan 10/0.25 160/-
Right: E Plan 40/0.65 160/0.17 Ph3 DL
Neither of these is marked CF, so do
they belong on this microscope?
I've been told that these are student (Economy) CF objectives.
Comparison CF vs. CFI objectives
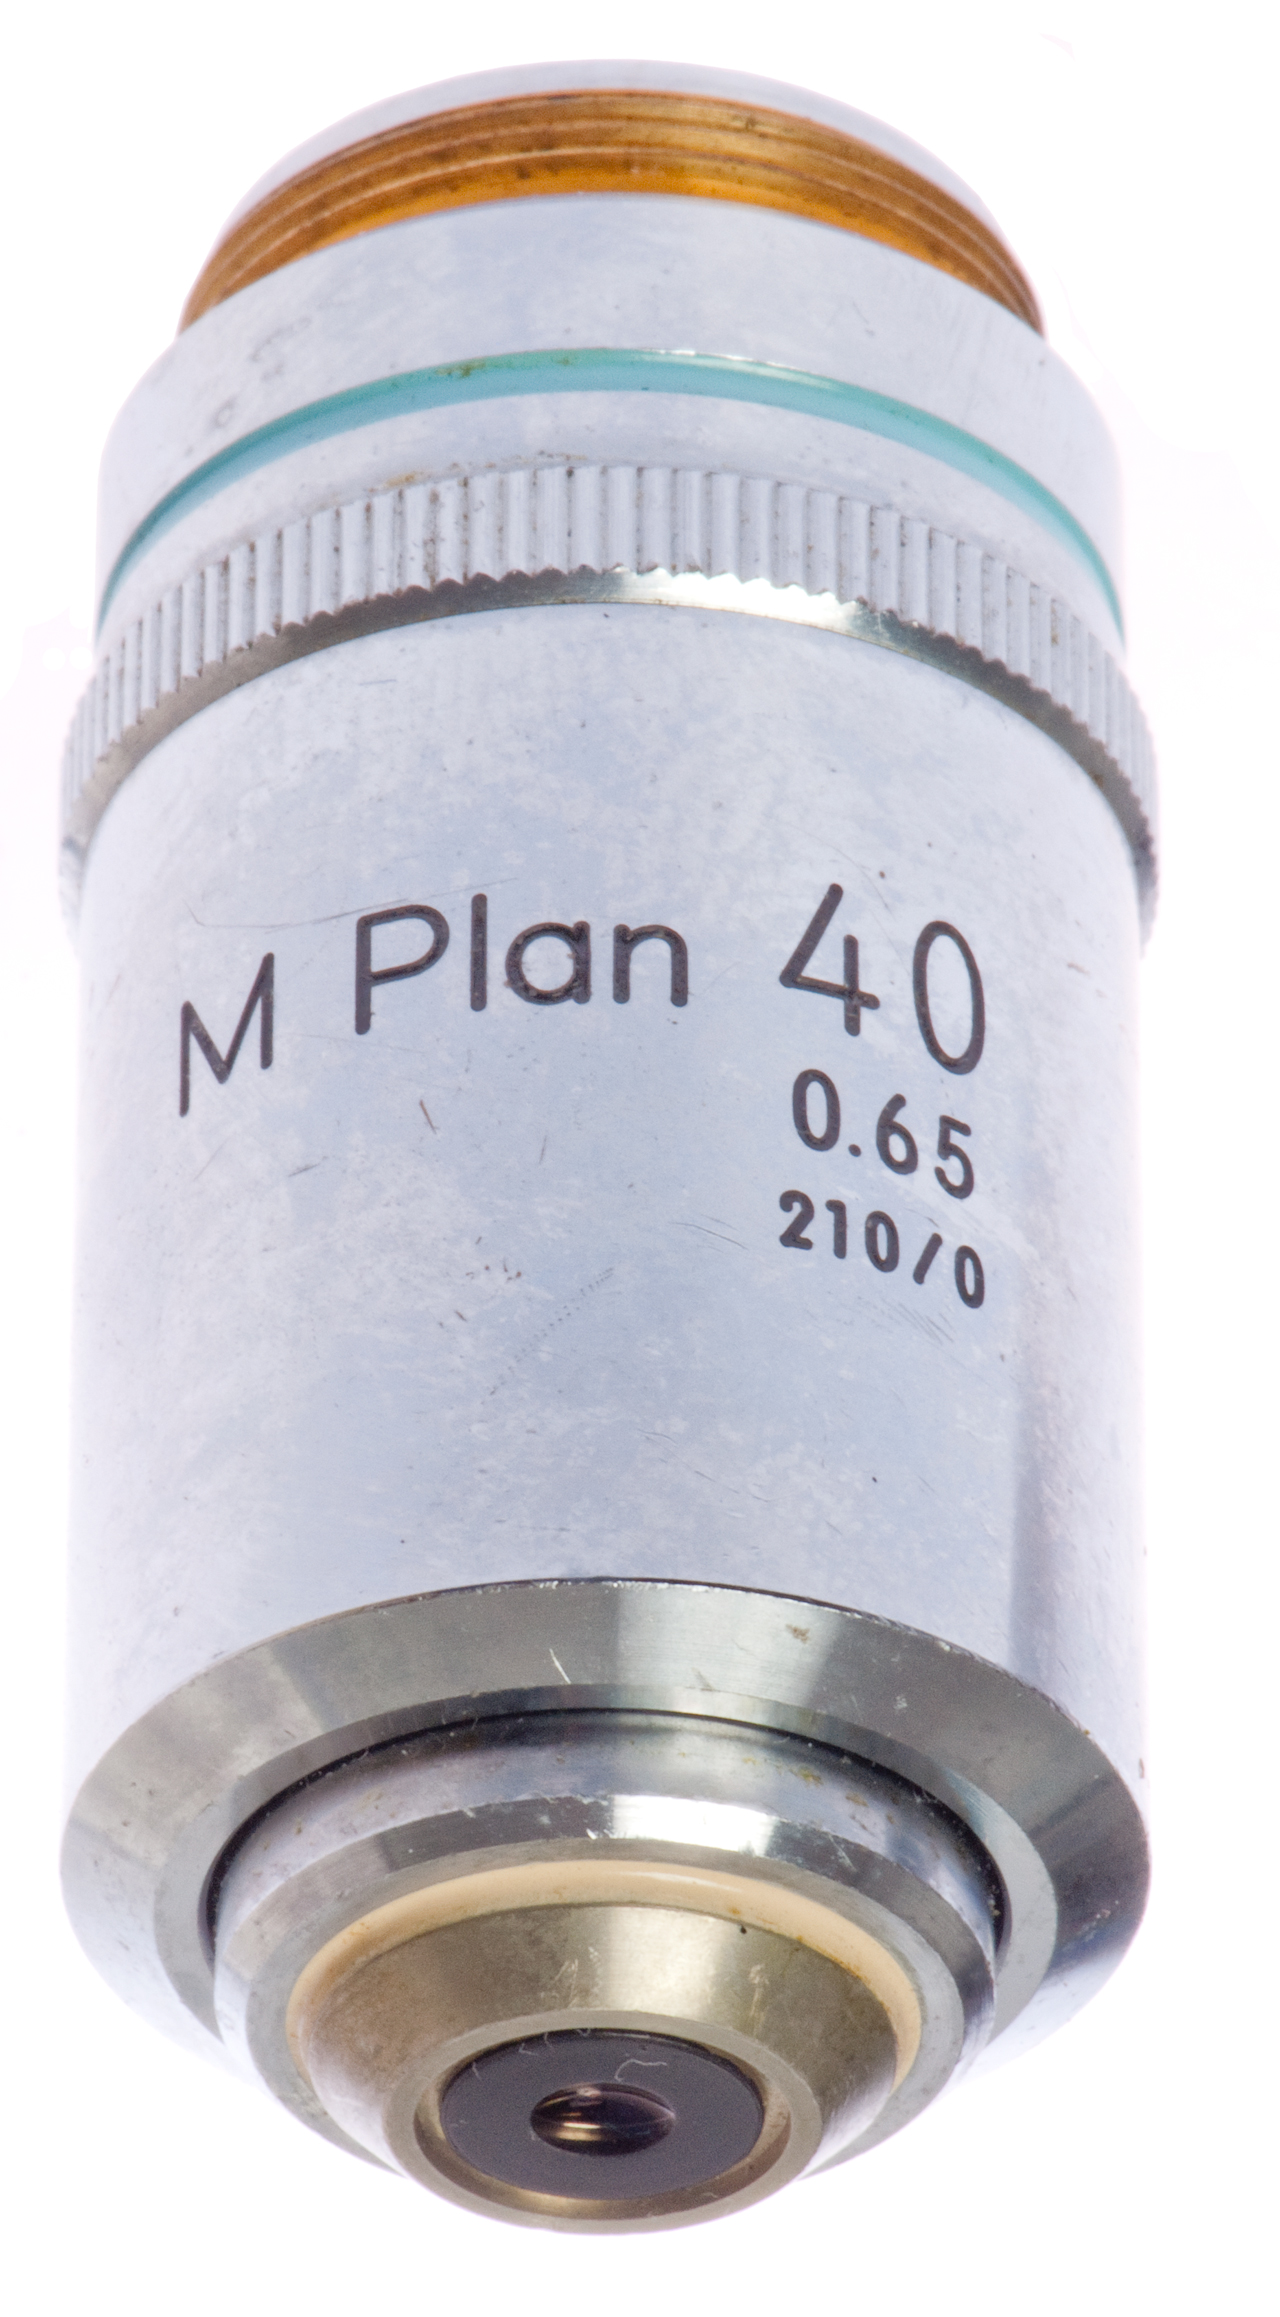
E Plan 40/0.65 160/0.17 (not Phase)
Left is Made in China copy of Nikon CF 10x, PFD=40mm.
Right is Nikon CFI E Plan 4x/0.10, ∞/- WD 30 PFD=60mm
Note everything is larger in diameter.
This is not so apparant in photos of CFI equipment when
it's all by itself. More on the Tube Lens page.
DIN 4x/0.10 160.0.17
M Plan 40x/0.65 210/0
DIN 20x on order Surrey Oriental Ltd (4 Aug 2014)
This fits between 10x and 40x
40x/ 0.65 S-series microscope
Should be used with Bi HKW eyepieces
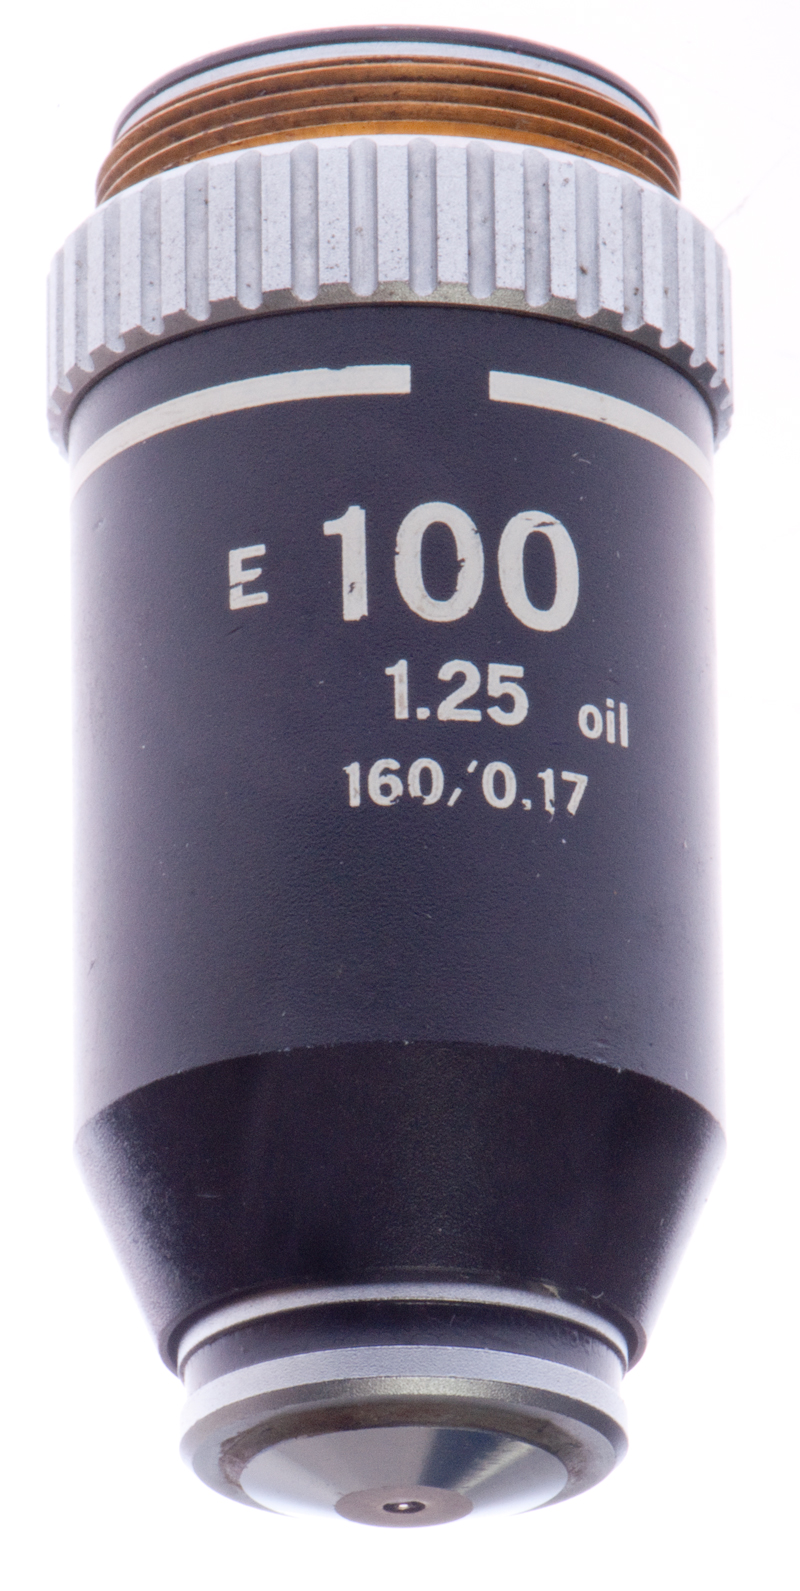
Nikon E Achromat 100x/1.25 Oil 160/0.17
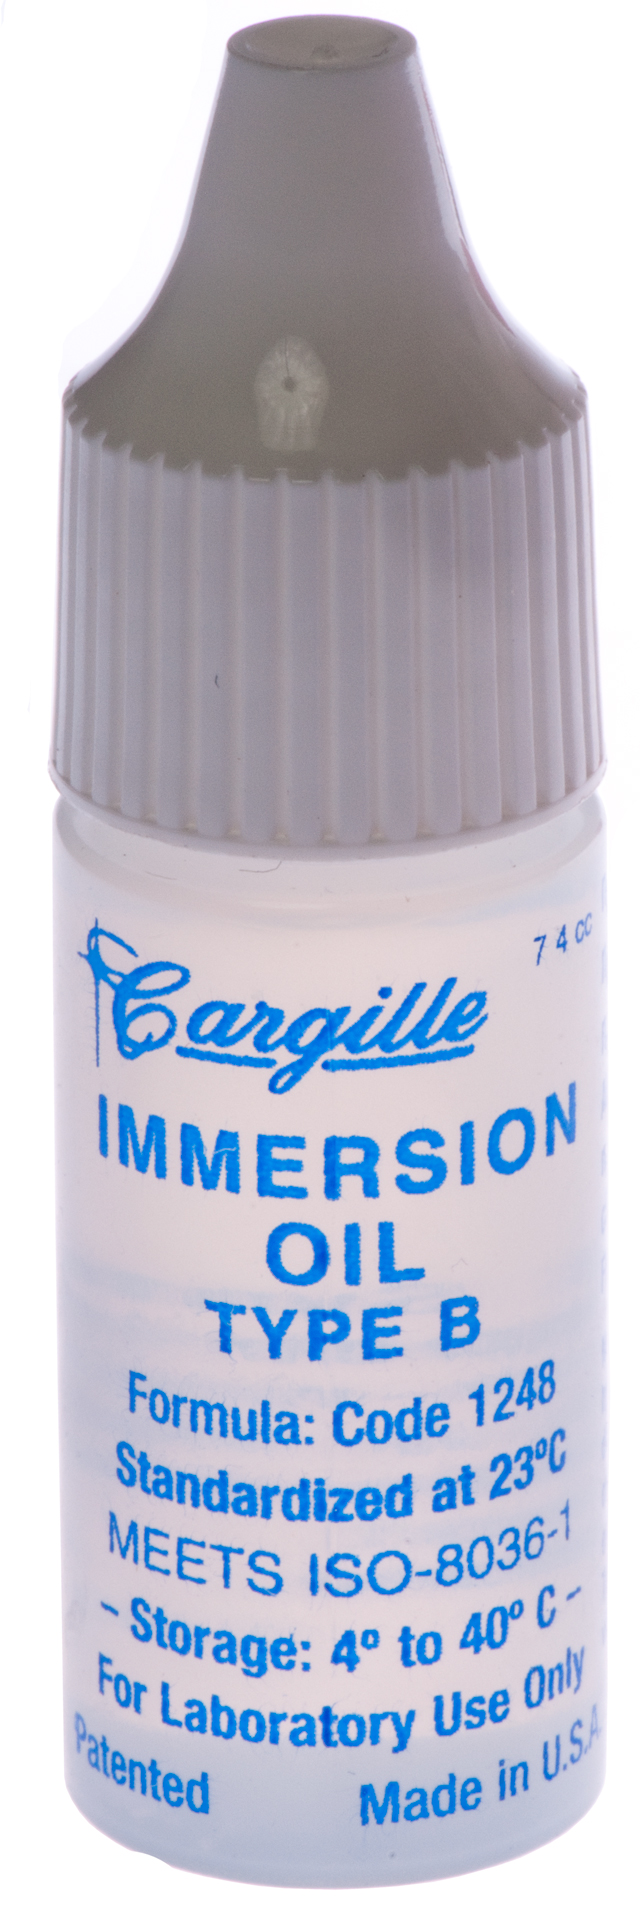
Immersion Oil
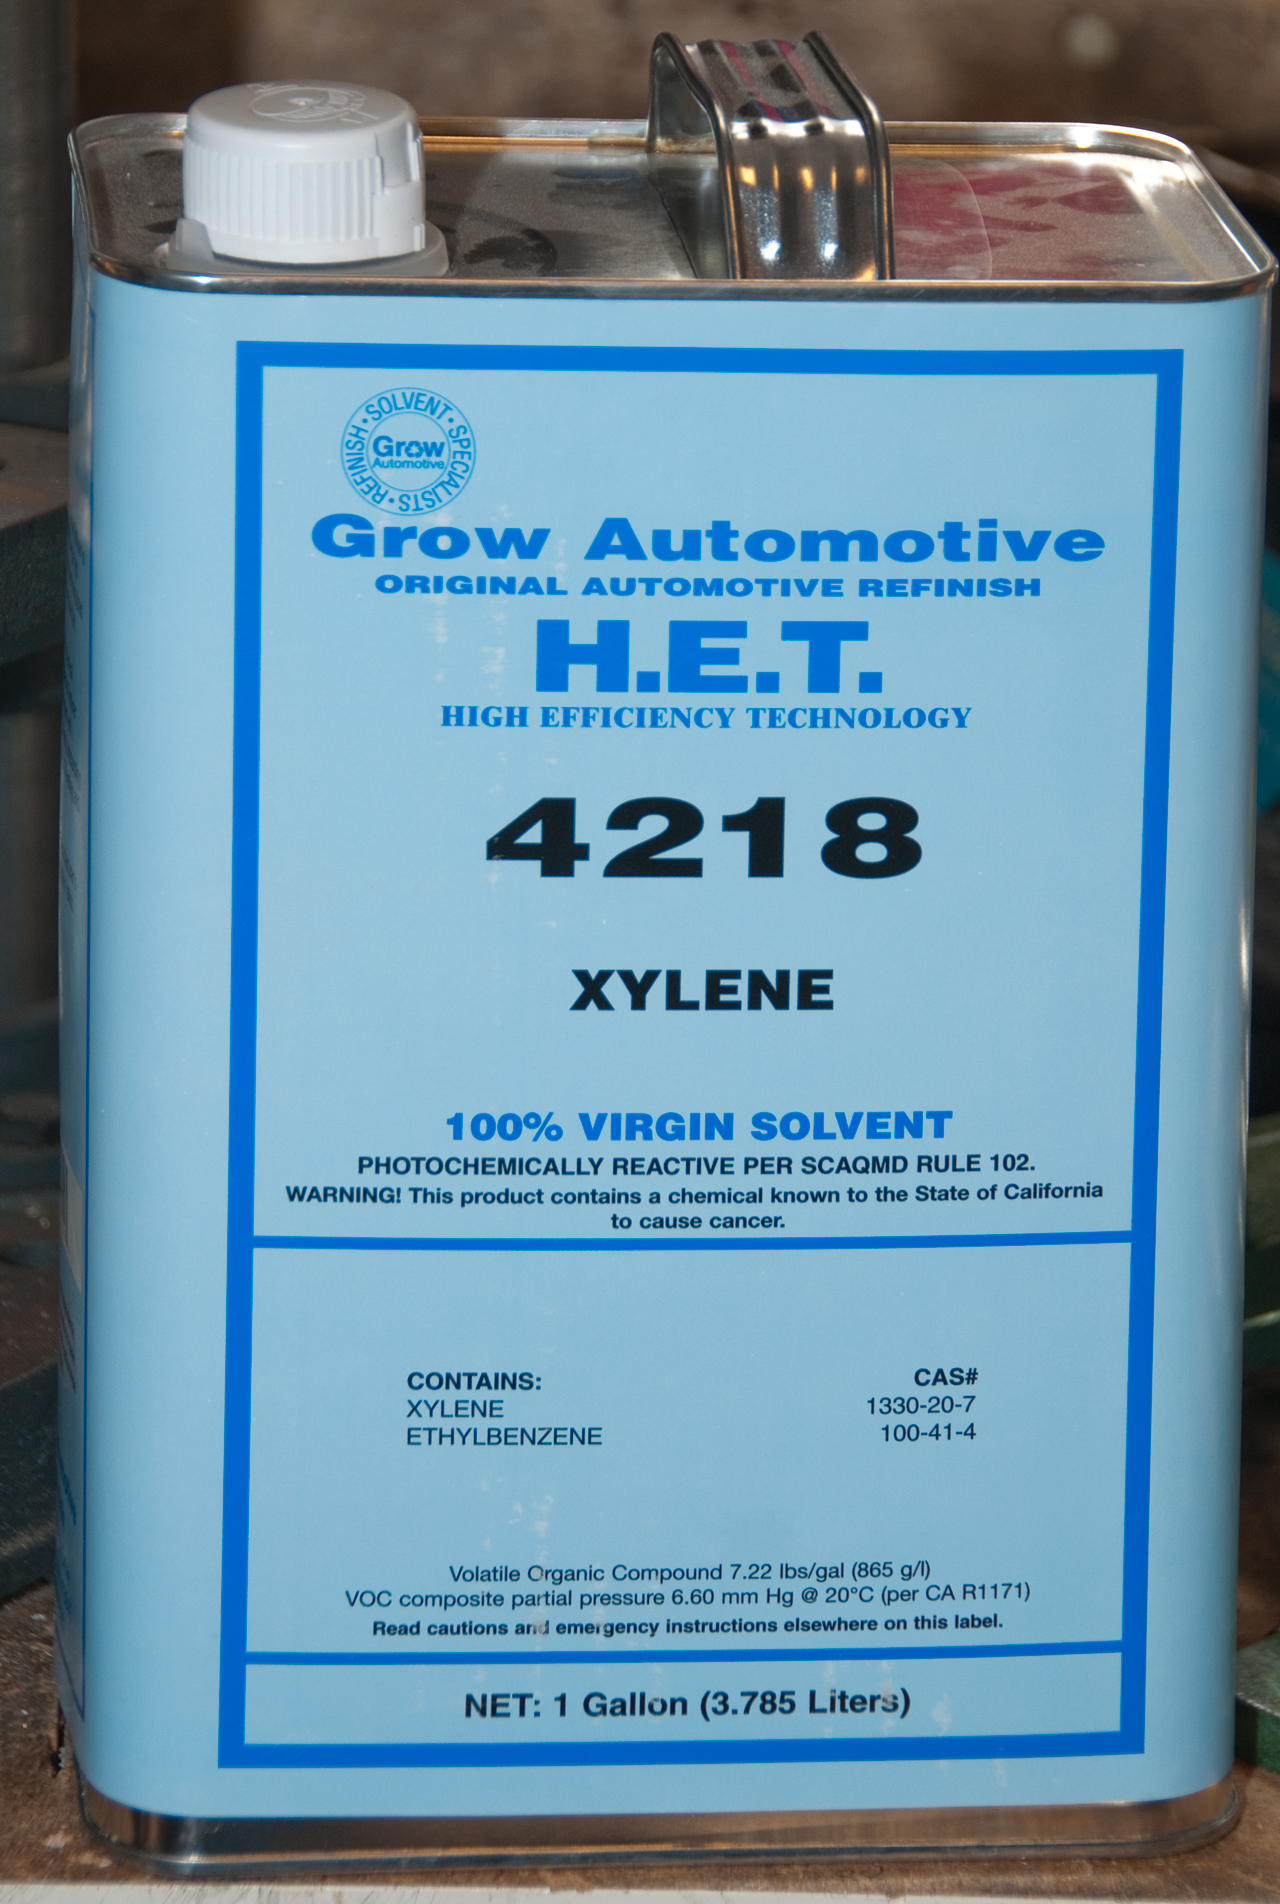
Xylene Immersion Oil Solvent
Grow Automotive H.E.T 4218
1 Gallon can
Immersion Oil Patents
3929667Immersion oil formulations for use in microscopy and similar fields, R P Cargille Lab Inc, Dec 30, 1975, 252/408.1 -
prior art oils contain polychlorinated'biphenyls (PCBs). Also has background on the need for immersion oils.
non-toxic immersion oil with excellent optical properties
4465621Blend of dialkyl phthalate; butyl benzyl phthalate and chlorinated paraffin, R. P. Cargille Laboratories, Inc., Aug 14, 1984, 252/582, 252/1, 252/408.1, 252/364 -
a refractive index of 1.518 or thereabouts and an extremely low fluorescence
4491533Heavy mineral oils with no background fluorescence, R. P. Cargille Laboratories, Inc., Jan 1, 1985, 252/301.16, 208/18, 252/1, 252/408.1, 208/12 -
immersion oil for use in fluorescence microscopy
4526711 Liquid optical coupling material comprising pentabromo-diphenyl oxide, alpha methylstyrene polymer, stabilizer, R. P. Cargille Laboratories, Inc., Jul 2, 1985
252/582, 252/408.1, 568/639, 359/886, 585/428, 568/580, 252/1, 359/665 - coupling adhesiveObjectives with 45mm Parafocal Distance
Here is a list of Nikon objective names that are CF optical system.
Many of these do not have CF printed on the objective.
Achromat
E Achromat
E Plan Achromat
Epi-Fluorescence (Fluor)
Epi-Fluorescence Phase-Contrast
High-Magnification Dry
Long-Working-Distance (LWD)
N Phase-Contrast
N Plan Achromat
N Plan Apochromat
N Plan DIC
No Cover Glass (NCG)
Note: The M Plan 210mm are for metallurgy or when the Vertical Illuminator is inserted into the optical path.
BD: Brightfield Darkfield for use with 210mm tubes (i.e. vertical illuminator installed)
M: Metalurgical for use with 210mm tubes (i.e. vertical illuminator installed) always Brightfield and will not work for darkfield.
CF ∞ with RMS threads: These are not CFI60 objectives since they have RMS threads. They go with the Epiphot Inverted Metallurgical microscope and the "E" series diaphot.
Since DIN objectives have the same parafocal distance (45mm) they might be a good fit for this microscope.
But RMS and JIS objectives have a shorter parafocal distance and the focusing rack on the Labophot can not bring them into focus so can not be used.
Infinity CFI Objectives
It may be possible to use the CFI objectives on the Labophot and other similar microscope stands.
The key reason for doing this is to take advantage of the increased performance of the CFI objectives and for me the lower powers are very attractive. It's my understanding that the CFI low power objectives have superior optics when compared with the CF optics. See: Why Use a 25 millimeters Objective Thread Size? The N.A. of low power objectives is higher.
In both the below cases the first method of attachment is to use an adapter with female 25-0.75 threads to accept the CFI objective and male RMS threads for the existing nosepiece.
This may stop down the light coming from the exit pupil, but the exit pupil looks to be about 6mm dia and the mechanical exit pupil size must be less than 9mm right at the back of the objective.
Since the light is parallel rays there should be no problem with vignetting. Using a pocket blue laser and moving it back and forth it can be seen that the exit pupil diameter, even back a couple hundred mm from the objective is still under 25mm dia. This is not a precision measurement.
There are a few of ways this will work.
(1) By connecting the camera directly to the stand (no head or visual observation. The camera is setup with a tube lens.
(2) By using a microscope 20.2mm to C-mount adapter with no optics then copling that to the T-mount threads on the tube lens camera setup. This has the advantage of using a trinocular head, but may have a problem with vignetting because of the C-mount ID or the 20.2mm tube ID. Also the eyepieces will not be in focus.
(3) There may be other options.
It may be that C-mount parts will work for a tube lens, if a suitable lens and mount can be found.
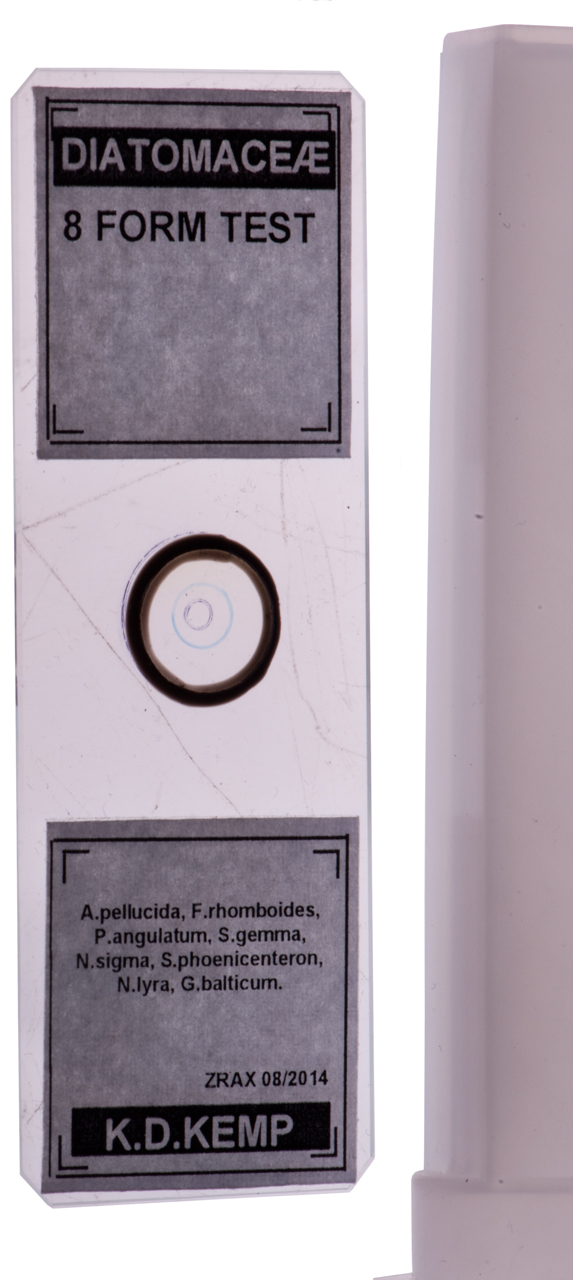
K.D. Kemp 8 Form Diatomaceae Test Slide
Got this slide from Microlife Services (aka diatoms) in the UK.
Diatom Fig 1
Comes in a 2-slide carry case
Note the plastic light table has scratches.
Nikon D300s
105mm Micro Nikkor lens
at max distance
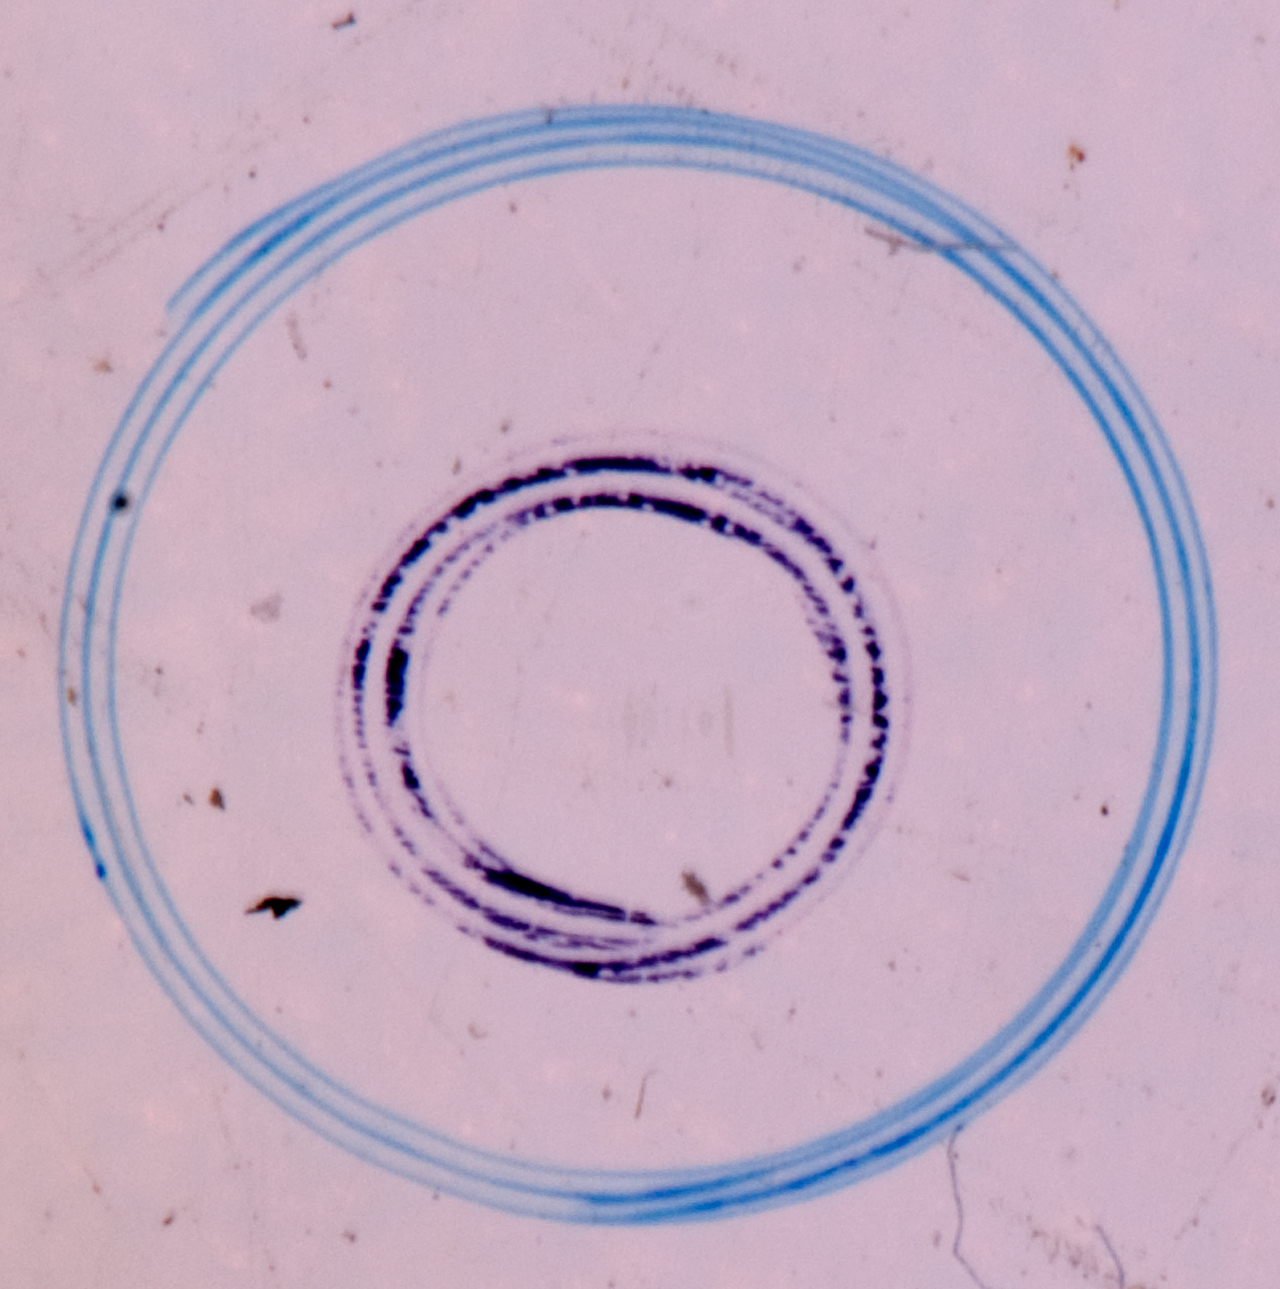
Diatom Fig 2
Nikon D300s
Nikon 105mm Micro Nikkor lens
at minimum distance
Diatom Fig 3
Diatom Fig 4
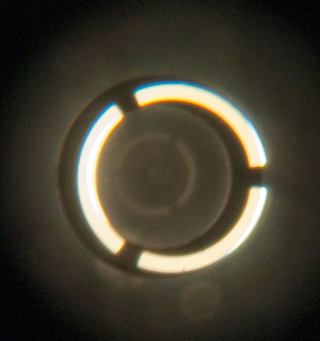
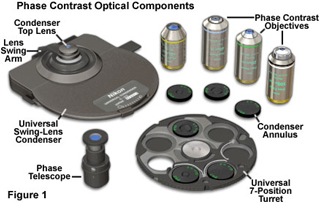
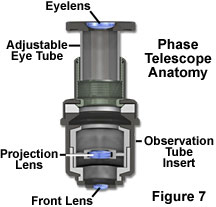
Phase Telescope
This is used to center the annular diaphragm when the Ph3 slider pressed in so it's in the light path.
It is installed in place of one of the eyepieces.
I don't have one, so will try using the paper method described here:
YouTube: Adjusting Phase (3 methods:Phase Telescope, observing image, paper)
The paper method didn't work because I don't have enough experience to know what a good phase image is. Got a phase microscope.
Some microscopes (but not the Labophot) have a Bertrand lens that can be switched into the optical path to view the phase ring at the back of the objective.
It might be marked Ph (B) - 0. See MicroscopyU -Phase Contrast Microscope Configuration
The following figure is from the above Phase Contrast Microscope Configuration web page.
In the patent (2616334
Phase microscopy, Zernike Frits, Nov 25, 1947, 59/370, 359/580, 359/489.7) a method is described to make the phase shift constant for different colors, but that method may or may not be employed in the Nikon phase optical system. If it is not then the closer to monochromatic light that's use the better the quality of images, this may be the reason for the GIF filter.
Phase Telescope
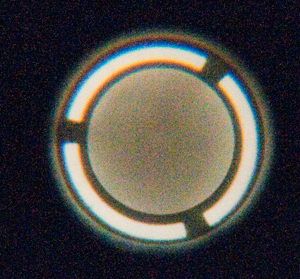
Afocal image looking at E Plan 40/0.65 160/0.17 Ph3 DL objective and with Ph 3 slider pushed into the optical path.
There is a reflection in the image that repeats the main pattern.
In order to adjust phase slider I need two small tools that did
not come with this miscrscope, they are hex drivers.
Phase slider A holds two phase plates and when it's installed the
Abbe condenser should be installed with theaperture diaphram lever forward and the two holes in the phase plate are aligned
with the two holes in front.
But when Phase sliders B or C are installed (where there is only one phase plate and an open space for brightfield the condenser should be installed with the lever to the left exposing adjusting hex screws on either side of the push/pull handle (knob).
Instruction Sheet, GIF filter and small unknown dual filter, phase telescope, Ph3-or-Brightfield slider B and E Plan 40x/0.65 160/0.17 Ph3 DL objective.
Missing are:
* the two small phase plate tools
* Phase slider A Ph1 10x DL or Ph3 40x DL
* Phase slider C 10x DL Ph 1 or brightfield
Extra part:
Small block with two filters?
Figure showing the condeser installed with the lever on the left,
and the two phase plate adjusting holes to the front.
The microscope came with the condenser improperly installed, the adjustment slider should be to the left for the single plate phase sliders B or C and facing forward only for the A dual plate slider.
PS The condenser mounts with a dovetail that's 45.5mm diameter
and you can see how the single mounting screw rids on the slope and acts to pull the condenser down to the mating flange of the support.
PPS you can see the GIF filter sitting on the field lens.
Note that a 7-position turret Ph condenser is shown
but there are a number of condensers that support Ph.
Optical diagram (from MicroscopyU)
After adjusting the two 1.5mm hex screws on the Ph3 slider.
Nikon MicroscopyU - Phase Contrast Microscope Alignment
Making a Phase Telescope using an eyepiece or two.
Slide Holder
The slide holder is attached to the sage, but can be removed if you're not using slides.
Stage
The stage is classically an X-Y movement device, but this one also can be rotated.
Condenser
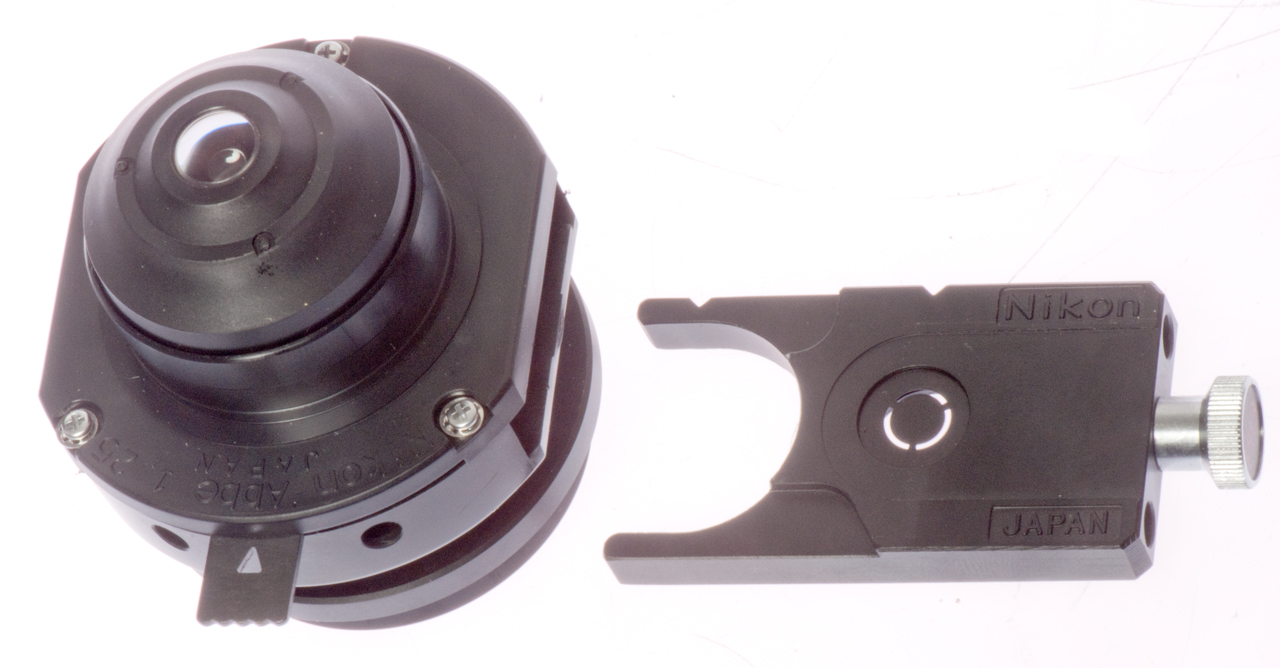
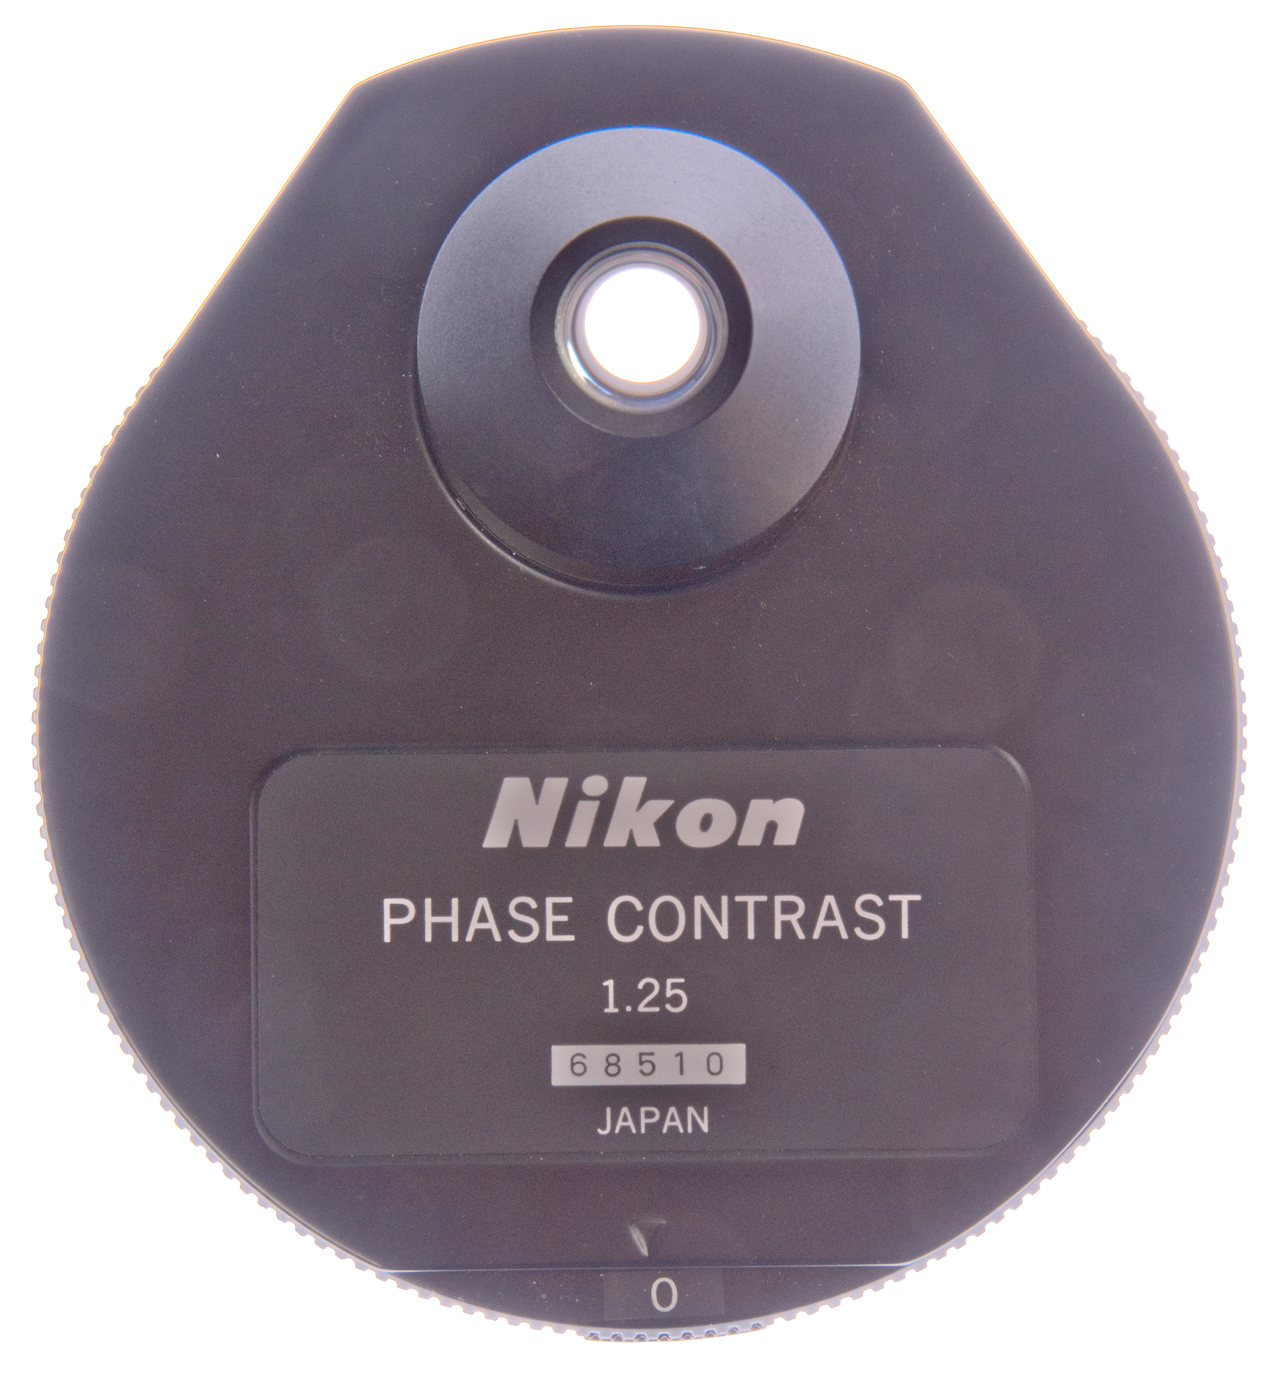
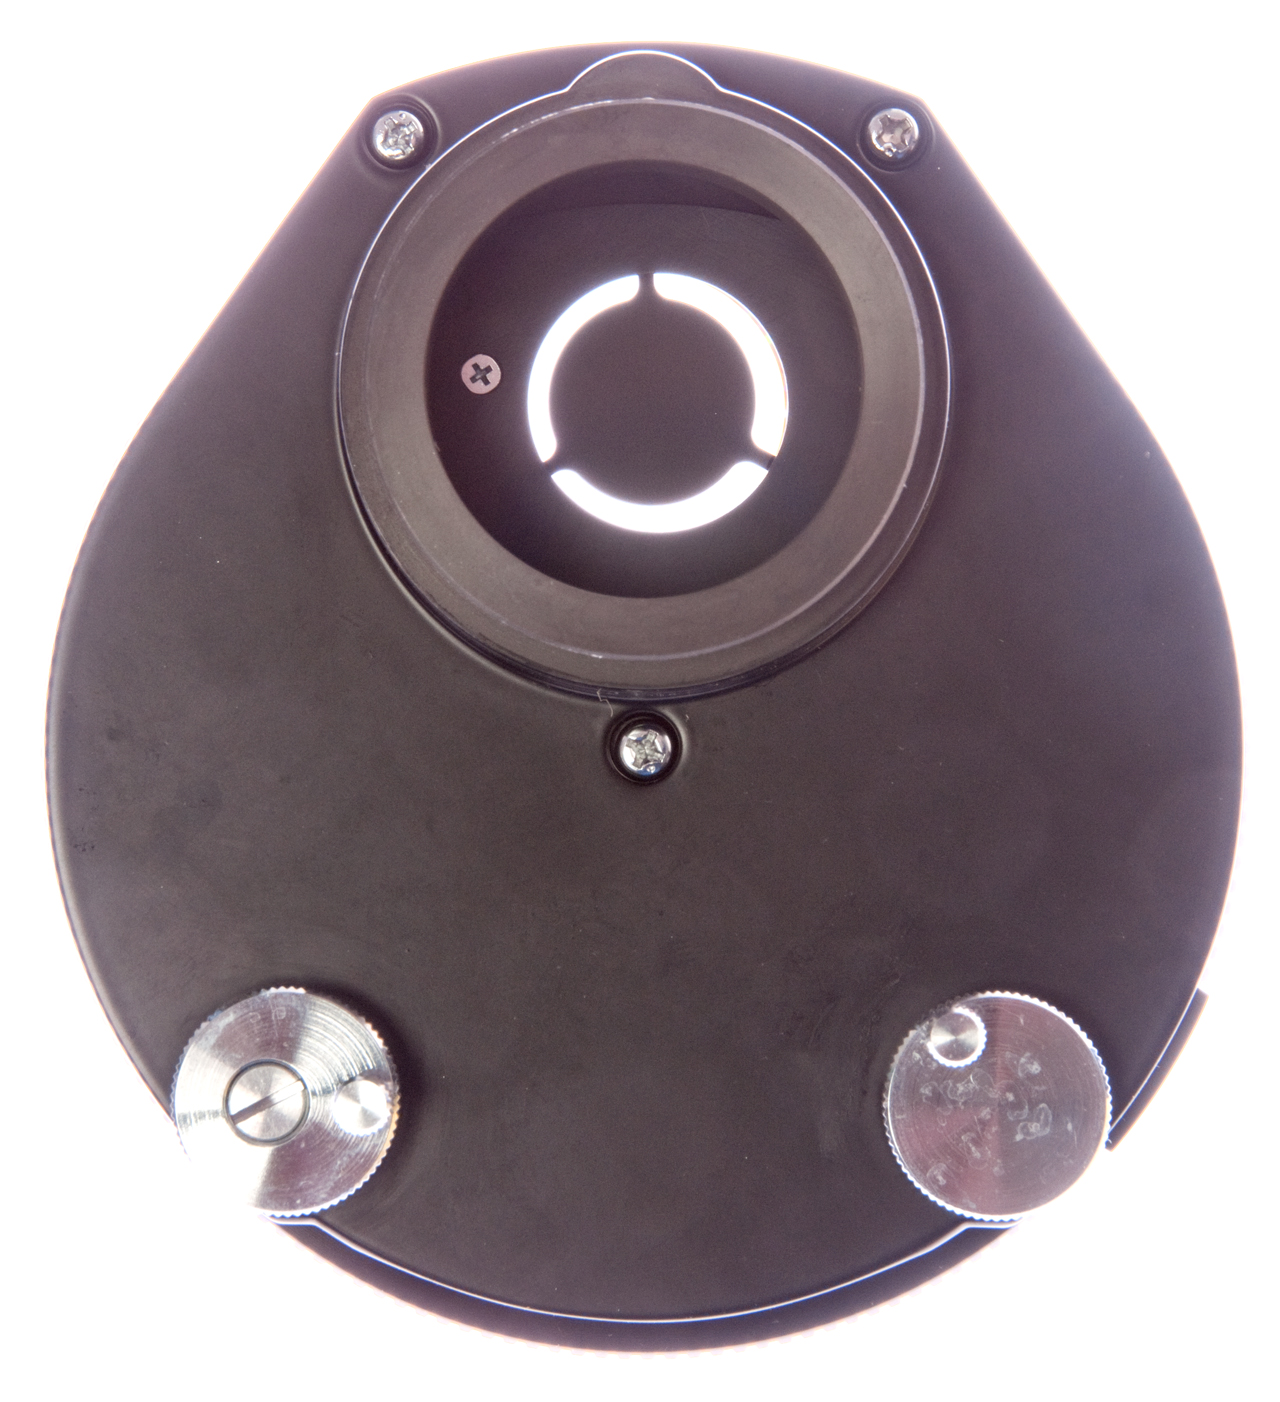
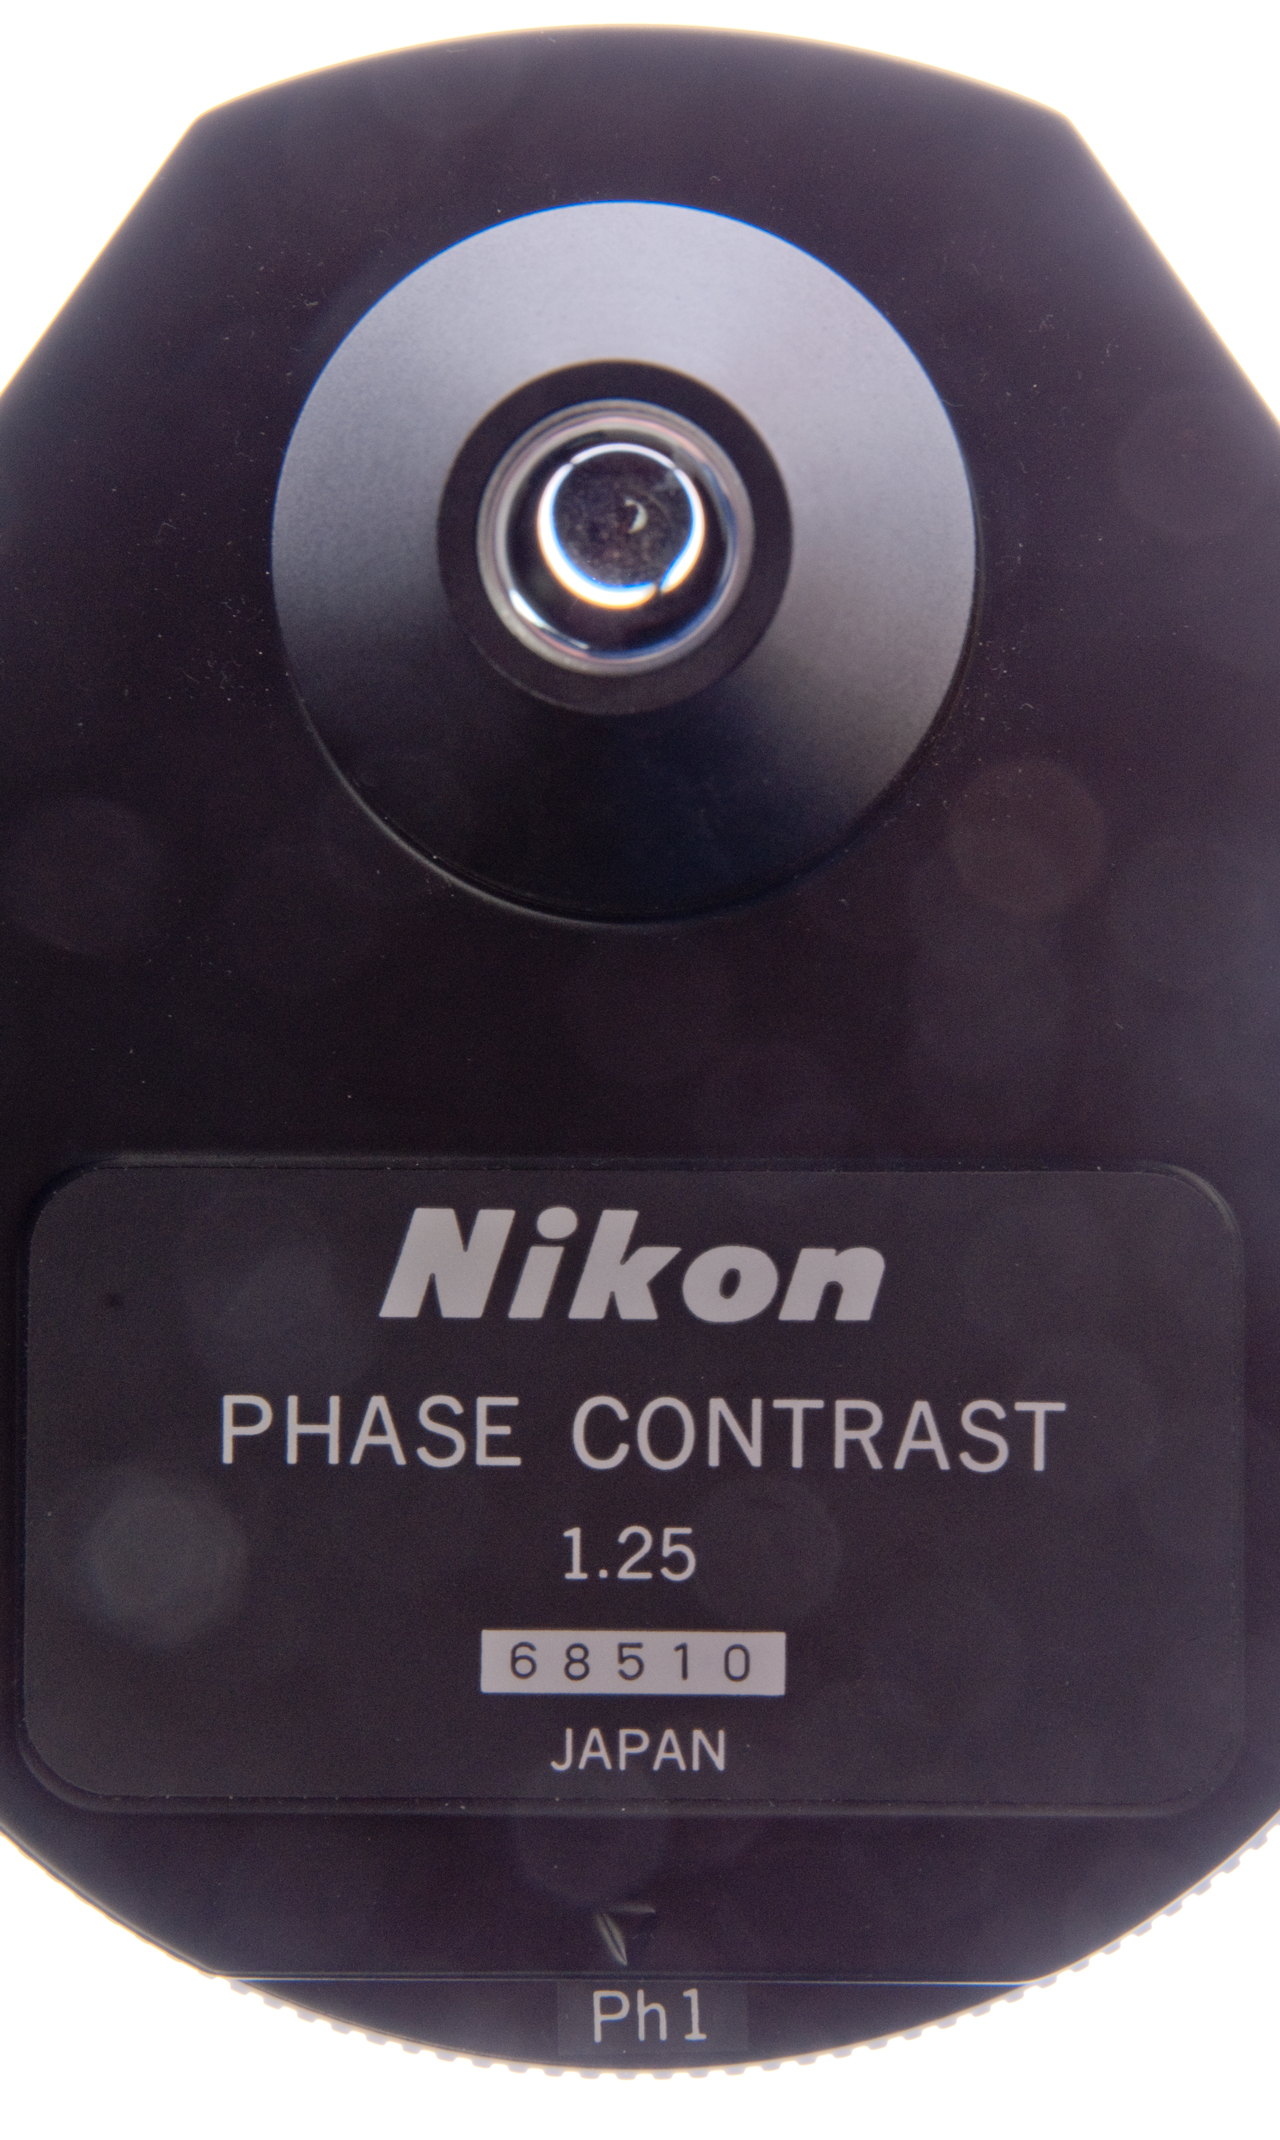
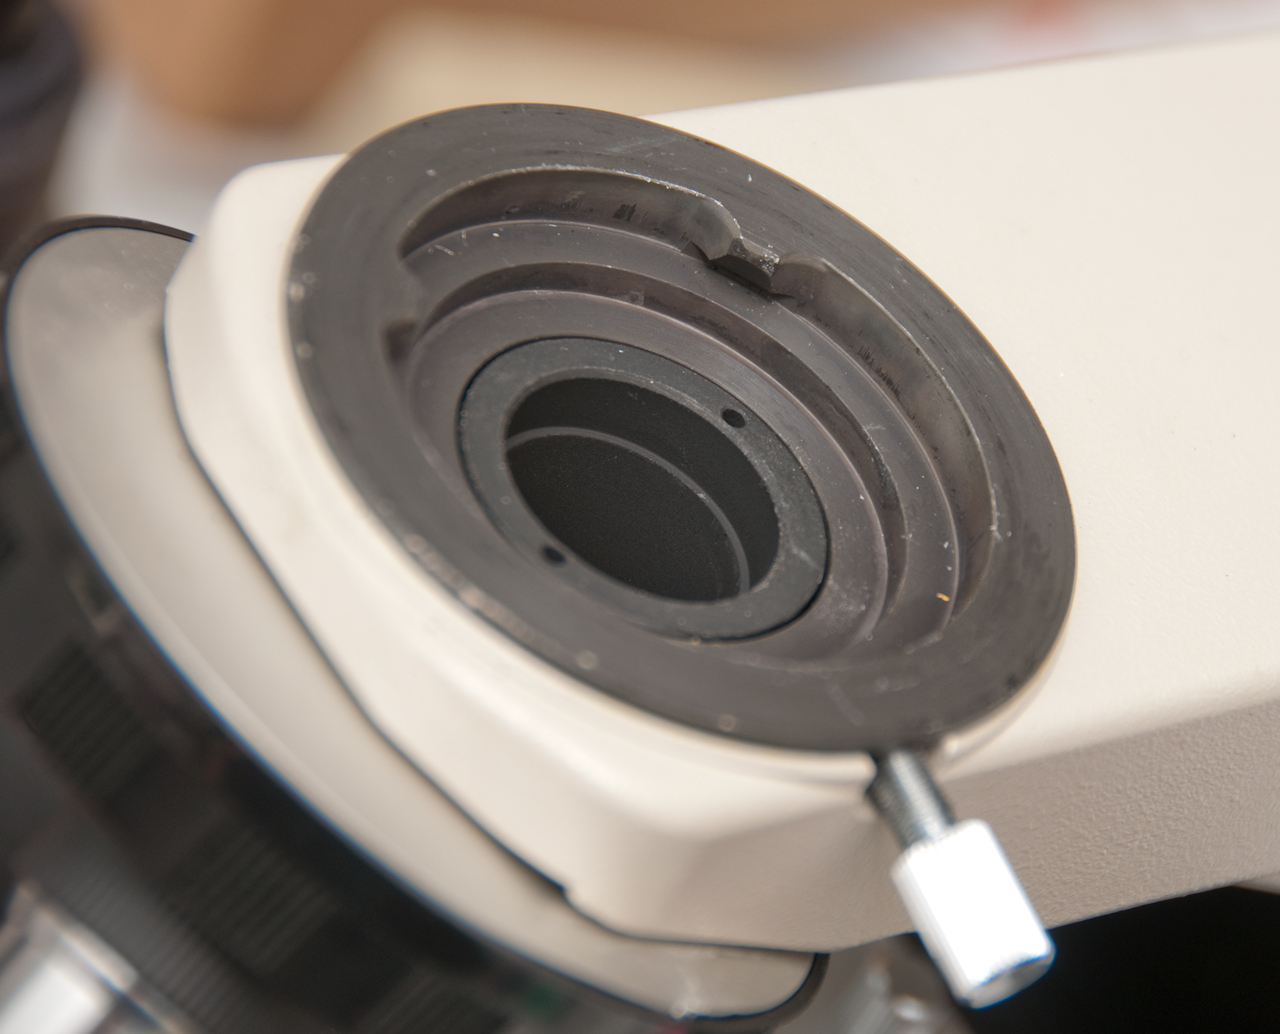
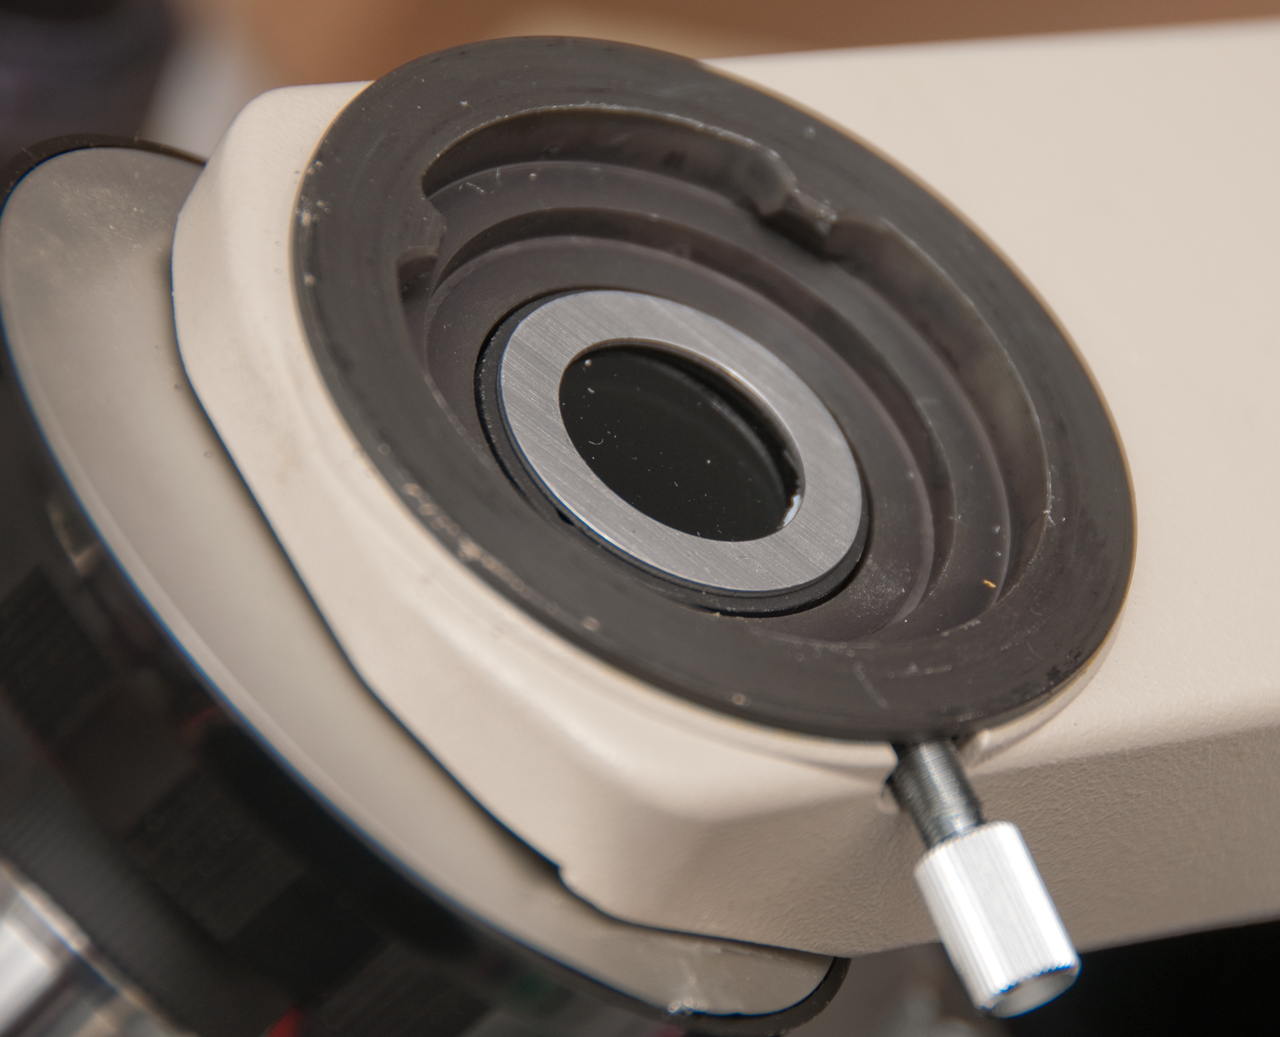
There are a number of condensers that fit this Nikon microscope. The one that came with it is the Abbe 1.25 Condenser & Ph3 slider.
The lever at the front changes the diaphragm which is how the N.A. is controlled.
It uses a dovetail mount where the condenser dovetail is 46mm.
Abbe 1.25
This is the condenser that came with the Labophot microscope.
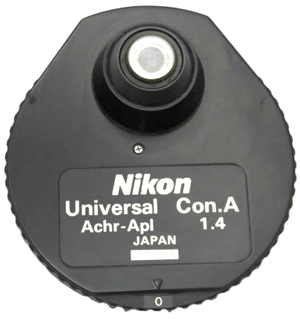
Phase Contrast 1.25
This is a condenser that I added. It has a 6 position turret.
0 (Bright field) with adjustable iris, DF (Dark Field), Ph1, Ph2, Ph3, Ph4
The diaphragm for bright field is connected to that turret position so only works in the "0" position.
There are two adjustment wheels and each has a smaller lock screw. But these wheels adjust the position of the plate, that's to say it does not adjust each individual insert, so you need to adjust each time you change turret positions, or that's how it looks now.
The detent (Wiki) is very weak. How to stiffen it up? Let me know.
0 (Bright field) Top
Note: BF Iris shown fully opened
Dark field Top
Dark field Bottom
Ph 1 Top
Ph 1 Bottom
Ph 2 Bottom
Ph 3 Bottom
Ph 4 Bottom
Back
The dovetail at the bottom (point) is 46.25mm OD.
Front
BF iris shown fully closed
Installed on Labophot
Installed on Labophot
Table of Condensers (most of which fit Labophot)
Photo
Name
N.A.
Spot dia mm
Remarks
Abbe
1.25
4.6
4X - 100X (Oil ?)
general purpose
Supports phase slider
Swing-out Achromat
0.90
0.1
In 3.4/ Out 12
Best for color photo
?phase slider?
6 position turret
Two levers on other side.
20x, 40x, 60x Plan Apo DIC prisms.
Ph2 and Ph3 phase annuli.
Dark field stop and bright field
Achromat/Aplanat
1.35
1.40
2.8
Best for high N.A.
20x, 40x, 60x Plan Apo DIC prisms. Ph2 and Ph3 phase annuli. Dark field stop and bright field
6 Position Turret
Nikon Phase Contrast condenser 1.25
Ph1, Ph2, Ph3, Ph4, Darkfield, Brightfield
Phase Contrast
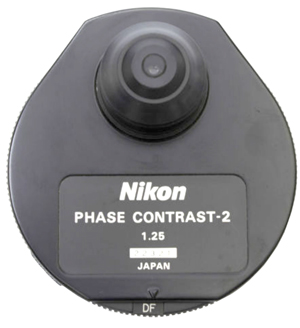
Phase Contrast-2
1.25
4.6?
6 Position Turret
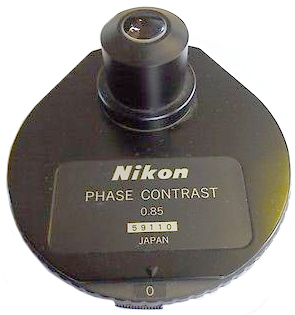
Nikon Phase Contrast 0.85
Phase Contrast
0.85
? does this fits the Labophot?
6 Position Turret
Nikon Phase Contrast LWD (Long Working Distance) 0.52
Phase Contrast
0.52
For: Inverted TE200, TE300, TE2000 Achr 0.8
0.85
0.1
N.A. adjustable 0.8 to 0.1
1.30 Phase Contrast
"Black Enamel"
1.30
For older S series microscopes, looks very different on bottom
Does not have the two centering adjustments.
0.65 LWD (Long Working Distance) Abbe
0.65
0.1
Achromat 0.13na
0.13
0.02
For: Eclipse 50i, 55i, 80i, 90i, Ci and Ni 6 Position Turret
Phase Contrast ELWD 0.3
0.3
For: Diaphot 200 , 300
Achr 0.85 Auto Iris
0.85
For: Eclipse???
HMC (Hoffman Modulation Contrast)
0.6
For: TS100
C-C Achr N.A=0.90
0.9
For: ?
6 Position Turret
∞ ELWD Phase Contrast
0.3
For: Inverted TE2000, TE200, TE300
DaylightBlue/Green Filter
This is a historical device that's no longer used.The idea was that if you had daylight film in your camera and were taking photographs using the tungsten lamp in the microscope then you could place this filter in the light path to correct the color temperature (Wiki, my web page oncolor management). Modern DSLR cameras either correct the color temperature in the camera, or in my case when using RAW (Wiki) files correct it in Adobe Camera Raw.
The key thing this filter does is limit the range of light wavelengths (colors) so that the phase contrast 1/4 wave plate is near a 1/4 wave. If all visible colors were allowed a very expensive compensation system would be needed for phase contrast. This compensation is described in the Zernike patent, but is typically not part of phase contrast optical systems.
Background
In the 160mm tube length microscopes the objective forms a real image 10mm down from the top of the tube where you can't get the camera imaging chip.
The common way to fix that is to use a relay lens where the power of the lens depends on the size and resolution of the imaging chip. But that adds optical elements which degrade image quality.
It's possible to change the objective to image distance by focusing the microscope so that the real image is above the top of the tube enough to fall on the camera's imaging chip but then you're not using the objective at it's designed magnification and so may be degrading the image quality.
Modern DSLR cameras have a "live view" (Wiki) feature that allows viewing what amounts to a TV image in real time. Even when I use the camera port on the trinocular head I need to use live view to refocus the image on the camera chip. It may be possible to make custom spacers to lift the eyepieces to the exact spot where they focus where the camera focuses, but I haven't don that yet. Also the camera has a video output so that you can see the microscope image on a computer monitor.
This means it's possible to do away with the head and eyepieces altogether and replace them with the computer monitor by connecting the DSLR directly to the microscope stand replacing the existing head.
The first step to see if this is possible was to measure the distance from the objective flange to the head interface flange and it's 45mm. Also note this path is just air, i.e. there are no glass parts of any kind in this path.
160mm - 45mm - 115 mm for the adapter and camera. The Nikon-F Flange Focal Distance (Wiki) is 46.50mm.
115mm - 46.50mm = 68.5mm for the adapter.
T-mount find focus tubes from Edmond Optics come in lengths of 35 - 60mm and 40 - 65mm.
If the 40 - 65mm tube is nominally set at 45mm (i.e. allowing 5mm adjustment) then the remaining length for the adapter is:
68.5 - 45 = 23.5mm.
To be compatible with existing T-mount camera adapters the adapter should have male threads.
16 July 2014: More later. . . .
The "phot" (CF) family of scopes uses a 48mm OD dovetail interface.
The Eclipse (CFI60) family of scopes uses a 51mm OD dovetail interface.
Many European scopes use a 42mm OD dovetail interface.
Purchased from eBay seller: optitec202. It contains a small filter that fits between the Labophot stand and head and another filter with angle calibration marke -45 to 0 to +45 degrees that fits on top of the field light source. Kit came with a couple of prepared slides with Tartaric acid and Citric acid. The crystals change color as the filter is rotated.
Fig PolKit 1 w/o Polarizing Filter
Fig PolKit 2 Stand with Polarizing Filter
Fig PolKit 3 Field Light Filter
YouTube video showing rotation of lower filter
------------
Epi Fluorescence centering alignment objective
I don't have an Epi Fluorescence lighting setup, but got this alignment objective in the hope that it can be used as part of an alignment procedure for the normal light function.
It consists of an 8 sided mirror (not equal sides) mounted at 45 degrees relative to the centerline of the "objective". There's a window mounted in the side of the cylindrical "objective" that has a ground glass screen with a cross target. The lower part of the "objective" that contains the target can rotate so that after the RMS threads are used to mount the "objective" the target can be aimed to the front for easy observation. I'm assuming the two (-) screws below the target are used to align the mirror to exactly 45 degrees relative to the centerline and that the large (-) screw in the bottom is used to align the center line optical axis with the center of the target.
In Fig 2 you can see two horizontal dashed lines and they persist when the "objective" is tilted up and down so they are there for a reason. Maybe just because the mirror is a rear surface type, i.e. independent of the look angle?
When a green laser pointer is shined down and you look at the screen you see a green dot.
When a blue laser pointer is shined down and you look at the screen you see a yellow dot.
This may mean that there's some filtering of UV light so that no harmful UV light comes out of the screen when aligning a UV light source.
Fig 1 shown right side up
Fig 2 looking down
The mirror may have it's reflecting surface
on the back so there's two reflections in
this photo.Maybe there would only be
one image if the camera centerline was the
same as the "objective' centerline.
Fig 3 shown upside down
3 adjustment screws
6128128
Microscope system, Nikon Corporation, Oct 3, 2000, 359/381, 359/656, 359/821 - describes why infinity optical system vs. 45mm parafocal & 160mm tube length.
Note; not applicable to the Labophot, but is applicable to all the newer Nikon microscopes.
6317261 Phase contrast observation device, Tatsuro Otaki, Nikon Corporation, Nov 13, 2001, 359/387, 359/386, 359/385, 359/371, 359/368, 359/370
ADH Phase-objective is in the CFI60 "infinity" range of objectives (>$4,000)
Microscope Objective Standards
Table of Microscope Objectives & photos taken with camera (not microscope)
B&L Stereo Zoom Microscope
Unitron No. 83444 Microscope
Mitutoyo Toolmakers Measuring Microscope 176-134
Nikon Labophot Microscope & accessories
Nikon Multiphot stand & Table of Nikon "phot" microscopes
DigitalPhotography101 Digital Photography 101: The Basics
Digital Photography 201 Stacking Images
Digital Photography 202: Close-Up, Macro & Micro
Digital Photography 203: Color Management
Digital Photography 204: Studio Flash
Digital Photography 205: Astrophotography
Digital Photography 206 Micro Photography - Tube Lens - Unitron Compound Microscope
EOG Electro-optical Gadgets
Lights sources
Mitutoyo Toolmakers Measuring Microscope 176-134
Nikon Nikon (and Kodak DC290) Cameras
Nikon Labophot Microscope (this page)
Nikon Multiphot System - Macro photography stand and list of "phot" family microscopes
NikonSB25 - Nikon SB-25 Flash & Manfrotto C1575B Avenger Super Clamp
Omnicon 3800 Tumor Colony Analyzer (TCA) Automated Inverted Biological Microscope (came with Nikon objective)
Optical Bench w/ old Microscope
Optical Spectrum Analyzers
Optics Day & Night
Spectronic 20D Spectrophotometer
Microscoy Primer by Frithjof A. S. Sterrenburg
Principles of Microscopy, being a Handbook to the Microscope by Sir A.E. Wright, M.D. MacMillan Co, 1907 - the best book on measuring the various components of a microscope.
Interference Phenomena, Compensation, and Optic Sign - polarized light and colors
Carolina Biological Supply Company - prepared slides & animal parts for dissection
YouTube: LAB EXERCISE 2; THE MICROSCOPE by Professor Fink- Labomed
Microbe Hunter - online magazine - Making a Wet Mount for Microscopy -
Arizona Fairy Shrimp - low cost kits of eggs & food.
Pippa's Progress - an excellent introductory series of videos (Viemo and sometimes stop playing)
Episode 1 - diatoms in toothpaste
Episode 2 - cells & bacteria from inside cheek & Stinging Nettle
Episode 3 - Gathering and viewing field water
Episode 4 - Learning about what we see
Episode 5 - Detective skills
Back to Brooke's: PRC68, Alphanumeric Index of Web Pages, Contact, Products for sal
Page Created 3 July 2014